| title | description | services | documentationcenter | author | manager | editor | keywords | ms.assetid | ms.service | ms.workload | ms.tgt_pltfrm | ms.devlang | ms.topic | ms.date | ms.author |
|---|---|---|---|---|---|---|---|---|---|---|---|---|---|---|---|
My first graphical runbook in Azure Automation | Microsoft Docs |
Tutorial that walks you through the creation, testing, and publishing of a simple graphical runbook. |
automation |
eslesar |
jwhit |
runbook, runbook template, runbook automation, azure runbook |
dcb88f19-ed2b-4372-9724-6625cd287c8a |
automation |
tbd |
na |
na |
get-started-article |
05/17/2017 |
magoedte;bwren |
[!div class="op_single_selector"]
This tutorial walks you through the creation of a graphical runbook in Azure Automation. We start with a simple runbook that tests and publishes while we explain how to track the status of the runbook job. Then we modify the runbook to actually manage Azure resources, in this case starting an Azure virtual machine. Then we complete the tutorial by making the runbook more robust by adding runbook parameters and conditional links.
To complete this tutorial, you need the following:
- Azure subscription. If you don't have one yet, you can activate your MSDN subscriber benefits or sign up for a free account.
- Automation account to hold the runbook and authenticate to Azure resources. This account must have permission to start and stop the virtual machine.
- An Azure virtual machine. We stop and start this machine so it should not be a production VM.
We start by creating a simple runbook that outputs the text Hello World.
- In the Azure portal, open your Automation account.
The Automation account page gives you a quick view of the resources in this account. You should already have some Assets. Most of those are the modules that are automatically included in a new Automation account. You should also have the Credential asset that's mentioned in the prerequisites. - Click the Runbooks tile to open the list of runbooks.

- Create a new runbook by clicking on the Add a runbook button and then Create a new runbook.
- Give the runbook the name MyFirstRunbook-Graphical.
- In this case, we're going to create a graphical runbook so select Graphical for Runbook type.

- Click Create to create the runbook and open the graphical editor.


The Library control on the left side of the editor allows you to select activities to add to your runbook. We're going to add a Write-Output cmdlet to output text from the runbook.
- In the Library control, click in the search textbox and type Write-Output. The search results will be displayed below.

- Scroll down to the bottom of the list. You can either right-click Write-Output and select Add to canvas or click the ellipse next to the cmdlet and then select Add to canvas.
- Click the Write-Output activity on the canvas. This opens the Configuration control blade, which allows you to configure the activity.
- The Label defaults to the name of the cmdlet, but we can change it to something more friendly. Change it to Write Hello World to output.
- Click Parameters to provide values for the cmdlet's parameters.
Some cmdlets have multiple parameter sets, and you need to select which you one to use. In this case, Write-Output has only one parameter set, so you don't need to select one.

- Select the InputObject parameter. This is the parameter where we specify the text to send to the output stream.
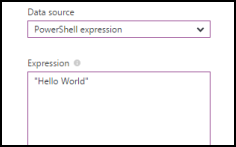
- In the Data source dropdown, select PowerShell expression. The Data source dropdown provides different sources that you use to populate a parameter value.
You can use output from such sources such as another activity, an Automation asset, or a PowerShell expression. In this case, we just want to output the text Hello World. We can use a PowerShell expression and specify a string. - In the Expression box, type "Hello World" and then click OK twice to return to the canvas.
- Save the runbook by clicking Save.


Before we publish the runbook to make it available in production, we want to test it to make sure that it works properly. When you test a runbook, you run its Draft version and view its output interactively.
- Click Test pane to open the Test blade.

- Click Start to start the test. This should be the only enabled option.
- A runbook job is created and its status displayed in the pane.
The job status starts as Queued indicating that it is waiting for a runbook worker in the cloud to become available. It then moves to Starting when a worker claims the job, and then Running when the runbook actually starts running. - When the runbook job completes, its output is displayed. In our case, we should see Hello World.

- Close the Test blade to return to the canvas.


The runbook that we created is still in Draft mode. We need to publish it before we can run it in production. When you publish a runbook, you overwrite the existing Published version with the Draft version. In our case, we don't have a Published version yet because we just created the runbook.
- Click Publish to publish the runbook and then Yes when prompted.

- If you scroll left to view the runbook in the Runbooks blade, it shows an Authoring Status of Published.
- Scroll back to the right to view the blade for MyFirstRunbook.
The options across the top allow us to start the runbook, schedule it to start at some time in the future, or create a webhook so it can be started through an HTTP call. - We just want to start the runbook so click Start and then Yes when prompted.

- A job blade is opened for the runbook job that we created. We can close this blade, but in this case we leave it open so we can watch the job's progress.
- The job status is shown in Job Summary and matches the statuses that we saw when we tested the runbook.

- Once the runbook status shows Completed, click Output. The Output blade is opened, and we can see our Hello World in the pane.

- Close the Output blade.
- Click All Logs to open the Streams blade for the runbook job. We should only see Hello World in the output stream, but this can show other streams for a runbook job such as Verbose and Error if the runbook writes to them.

- Close the All Logs blade and the Job blade to return to the MyFirstRunbook blade.
- Click Jobs to open the Jobs blade for this runbook. This lists all the jobs created by this runbook. We should only see one job listed since we only ran the job once.

- You can click this job to open the same Job pane that we viewed when we started the runbook. This allows you to go back in time and view the details of any job that was created for a particular runbook.


We've tested and published our runbook, but so far it doesn't do anything useful. We want to have it manage Azure resources. Before we configure the runbook to authenticate, we create a variable to hold the subscription ID and reference it after we set up the activity to authenticate in step 6 below. Including a reference to the subscription context allows you to easily work between multiple subscriptions. Before proceeding, copy your subscription ID from the Subscriptions option off the Navigation pane.
- In the Automation Accounts blade, click the Assets tile and the Assets blade is opened.
- In the Assets blade, click the Variables tile.
- On the Variables blade, click Add a variable.

- In the New variable blade, in the Name box, enter AzureSubscriptionId and in the Value box enter your Subscription ID. Keep string for the Type and the default value for Encryption.
- Click Create to create the variable.

Now that we have a variable to hold our subscription ID, we can configure our runbook to authenticate with the Run As credentials that are referred to in the prerequisites. We do that by adding the Azure Run As connection Asset and Add-AzureRMAccount cmdlet to the canvas.
- Open the graphical editor by clicking Edit on the MyFirstRunbook blade.

- We don't need the Write Hello World to output anymore, so right-click it and select Delete.
- In the Library control, expand Connections and add AzureRunAsConnection to the canvas by selecting Add to canvas.
- On the canvas, select AzureRunAsConnection and in the Configuration control pane, type Get Run As Connection in the Label textbox. This is the connection
- In the Library control, type Add-AzureRmAccount in the search textbox.
- Add Add-AzureRmAccount to the canvas.

- Hover over Get Run As Connection until a circle appears on the bottom of the shape. Click the circle and drag the arrow to Add-AzureRmAccount. The arrow that you created is a link. The runbook starts with Get Run As Connection and then run Add-AzureRmAccount.

- On the canvas, select Add-AzureRmAccount and in the Configuration control pane type Login to Azure in the Label textbox.
- Click Parameters and the Activity Parameter Configuration blade appears.
- Add-AzureRmAccount has multiple parameter sets, so we need to select one before we can provide parameter values. Click Parameter Set and then select the ServicePrincipalCertificatewithSubscriptionId parameter set.
- Once you select the parameter set, the parameters are displayed in the Activity Parameter Configuration blade. Click APPLICATIONID.

- In the Parameter Value blade, select Activity output for the Data source and select Get Run As Connection from the list, in the Field path textbox type ApplicationId, and then click OK. We are specifying the name of the property for the Field path because the activity outputs an object with multiple properties.
- Click CERTIFICATETHUMBPRINT, and in the Parameter Value blade, select Activity output for the Data source. Select Get Run As Connection from the list, in the Field path textbox type CertificateThumbprint, and then click OK.
- Click SERVICEPRINCIPAL, and in the Parameter Value blade, select ConstantValue for the Data source, click the option True, and then click OK.
- Click TENANTID, and in the Parameter Value blade, select Activity output for the Data source. Select Get Run As Connection from the list, in the Field path textbox type TenantId, and then click OK twice.
- In the Library control, type Set-AzureRmContext in the search textbox.
- Add Set-AzureRmContext to the canvas.
- On the canvas, select Set-AzureRmContext and in the Configuration control pane type Specify Subscription Id in the Label textbox.
- Click Parameters and the Activity Parameter Configuration blade appears.
- Set-AzureRmContext has multiple parameter sets, so we need to select one before we can provide parameter values. Click Parameter Set and then select the SubscriptionId parameter set.
- Once you select the parameter set, the parameters are displayed in the Activity Parameter Configuration blade. Click SubscriptionID
- In the Parameter Value blade, select Variable Asset for the Data source and select AzureSubscriptionId from the list and then click OK twice.
- Hover over Login to Azure until a circle appears on the bottom of the shape. Click the circle and drag the arrow to Specify Subscription Id.


Your runbook should look like the following at this point: 
Here we add a Start-AzureRmVM activity to start a virtual machine. You can pick any virtual machine in your Azure subscription, and for now you hardcode that name into the cmdlet.
- In the Library control, type Start-AzureRm in the search textbox.
- Add Start-AzureRmVM to the canvas and then click and drag it underneath Specify Subscription Id.
- Hover over Specify Subscription Id until a circle appears on the bottom of the shape. Click the circle and drag the arrow to Start-AzureRmVM.
- Select Start-AzureRmVM. Click Parameters and then Parameter Set to view the sets for Start-AzureRmVM. Select the ResourceGroupNameParameterSetName parameter set. Note that ResourceGroupName and Name have exclamation points next them. This indicates that they are required parameters. Also note both expect string values.
- Select Name. Select PowerShell expression for the Data source and type in the name of the virtual machine surrounded with double quotes that we start with this runbook. Click OK.

- Select ResourceGroupName. Use PowerShell expression for the Data source and type in the name of the resource group surrounded with double quotes. Click OK.

- Click Test pane so that we can test the runbook.
- Click Start to start the test. Once it completes, check that the virtual machine was started.


Your runbook should look like the following at this point: 
Our runbook currently starts the virtual machine in the resource group that we specified in the Start-AzureRmVM cmdlet. Our runbook would be more useful if we could specify both when the runbook is started. We now add input parameters to the runbook to provide that functionality.
- Open the graphical editor by clicking Edit on the MyFirstRunbook pane.
- Click Input and output and then Add input to open the Runbook Input Parameter pane.

- Specify VMName for the Name. Keep string for the Type, but change Mandatory to Yes. Click OK.
- Create a second mandatory input parameter called ResourceGroupName and then click OK to close the Input and Output pane.

- Select the Start-AzureRmVM activity and then click Parameters.
- Change the Data source for Name to Runbook input and then select VMName.
- Change the Data source for ResourceGroupName to Runbook input and then select ResourceGroupName.

- Save the runbook and open the Test pane. Note that you can now provide values for the two input variables that you use in the test.
- Close the Test pane.
- Click Publish to publish the new version of the runbook.
- Stop the virtual machine that you started in the previous step.
- Click Start to start the runbook. Type in the VMName and ResourceGroupName for the virtual machine that you're going to start.

- When the runbook completes, check that the virtual machine was started.


We now modify the runbook so that it only attempts to start the virtual machine if it is not already started. You do this by adding a Get-AzureRmVM cmdlet to the runbook that gets the instance level status of the virtual machine. Then you add a PowerShell Workflow code module called Get Status with a snippet of PowerShell code to determine if the virtual machine state is running or stopped. A conditional link from the Get Status module only runs Start-AzureRmVM if the current running state is stopped. Finally, we output a message to inform you if the VM was successfully started or not using the PowerShell Write-Output cmdlet.
-
Open MyFirstRunbook in the graphical editor.
-
Remove the link between Specify Subscription Id and Start-AzureRmVM by clicking on it and then pressing the Delete key.
-
In the Library control, type Get-AzureRm in the search textbox.
-
Add Get-AzureRmVM to the canvas.
-
Select Get-AzureRmVM and then Parameter Set to view the sets for Get-AzureRmVM. Select the GetVirtualMachineInResourceGroupNameParamSet parameter set. Note that ResourceGroupName and Name have exclamation points next them. This indicates that they are required parameters. Also note both expect string values.
-
Under Data source for Name, select Runbook input and then select VMName. Click OK.
-
Under Data source for ResourceGroupName, select Runbook input and then select ResourceGroupName. Click OK.
-
Under Data source for Status, select Constant value and then click True. Click OK.
-
Create a link from Specify Subscription Id to Get-AzureRmVM.
-
In the library control, expand Runbook Control and add Code to the canvas.
-
Create a link from Get-AzureRmVM to Code.
-
Click Code and in the Configuration pane, change label to Get Status.
-
Select Code parameter, and the Code Editor blade appears.
-
In the code editor, paste the following snippet of code:
$StatusesJson = $ActivityOutput['Get-AzureRmVM'].StatusesText $Statuses = ConvertFrom-Json $StatusesJson $StatusOut ="" foreach ($Status in $Statuses){ if($Status.Code -eq "Powerstate/running"){$StatusOut = "running"} elseif ($Status.Code -eq "Powerstate/deallocated") {$StatusOut = "stopped"} } $StatusOut -
Create a link from Get Status to Start-AzureRmVM.

-
Select the link and in the Configuration pane, change Apply condition to Yes. Note the link turns to a dashed line indicating that the target activity only runs if the condition resolves to true.
-
For the Condition expression, type $ActivityOutput['Get Status'] -eq "Stopped". Start-AzureRmVM now only runs if the virtual machine is stopped.
-
In the Library control, expand Cmdlets and then Microsoft.PowerShell.Utility.
-
Add Write-Output to the canvas twice.

-
On the first Write-Output control, click Parameters and change the Label value to Notify VM Started.
-
For InputObject, change Data source to PowerShell expression and type in the expression "$VMName successfully started.".
-
On the second Write-Output control, click Parameters and change the Label value to Notify VM Start Failed
-
For InputObject, change Data source to PowerShell expression and type in the expression "$VMName could not start.".
-
Create a link from Start-AzureRmVM to Notify VM Started and Notify VM Start Failed.
-
Select the link to Notify VM Started and change Apply condition to True.
-
For the Condition expression, type $ActivityOutput['Start-AzureRmVM'].IsSuccessStatusCode -eq $true. This Write-Output control now only runs if the virtual machine is successfully started.
-
Select the link to Notify VM Start Failed and change Apply condition to True.
-
For the Condition expression, type $ActivityOutput['Start-AzureRmVM'].IsSuccessStatusCode -ne $true. This Write-Output control now only runs if the virtual machine is not successfully started.
-
Save the runbook and open the Test pane.
-
Start the runbook with the virtual machine stopped, and it should start.


- To learn more about Graphical Authoring, see Graphical authoring in Azure Automation
- To get started with PowerShell runbooks, see My first PowerShell runbook
- To get started with PowerShell workflow runbooks, see My first PowerShell workflow runbook