Dựa theo kinh nghiệm ít ỏi và thời gian dùng GetX của mình, đây là base cấu trúc thư mục, cũng như các package cần thiết/hàm mà mình hay dùng. Hi vọng sẽ giúp ích được cho bạn!
- Copy toàn bộ thư mục lib/ và ghi đè nó vào project của bạn.
- Dựa theo mẫu file
pubspec.yamldưới dây bạn copy và chọn lọc tương ứng
environment:
  sdk: ">=3.0.0	 <4.0.0"
  flutter: ^3.10.0

dependencies:
  cupertino_icons: any
  get: any
  intl: any
  firebase_core: any
  firebase_auth: any
  flutter_local_notifications: ^14.0.0+1 #nên sử dụng từ phiên bản này trở lên
  cloud_firestore: any #dung de load data notify
  firebase_messaging: any
  shared_preferences: any
  flutter_form_builder: any #bingding form
  form_builder_validators: any
  fluttertoast: any
  flutter_svg: any
  flutter_localizations:
    sdk: flutter
  flutter:
    sdk: flutter

dev_dependencies:
  flutter_lints: ^2.0.1
  flutter_test:
    sdk: flutter

flutter:
  uses-material-design: true
  assets:
    - assets/images/
    - assets/svg/
    - assets/gif/
- assets/translations/Tải source Get CLI mà mình đã tự custom.
Sau khi download xong, mở CommandLine tại vị trí của source Get CLI và gõ theo lệnh:
dart pub global activate --source path .Nó sẽ tự động sinh ra file get.bat, thường thì đường dẫn phát sinh sẽ nằm tại đây:
| Platform | Directory |
|---|---|
| Window | %USERPROFILE%\AppData\Local\Pub\Cache\bin |
| MacOS | Users%USERPROFILE%.pub-cache\bin |
Enviroment của Get CLI không tự động cập nhật vào terminal của bạn. Nên lúc này khi lần đầu chạy, bạn phải cấu hình Enviroment cho nó.
Windows+Rvà gõsysdm.cpl.- Phía trên chọn Tab
Advanced> click nútEnvironment Variablesở dưới. - Màn hình dưới của
System Variables, tìm chữPathDouble-click để mở Edit. - Copy đường dẫn Directory ở trên, chọn
Newvà dán vào. - Chạy thử.
Gõ lệnh để thêm Environment
export PATH="$PATH":"$HOME/.pub-cache/bin"Full code file .zshrc của mình được cấu hình như sau:
export PATH="$PATH:$HOME/Program Files/flutter/bin"
export ANDROID_HOME="$HOME/Library/Android/sdk"
export PATH="$ANDROID_HOME/tools:$ANDROID_HOME/tools/bin:$ANDROID_HOME/platform-tools:$PATH"
export PATH="$PATH":"$HOME/.pub-cache/bin"
export PATH="$PATH":"$HOME/.dotnet/tools"

parse_git_branch() {
  git branch 2> /dev/null | sed -e '/^[^*]/d' -e 's/* \(.*\)/ (\1)/'
}

export NEWLINE=$'\n'
PROMPT="[%F{green}%*%f]:%F{magenta}%n%f:%F{011}%~%f:%F{014}$(parse_git_branch)$NEWLINE%F{010}$%f "
để áp dụng terminal chạy với lệnh.
source ~/.zshrcBạn có thể tìm hiểu thêm nếu không rõ... Nội dung này sẽ được update cụ thể sau.
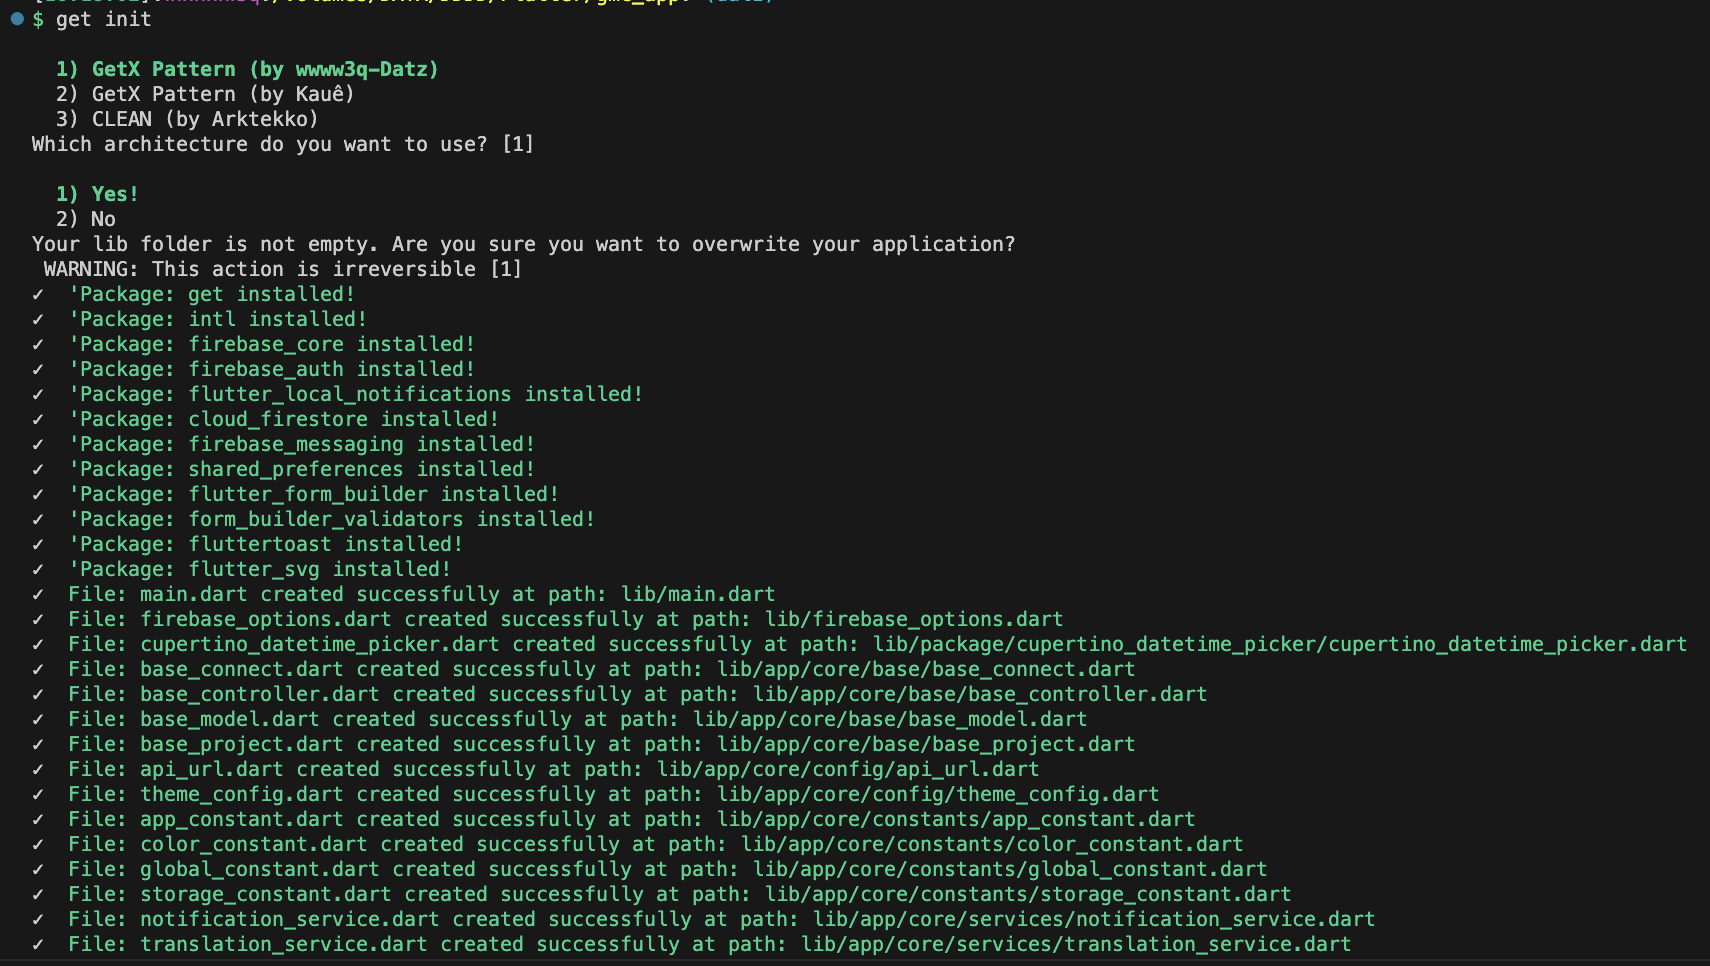
chạy lệnh để tạo template project
get initNhập con số để tạo mẫu (nhấn enter 2 lần để tạo template của mình)

Tham khảo tại đây để cài FlutterFire CLI
Gõ lệnh này để tự động cấu hình config firebase trong 1 nốt nhạc
flutterfire configure
Vậy là xong !.
Lưu ý: mình chỉ liệt kê 1 số cái thường dùng. muốn biết thêm về Get Cli, bạn có thể tham khảo bản gốc tại đây
get create page:nameLệnh này cho phép bạn tạo các modules nhanh bao gồm bộ 3 [Controller, Binding, View]
Tự động tạo đường dẫn AppPages, AppRoutes
Có thể tạo modules bên trong modules khác
get create page:name on other_moduleKhi sử dụng on để tạo modules mới, CLI sẽ sử dụng children pages.
get generate model on response with assets/import_response.jsonKhi sử dụng template của mình, trong assets có file sẵn import_response.json, chỉ việc ném json cần generate model vào đây. Sẽ tự tạo model theo cấu trúc BaseModel
Nếu thấy lỗi đỏ file là do thiếu import, cứ bấm gợi ý và chọn auto import file base_model.dart
get generate locales assets/translationsLệnh này sẽ tạo ra file chuyển đổi ngôn ngữ dựa theo json.
Để sử dụng chỉ việc LocaleKeys.KeyName.tr
Sử dụng hàm có sẵn mà template này có TranslationService.changeLocale để chuyển ngôn ngữ và lưu vào hệ thống
Tùy chỉnh BaseURL tại /app/core/config/api_url.dart > base_url
Gọi api đơn giản với hàm apiCall.onRequest tại BaseController
final UsersModel? result = await apiCall.onRequest(
      ApiUrl.post_auth_login(),
      RequestMethod.POST,
      body: {
        'userName': 'foo',
        'password': 'bar',
      },
      baseModel: UsersModel(),
    );
Các tham số của onRequest
| Type | Parameter | Description |
|---|---|---|
String |
url |
Required. Đường dẫn api (vd: '/auth/login') |
RequestMethod |
method |
Required. GET, POST, PUT, PATH, DELETE |
dynamic |
body |
Có thể truyền vào FormData để gửi hình ảnh, hoặc truyền Map<String,dynamic>, hoặc truyền vào object model có kế thừa BaseModel |
BaseModel? |
baseModel |
Khi api trả về, mong muốn parse thành Model nào |
Map<String, dynamic>? |
queryParam |
Thường dùng cho phương thức GET để tìm kiếm |
bool? |
isShowLoading |
Muốn hiện loadding ở api này hay không (mạc định true) |
Có thể tùy chỉnh UI LoaddingWidget tại /app/custom/widget/loadding_widget.dart
Tự động Printt màu của API khi bạn Request và có Response trả về
 Sử dụng như hàm
 print() của dart để truyền tham số
import '/app/core/utils/utils.dart';

void printColor(){
    Printt.defaultt("defaultt Color");
    Printt.black("black Color");
    Printt.red("red Color");
    Printt.green("green Color");
    Printt.yellow("yellow Color");
    Printt.blue("blue Color");
    Printt.magenta("magenta Color");
    Printt.cyan("cyan Color");
    Printt.white("white Color");
    Printt.reset("reset Color");
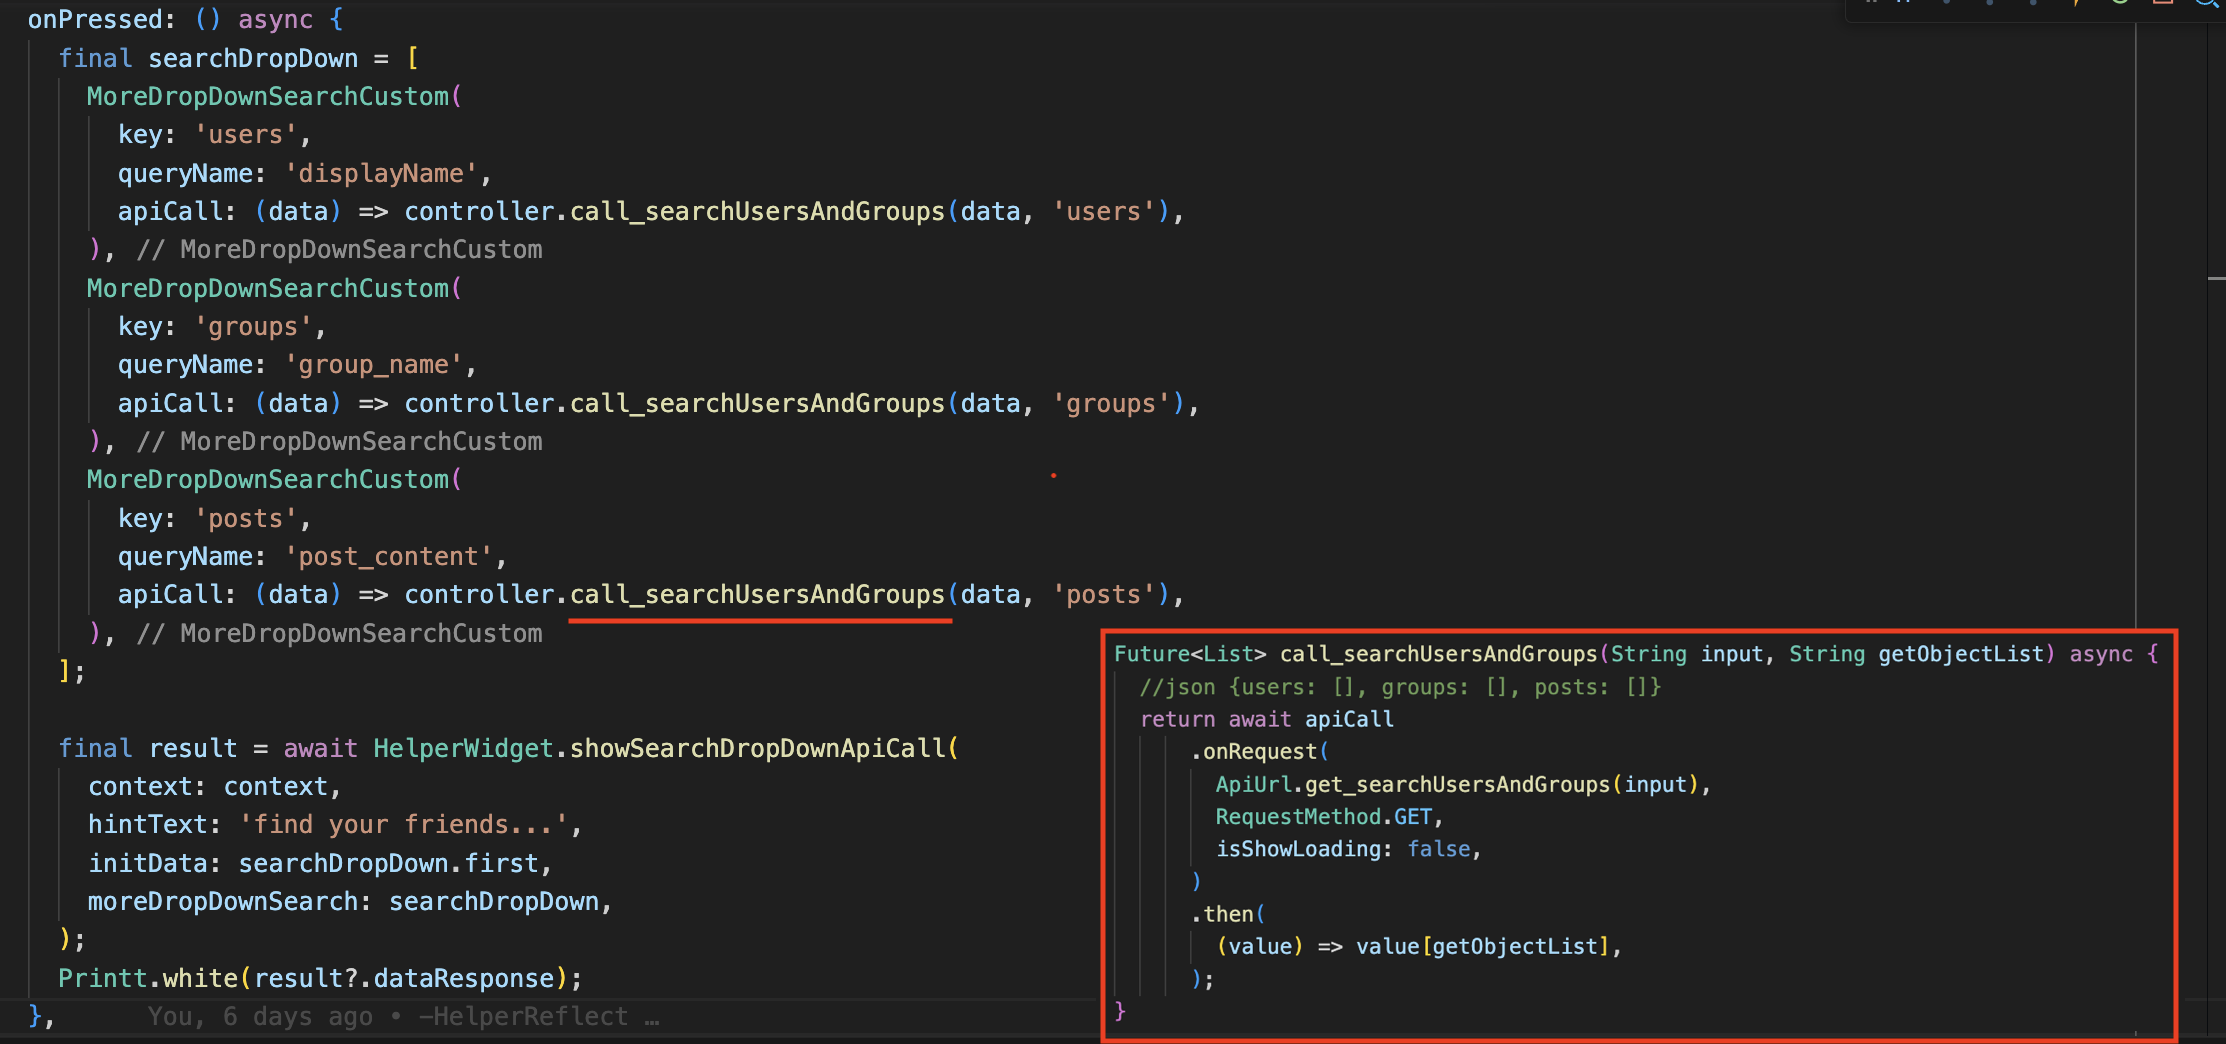
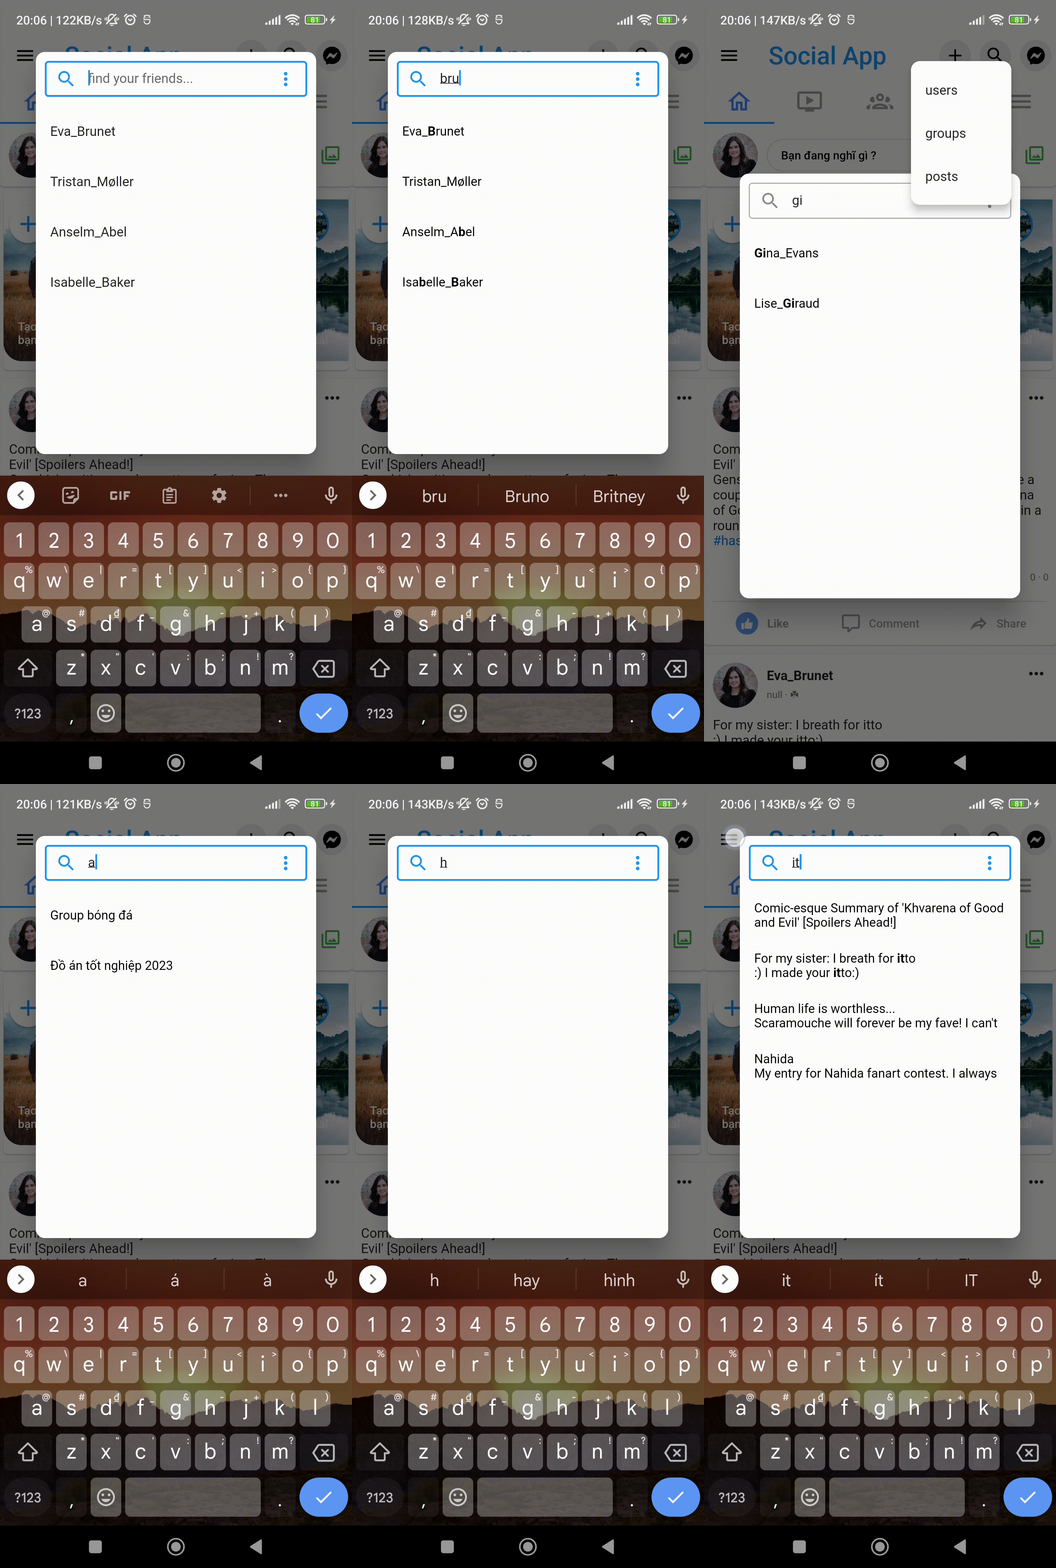
}Trong HelperReflect có sẵn cơ bản hàm Search bạn có thể tham khảo cách dùng dưới đây tại HelperWidget.showSearchDropDownApiCall
- Nếu bạn đã có danh sách data có sẵn và chỉ cần filter dựa theo đó, có thể sử dụng
HelperWidget.showSearchDropDown - Nếu bạn có api tìm kiếm và phải gọi khi tìm bạn có thể sử dụng
HelperWidget.showSearchDropDownApiCall
Để tránh việc gọi api liên tục, giới hạn query khi dừng là 1 giây
Dưới đây mình sẽ ví dụ ở showSearchDropDownApiCall:
Ngoài các tính năng cơ bản trên, bạn có thể tham khảo các hàm hỗ trợ khác:
| Function | Description |
|---|---|
| LimitRangeTextInput | TextFormField có tham số vào là inputFormatters, bạn có thể đặt nó ở đây để giới hạn con số người dùng nhập vào |
| Helper.tryFormatDateTime | Thử định dạng chuỗi theo ngày-tháng-năm, trả về nguyên mẫu nếu lỗi |
| Helper.limitShowList | Giới hạn danh sách hiển thị |
| Helper.randomColor/randomNumber | y như ý nghĩa của tên hàm! |
| Helper.listGenerateSeparated | Hoạt động tương tự ListView.separated, chèn phần tử vào giữa các vị trí của danh sách |
| Helper.readFileJson | Đọc file Json của ban5 |
| Helper.containsToLowerCase | So sánh giữa 2 chuổi (thường dùng cho tìm kiem61) |
| Helper.generateIdFromDateTimeNow | Tạo ID theo thời gian hiện tại |
| Helper.convertToListMap | API thường trả về List<dynamic>, bạn muốn ép nó sang List<Map<String,dynamic>> có thể sử dụng hàm này |
| HelperWidget.showToast | Hiện thông báo nổi (thường dùng cho lỗi api) |
| HelperWidget.highlightOccurrences | Tô đậm chữ tìm kiếm |
| HelperWidget.showSnackBar | Hiện thông báo ở phía dưới (Success ✅/Error X) |
| HelperWidget.buildImage/buildFile | Tạo sẵn widget hiển thị hình ảnh/file (click vào thì phóng to) |
| HelperWidget.showSearchDropDown | phiên bản khác của DropdownButton nhưng có tìm kiếm |
Ngoài ra có class NotificationService viết sẵn các hàm cơ bản để push noti.
Cấu hình notify native mình sẽ làm và updat sau này ở 1 commit riêng
Bạn có thắc mắc Binding ở GetPage là gì ? Theo cách mình hiểu đơn giản của GetX
binding: BindingsBuilder(() => Get.lazyPut(() => HomeController()))
Nó giống như hỗ trợ xóa Controller sau khi màn hình đó được xóa khỏi Stack, và giúp cho tự khởi tạo Controller sau khi vào Page.


