Run ./build.sh
This will install nvm if it isn't already, as well as use NodeJS v12.0 (it will install if not present).
The output of this script is a vsix file in the project root directory.
-
Open the Extensions settings in VSCode
-
On the left pane, click the ellipsis icon
-
Select Install from VSIX and locate the
.vsixfile created by the build script. -
Make sure the Language is set to 'Home Assistant' using the language picker:

and/or pin it via a
./vscode/settings.jsonfile in your Home Assistant configuration folder:{ "files.associations": { "*.yaml": "home-assistant" } }
The VS Code docs also explain how to set the 'Home Assistant' language as default for '.yaml' or for a workspace (via a settings file).
-
Configure the connection to Home Assistant (more info in the Configuration section below)
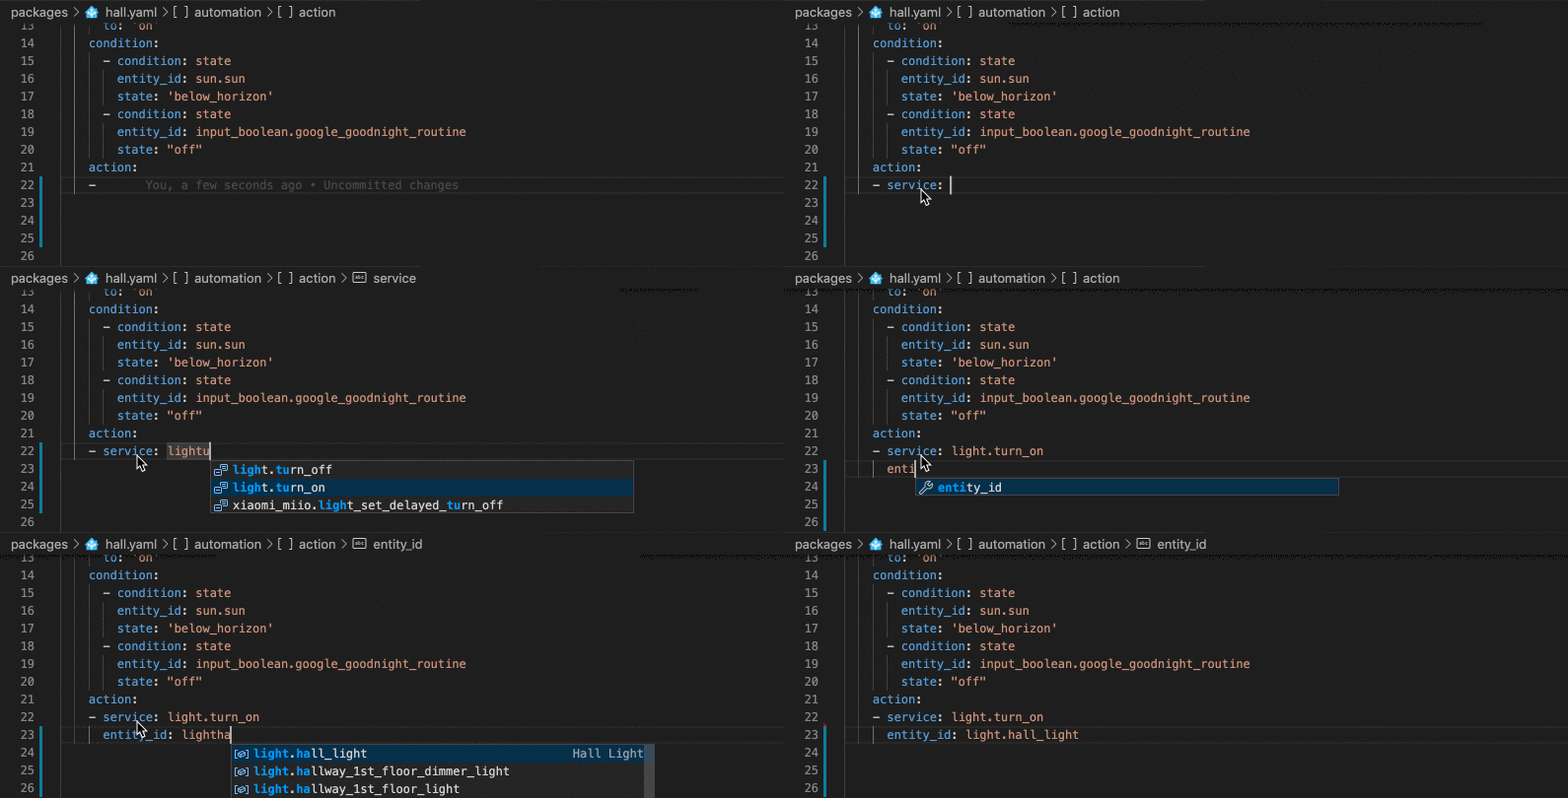
When connected with your Home Assistant server, entity id' and services will be auto-completed.
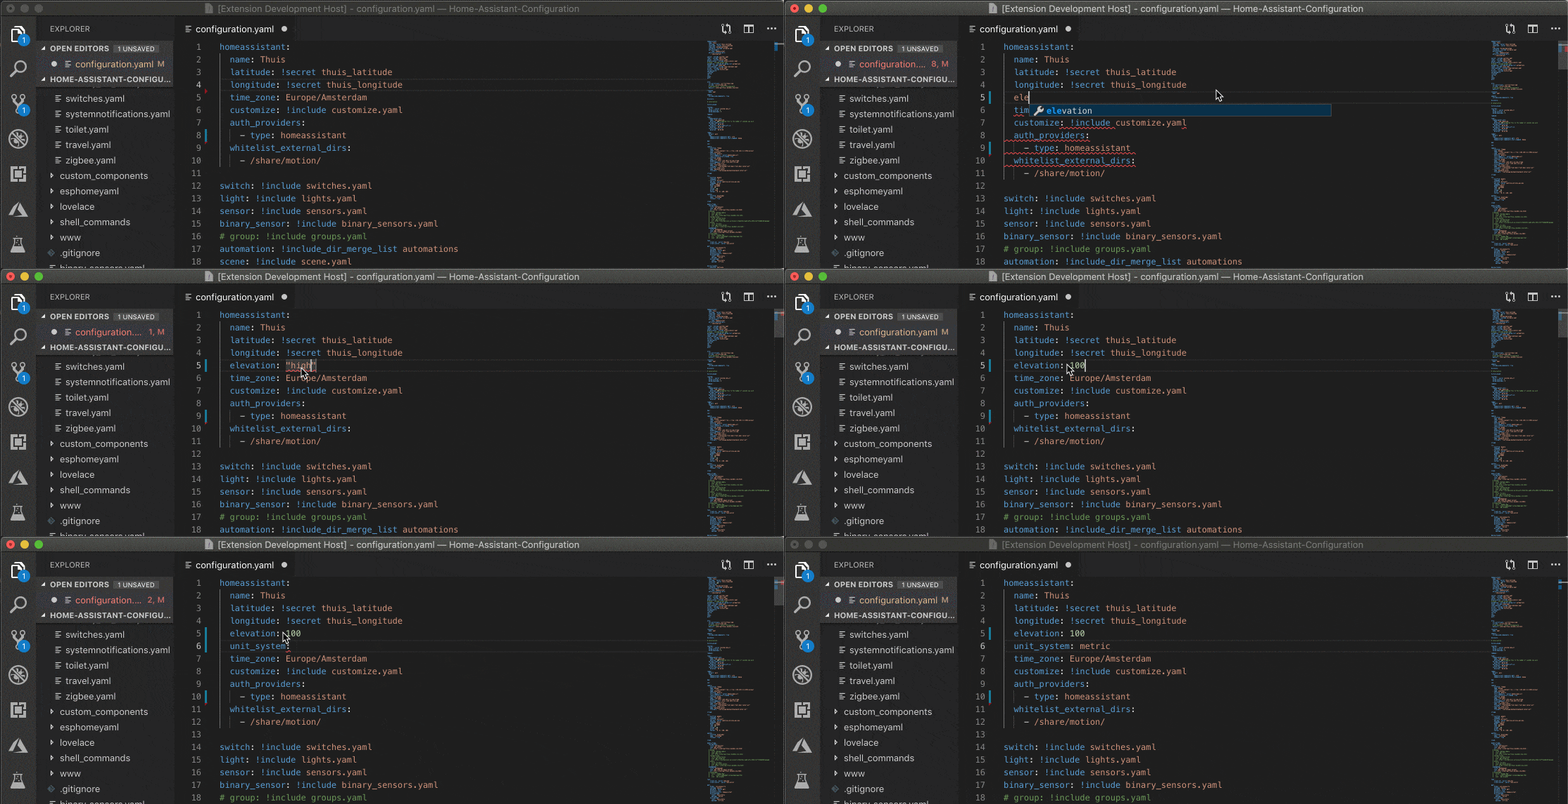
Most of the scheme's of Home Assistant will be validated and things like properties, values and enums will be auto-completed. This extension understands the behaviour of Home Assistant '!include...' behaviour and use this to provide scoped validation for all your files.
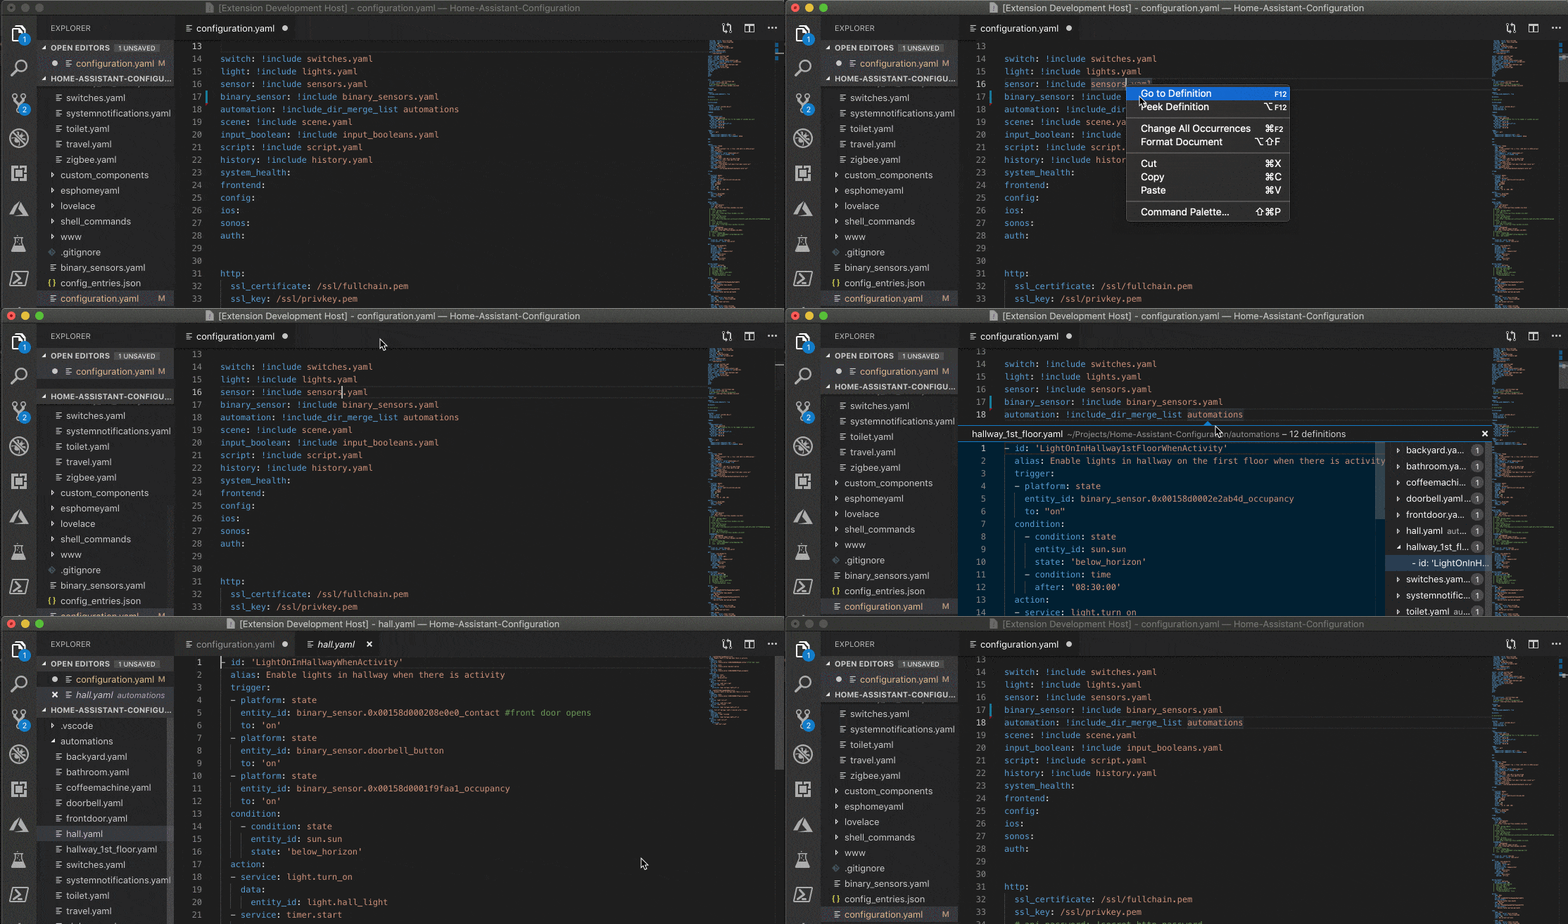
Easy navigate between your files references via the different !include... tags using 'f12' / 'Go to Definition'.
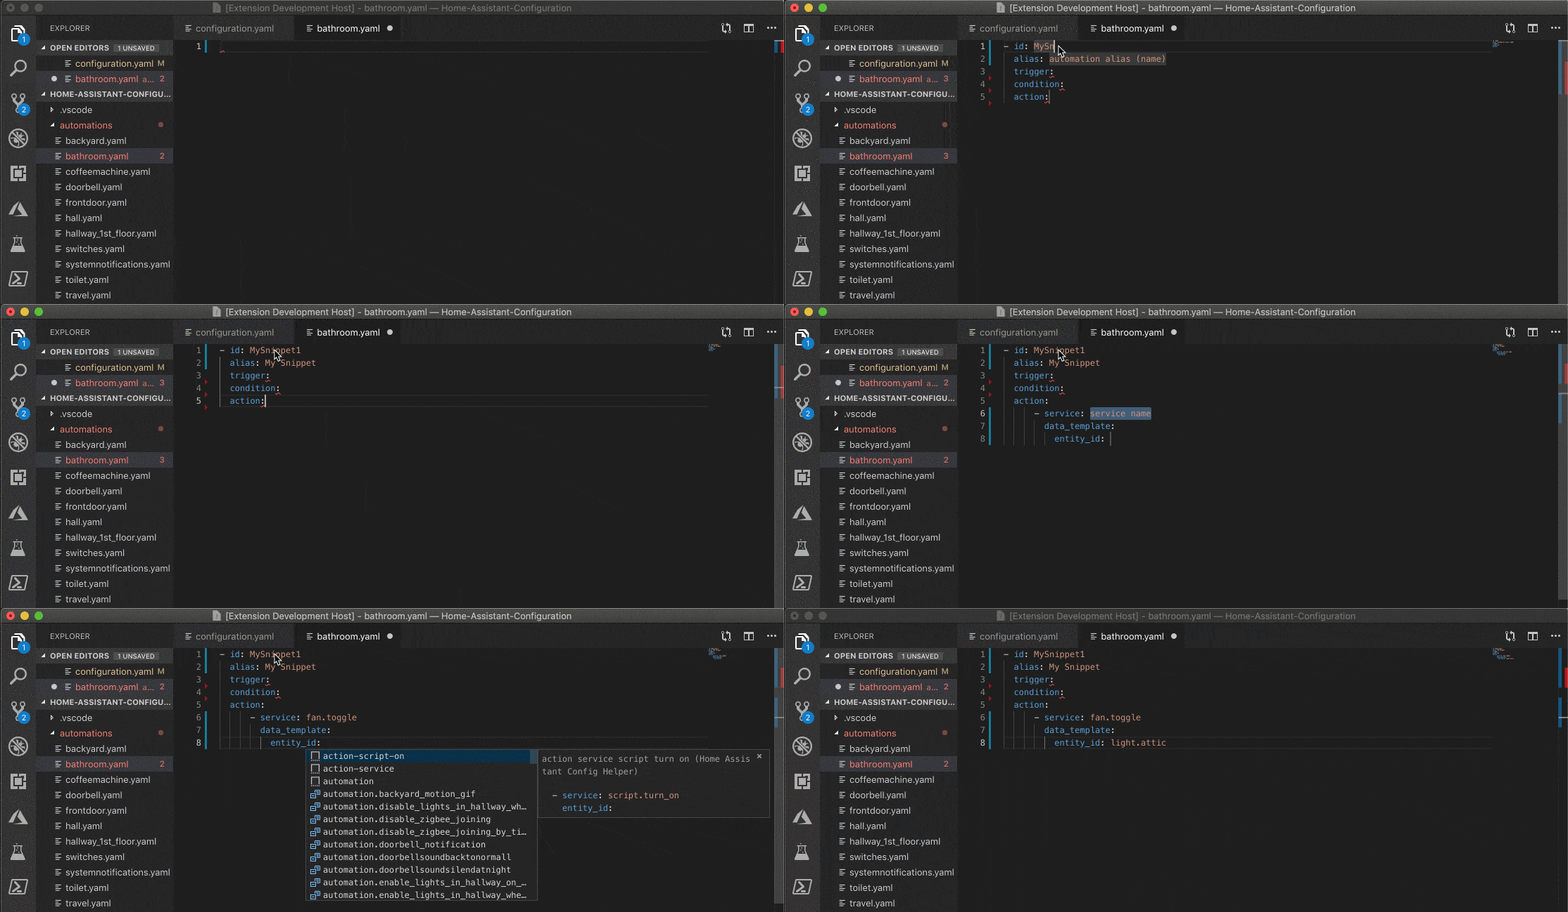
Snippets allow you to create commonly used data structures very quickly.
After installation, this extension needs your...
- Home Assistant Root URL and a
- Long Lived Access Token
...to be able to connect to your Home Assistant Server.
There are 2 ways to get this done:
-
Via the default VS Code Settings UI
Set the values with the default settings editor of VS Code: to open the VS Code settings, go to (cmd+shift+p) 'Preferences: Open Settings (UI)', then go to 'Extensions' and then 'Home Assistant'. Please note the difference between 'User Settings' and 'Workspace Settings', by default the extension sets them on User-level but they can be overridden at workspace level.
-
Via Environment Variables
Set the
HASS_SERVERandHASS_TOKENEnvironment Variables. This is convenient when you're using both this extension and the Home Assistant CLI. The extension will only use these Environment Variables when you have not set any setting in VS Code.Remember the scope of your environment variables differs per OS. Usually for this to work, you need to start VS Code from the from the prompt where the environment variables are set.
- New: Schema Validation/completion for most data structures
- New: Go to Definition for include-references
- New: HA As a Language Server (enabling other IDE's in later stage)
For older release information visit the releases section at GitHub
Reach out to me on Twitter or the Home Assistant Discord.
- Go to Definition for sntities, scripts and automations
- Render Jinja2 template locally (like/via CLI?) in preview pane
- Autocomplete !secrets
- Autocomplete triggers
- Check local config with HA Server
| Master | Dev | |
|---|---|---|
| Build status | ||
| Deployment Status | ||
| Get it |  |
This extension collects telemetry data to help us build a better experience for using VS Code with Home Assistant. We use vscode-extension-telemetry, which reports the following data:
- Extension name
- Extension version
- Machine ID and session ID from VS Code
- Operating system
- Platform version
Additionally, if the language server fails to activate, we report the diagnostic
data the language server produces. The extension respects the telemetry.enableTelemetry
setting, which you can learn more about at VS Code's
telemetry FAQ.


