This sample goes through the basics of creating an Azure Function that triggers on a new Azure Storage Queue message. The function can then be deployed to Kubernetes with KEDA for event driven activation and scale.
- Azure Function Core Tools v3.
- An Azure Subscription (to host the storage queue)
- An Azure Storage account with the queue "myqueue-items"
- Kubernetes cluster (Azure AKS with RBAC)
- Docker and a Docker registry (Azure Container Registry)
- Dotnet Core 3.1
mkdir demo-keda
cd demo-keda
func init --worker-runtime dotnet --docker
func new -n Demo -l C#
Select QueueTrigger
Open local.settings.json which has the local debug connection string settings. Replace the {AzureWebJobsStorage} with the connection string value for your Azure Storage account:
local.settings.json
{
  "IsEncrypted": false,
  "Values": {
    "FUNCTIONS_WORKER_RUNTIME": "dotnet",
    "AzureWebJobsStorage": "<YOUR CONNECTION STRING>"
  }
}Open Demo.cs and update Connection = "" with the connection string value for your Azure Storage account:
Demo.cs
[FunctionName("Demo")]
        public static void Run([QueueTrigger("myqueue-items", Connection = "AzureWebJobsStorage")]string myQueueItem, ILogger log)
        {
            log.LogInformation($"C# Queue trigger function processed: {myQueueItem}");
}Start the function locally
func start
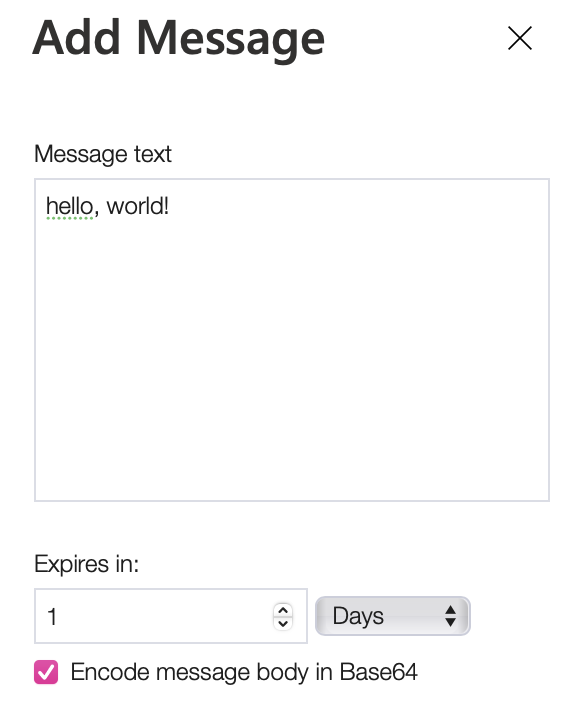
Go to your Azure Storage account in the Azure Portal and open the Storage Explorer. Select the myqueue-items queue and add a message to send to the function.
After the message has been added, you should see your function picking up the event:
[2021-01-10T10:05:08.733Z] Executing 'Demo' (Reason='New queue message detected on 'myqueue-items'.', Id=2fd43362-e584-46cd-a45f-c4851cd6a0c1)
[2021-01-10T10:05:08.734Z] Trigger Details: MessageId: 564208a2-c461-478d-b212-b1f3b617f7e4, DequeueCount: 1, InsertionTime: 01/10/2021 10:05:07 +00:00
[2021-01-10T10:05:08.744Z] C# Queue trigger function processed: hello, world!
[2021-01-10T10:05:08.757Z] Executed 'Demo' (Succeeded, Id=2fd43362-e584-46cd-a45f-c4851cd6a0c1, Duration=51ms)
Follow the instructions to deploy KEDA v 2.0 in your cluster.
To confirm that KEDA has successfully installed you can run the following command and should see the following CRD.
kubectl get customresourcedefinition

scaledobjects.keda.k8s.io                          2020-12-18T09:36:29Z
scaledobjects.keda.sh                              2021-01-07T17:29:54Z
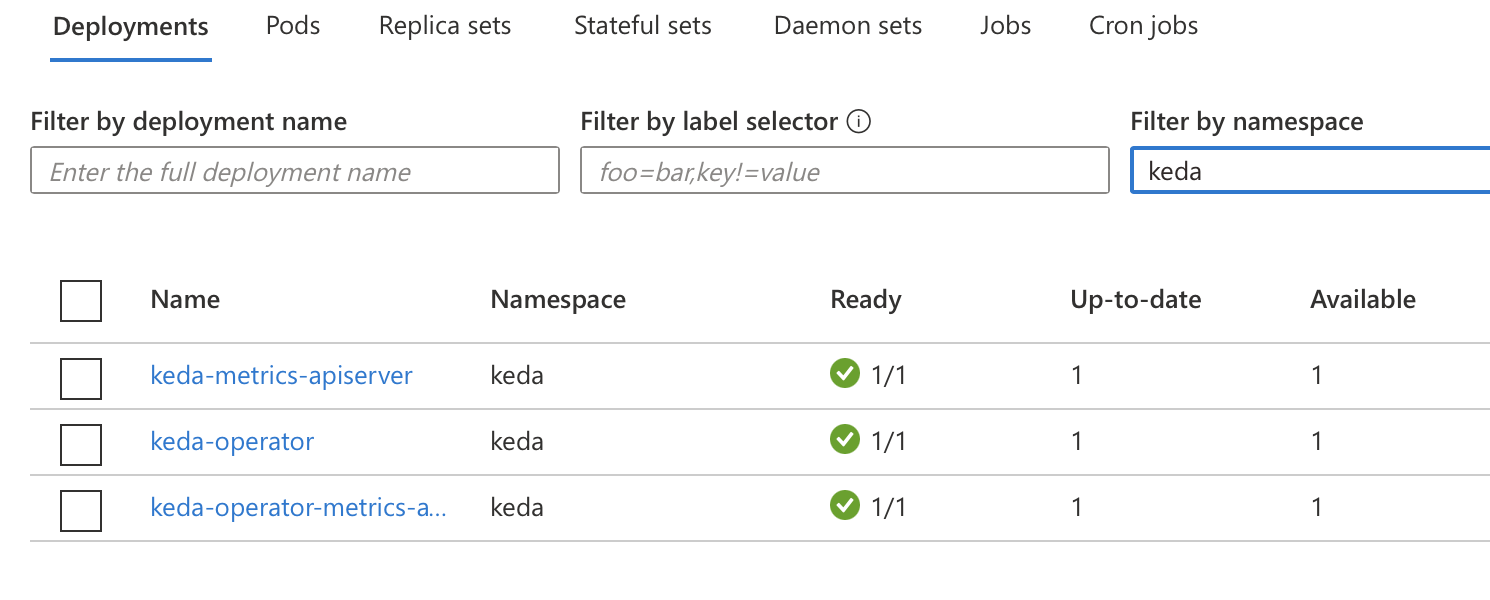
and/or check in your kubernetes cluster (Azure example), that the following deployments are active:
Let's name our image demo-keda and create local docker image:
docker build -t <your registry name>.azurecr.io/demo-keda .
And push it to the registry
docker push <your registry name>.azurecr.io/demo-keda:latest
Generate a deployment yaml for the kubernetes' namespace demo:
func kubernetes deploy --name demo-keda --namespace demo \
  --image-name <your registry name>.azurecr.io/demo-keda:latest --dry-run > deploy.yaml
Func will generate KEDA v 1.0 yaml files, so we would need to fine-tune it.
Open deploy.yaml and replace the last section (ScaledObject) with this one:
apiVersion: keda.sh/v1alpha1
kind: ScaledObject
metadata:
  name: demo-keda
  namespace: demo
spec:
  scaleTargetRef:
    name: demo-keda
  cooldownPeriod:  180
  minReplicaCount: 0
  maxReplicaCount: 2
  advanced:
    restoreToOriginalReplicaCount: true
  triggers:
  - type: azure-queue
    metadata:
      connectionFromEnv: AzureWebJobsStorage
      queueName: myqueue-items
      queueLength: '1'
..and apply the deployment to your cluster.
kubectl apply -f deploy.yaml
This is how it looks in the Azure Kubernetes cluster:
Initially after deploy and with an empty queue you should see 0 pods running.
kubectl get pods -n demo
By default, for a ScaledObject a pollingInterval equals 30 seconds, and cooldownPeriod equals 300 seconds, meaning that the queue will be polled each 30 seconds and your active scaled object (job) would be stopped in 5 minutes, if there are no messages in the queue. In our fine-tuning we have set queueLength to 1, so the auto-scaling should be triggred on average for each queued message. Be default, the value is 5.
Start watching the auto-scaling:
kubectl get pods -w -n demo
Add 5-10 queue messages to the queue. KEDA will detect the events and add pods.
Please, notice that maxReplicaCount limits the number of active jobs.
NAME                        READY   STATUS    RESTARTS   AGE
demo-keda-59b677fdd-5qchq   0/1     Pending   0          0s
demo-keda-59b677fdd-5qchq   0/1     Pending   0          0s
demo-keda-59b677fdd-5qchq   0/1     ContainerCreating   0          0s
demo-keda-59b677fdd-5qchq   1/1     Running             0          2s
kubectl delete deploy demo-keda -n demo
kubectl delete ScaledObject demo-keda -n demo
kubectl delete Secret demo-keda -n demo


