
This is an update to Morten Nobel-Jørgensen's SimpleRenderEngine (sre). The intent of the updates is to enhance the capabilities and to make the SRE interface easier to use (e.g. not as dependent on advanced C++11/14 features like Lambdas) and with less exposure of OpenGL internals (e.g. by abstracting away direct use of transformation matrices).
Two new cameras (derived from the basic virtual camera) have been added:
- A basic "First-Person Surveyor (FPS)" (e.g. a Minecraft-like) camera (demonstrated in
examples/18_FPS-camera.cpp) - A basic "Flight" camera (demonstrated in
examples/19_Flight-camera.cpp)
The goal of SimpleRenderEngine is to provide easy way to get started with graphics programming in 2D or 3D without a deep knowledge about the low-level graphics APIs like OpenGL, DirectX and Vulkan.
SimpleRenderEngine currently depends on Simple Direct Layer 2.x (SDL2), SDL2-image, OpenGL Mathematics (GLM), and OpenGL 3.3 (or higher), Dear ImGui and runs on Windows, macOS, and Linux.
sre provides:
- First-Person Surveyor (e.g. Minecraft-like) virtual camera
- Flight virtual camera
- Basic virtual camera (perspective and orthographic)
- Texture support (JPEG, PNG)
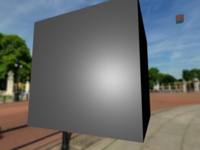
- Cube map support
- Mesh support (with custom vertex attributes)
- Shaders (PBR, Blinn-Phong, unlit, alpha blending, and custom shaders)
- Enforces efficient use of OpenGL
- Forward rendering
- Full C++14 support
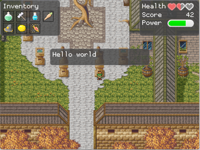
- Support for 2D or 3D rendering
- GUI rendering (using Dear ImGui)
- Emscripten support (allows cross compiling to HTML 5 + WebGL)
- VR support (OpenVR)
- Bump mapping
- Shadowmap
To keep sre as simple and flexible as possible the following features are not a part of sre:
- Scenegraphs
- Deferred rendering
- Dynamic particle systems
Use the Ubuntu 'Software Updater' utility to ensure Ubuntu is fully up-to-date. Then take these steps:
sudo apt full-upgrade
sudo apt update
sudo apt autoremove
Install compilers and build tools (if not installed already):
sudo apt install g++
sudo apt install git
sudo apt install make
sudo apt install cmake
sudo apt install cmake-curses-gui # This is optional
Install libraries (if not installed already):
sudo apt install libsdl2-dev
sudo apt install libsdl2-image-dev
sudo apt install libglew-dev
SRE is fully supported using the MSYS2 "Linux-like" environment. It is possible to build SRE with Microsoft Visual Studio, but several warnings have not been addressed and several manual steps need to be taken inside Visual Studio to build successfully.
Go to the MSYS2 site https://www.msys2.org/ and follow instructions to install MSYS2 and mingw64.
Open 'MSYS2 MinGW64 64-bit' command line from 'MSYS2 64bit' folder in the Windows Start Menu and then run:
pacman -S --needed base-devel mingw-w64-x86_64-toolchain # Install compilers and tools
pacman -S mingw-w64-x86_64-glew  # Install GLEW
pacman -S mingw-w64-x86_64-cmake # Install CMake
pacman -S mingw-w64-x86_64-qt6   # Install CMake gui (not keeping qt in-sync with CMake can lead to "error while loading shared libs")
The cmake executables are:
/mingw64/bin/cmake.exe
/mingw64/bin/cmake-gui.exe
Install SDL2:
pacman -S mingw-w64-x86_64-SDL2
pacman -S mingw-w64-x86_64-SDL2_image
To see which packages are needed to make a package work properly, use
packman -Qi package_name [e.g. mingw-w64-x86_64-cmake]
To search for a package available in MSYS2, use the command
pacman -Ss package_name
To search for an already-installed package, use the command
pacman -Qs package_name [or part of a package name]
TODO: Add MacOS instructions
Go to the directory that you want to install SRE into and clone the repository:
cd [directory-to-install-into]
git clone --recurse-submodules https://github.com/estrac/SimpleRenderEngine.git sre
In the above command, sre is the installation directory that will be created for SRE. Note that if you have forked the repository you should replace estrac with your username.
Go to the installation directory:
cd sre
If you have forked the repository, run the following to stay in-sync:
git remote add upstream https://github.com/estrac/SimpleRenderEngine.git
Use the pwd command to get the full-path-of-install-directory used below
pwd
The -p flag gracefully handles a pre-existing directory
mkdir -p ../sreBuild
Go to the build directory and run CMake:
cd ../sreBuild
cmake [full-path-of-install-directory]
or for developers who want to build a Debug version and run tests:
cmake [install-dir] -DCMAKE_BUILD_TYPE=Debug -DINSTALL_GTEST=ON -DUSE_SRE_TEST_AND_UTILS:BOOL=ON
Finally, build SRE and run the examples
make
cd examples
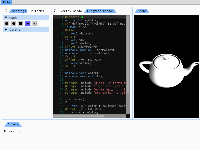
./SRE-Example-00_hello-engine
Tests can be built by selecting USE_SRE_TEST_AND_UTILS in CMake and are located in the test folder. Tests are automatically run (nightly, after checkin, and after a pull request) using GitHub Actions with the cmake.yml file in .github/workflows. They can run manually from the build directory by using the following command
ctest --output-on-failure
or, to run only the regression tests
ctest -R regression
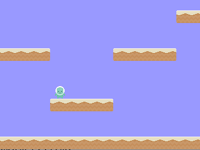
Examples (in the examples folder).
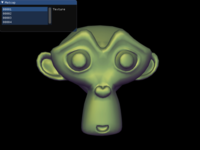
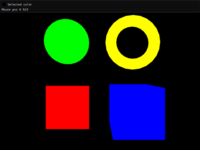

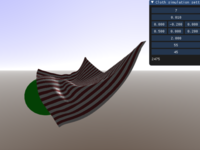


API documentation is defined in header files, usage is shown in the example files.
- https://www.libsdl.org Simple Direct Layer 2.x
- https://www.libsdl.org/projects/SDL_image/ Simple Direct Layer Image 2.x
- http://glm.g-truc.net/ OpenGL Mathematics (bundled as submodule)
- https://www.opengl.org/registry/ OpenGL Registry
- https://github.com/ocornut/imgui ImGui 1.60 (submodule)
- https://github.com/BalazsJako/ImGuiColorTextEdit ImGuiColorTextEdit (bundled as submodule)
- https://github.com/kazuho/picojson PicoJSON (bundled as submodule)