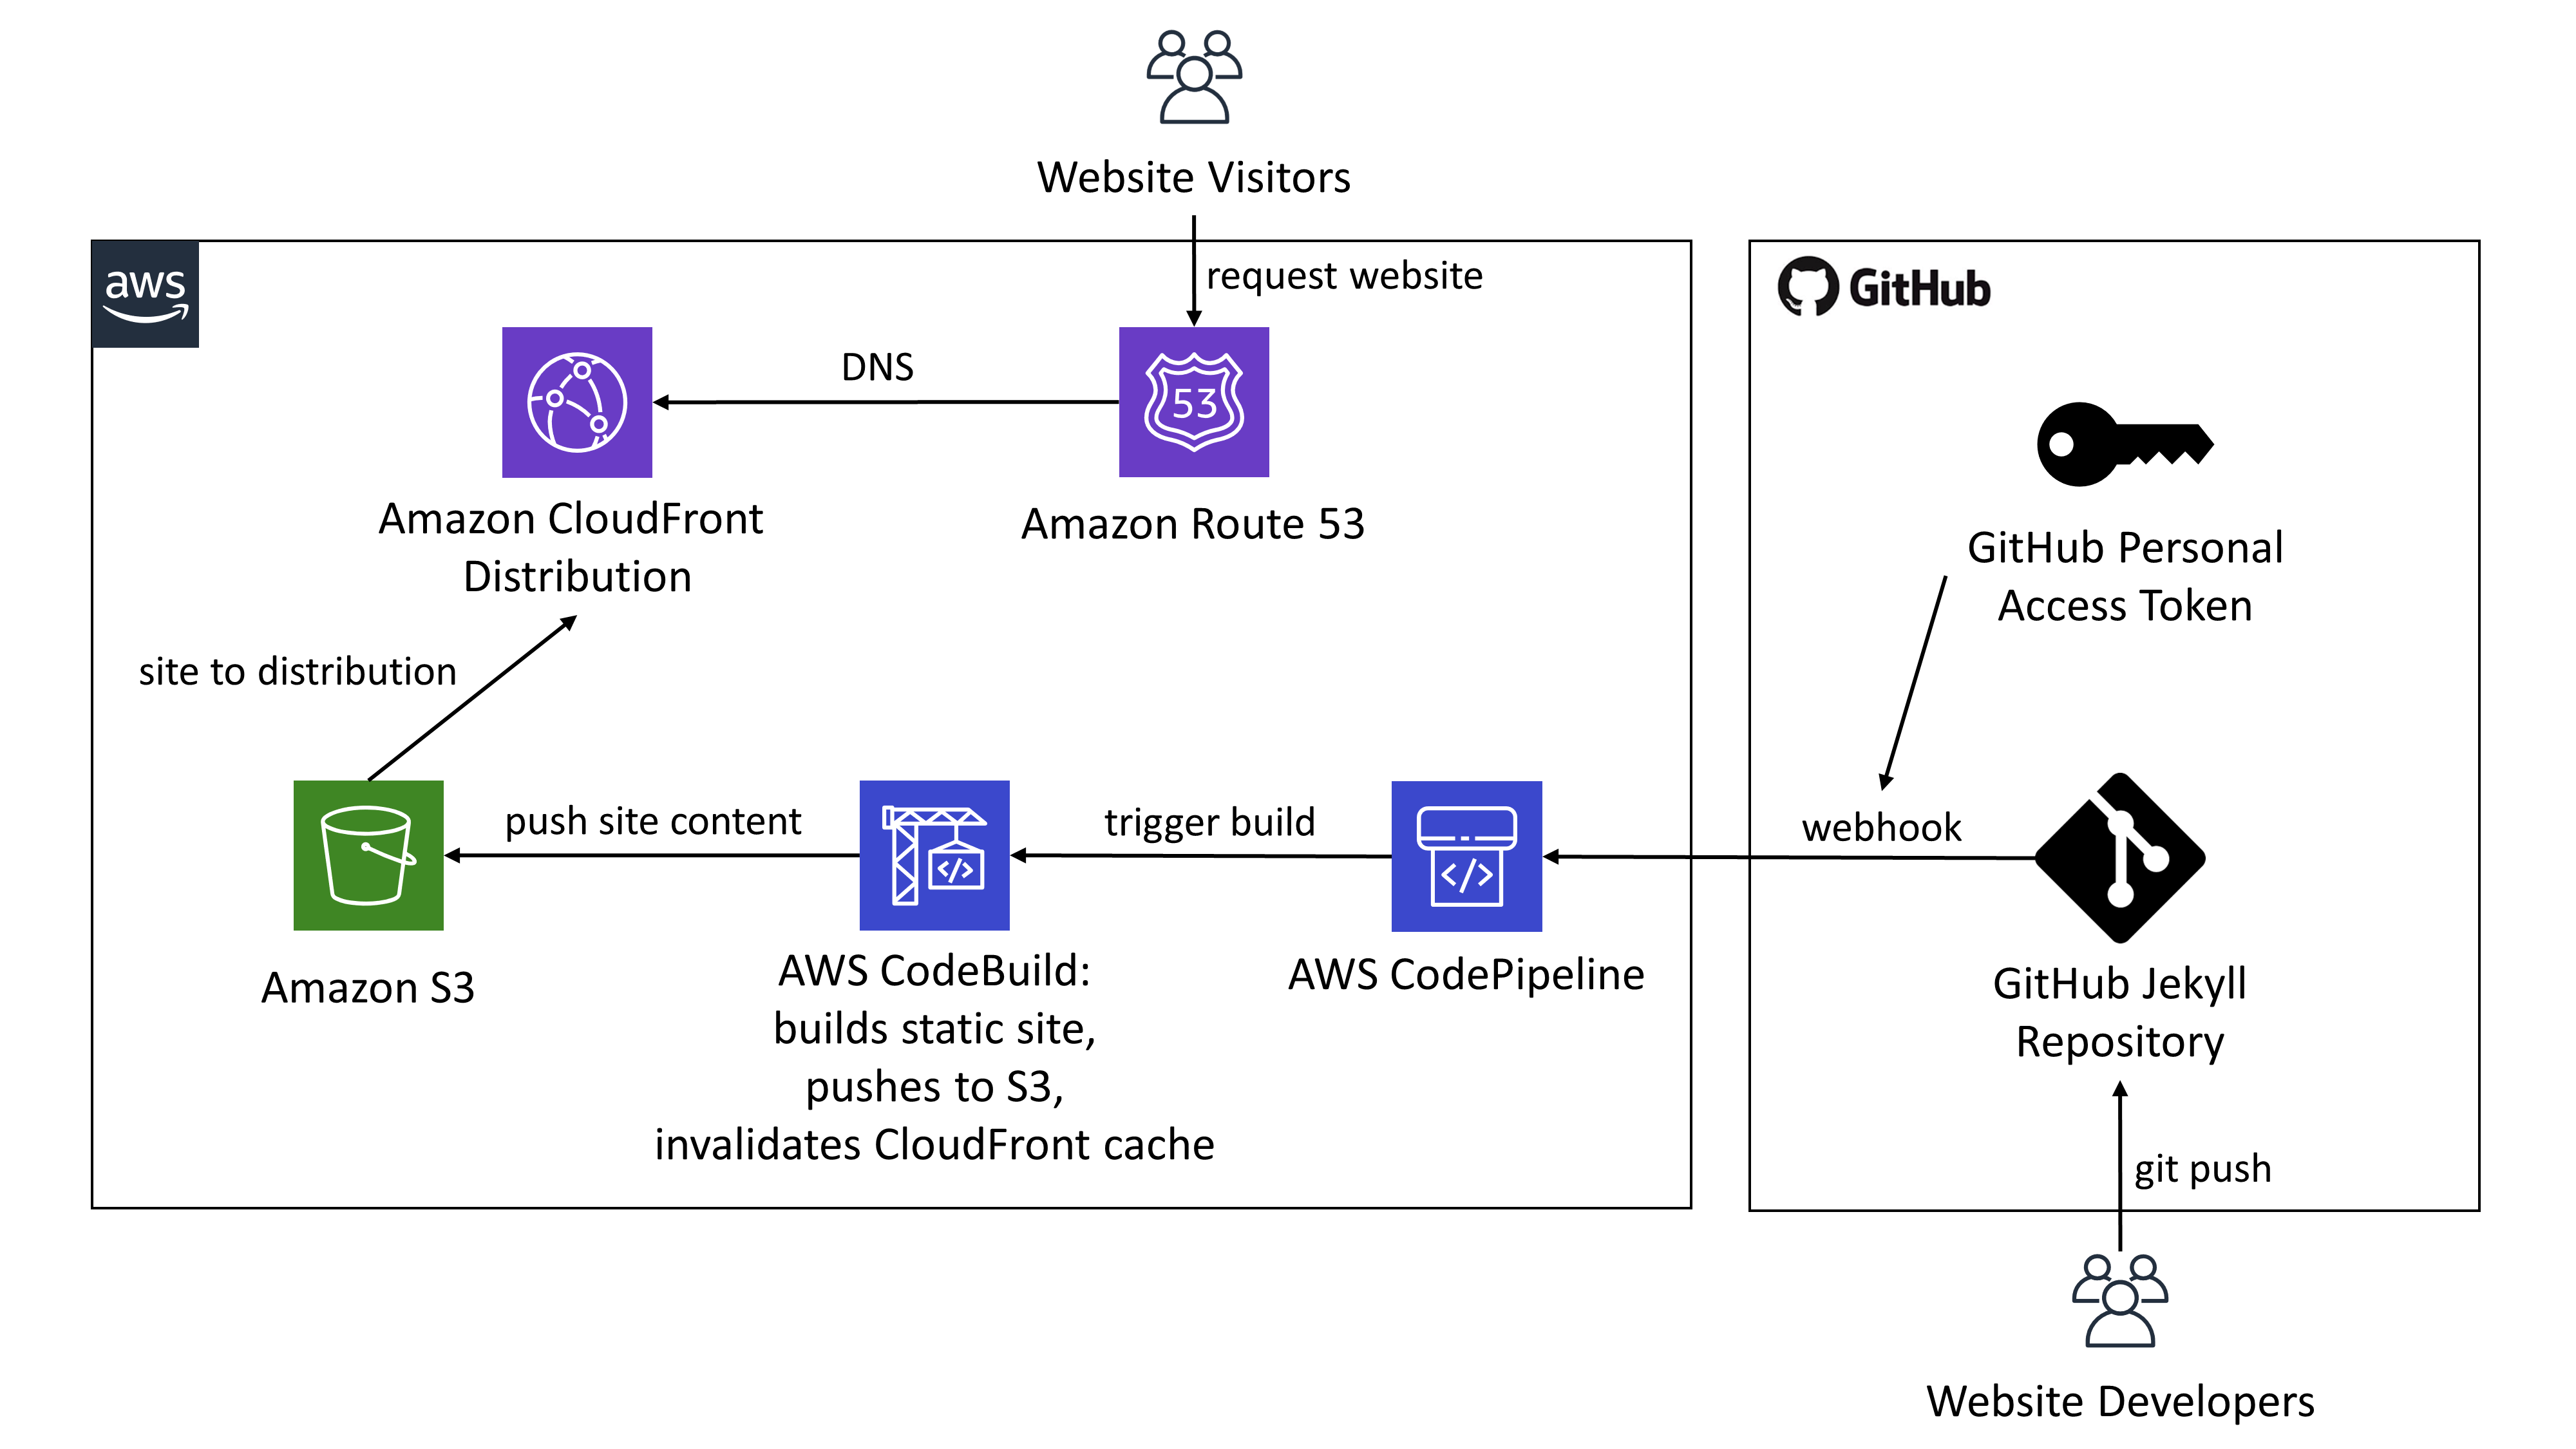
Automatically deploy your GitHub-hosted Jekyll project on AWS with your own custom domain via S3, CloudFront, and Route53.
CI/CD is also included to automatically deploy when you push your Jekyll changes to GitHub.
Requires a GitHub Jekyll project, a GitHub personal access token, an AWS account, and a Route53-purchased domain.
Associated blog post can be found here.
The diagram above shows a non-exhaustive architecture overview (e.g. S3 log bucket, IAM Roles created in cloudformation.html are not shown).
- You need an AWS account, and you need to be able to log in with sufficient permissions to create all of the AWS Resources contained in
cloudformation.yml. - You need to register your desired domain using AWS Route53 in advance of using
cloudformation.yml. - You need a public certificate for your domain to be used by AWS CloudFront. Follow the instructions on the AWS Docs.
- You need a GitHub account that contains a repository with a Jekyll project. Note that if your Jekyll project uses CoffeeScript you'll need to edit the
BuildSpecparameter in the template so that NodeJS gets installed (see some of the blog posts in the Acknowledgements for an example of how this is done). - You need to create a GitHub personal access token with the
repoandadmin:repo_hookoptions selected for CodePipeline to access your repository (AWS Docs). - Once you have all the above prerequisites in order, you simply create an AWS CloudFormation stack using the
cloudformation.ymlfile in this project and fill in all of the required parameters. Once the template has been deployed successfully, CodeBuild will build and deploy your website automatically and you should see it hosted at the domain that you specified in yourWebsiteURLparameter in the CloudFormation stack. You will see your website changes automatically whenever you push changes to your GitHub Jekyll repository on the specified branch.
There exist several blog posts online (see the Acknowlegements section below) that outline how to deploy a Jekyll website to AWS, but I wanted to codify the entire process into a single CloudFormation script so that I could better manage my own personal website. I also wanted to provide an easier out-of-the-box solution to anyone looking to host their Jekyll site on AWS.
In the course of building this CloudFormation template I referenced several blogs and AWS support pages, notably:
- AWS tutorial for wiring up GitHub to CodePipeline via CloudFormation
- Zeta Two blog post about deploying Jekyll to AWS similar to how it's done in this project
- Alex Bilbie blog post about deploying Jekyll to AWS similar to how it's done in this project
- Joeri Smits blog post about deploying Jekyll to AWS similar to how it's done in this project
- AWS blog post about using OAI to only allow website traffic to CloudFront and not to S3 while also using Lambda@Edge to handle paths that end in / and not /index.html
Thanks to the authors above without whom I don't think I could have done this project successfully.
