Beaker is a next generation coding notebook built for the AI era. Beaker seamlessly integrates a Jupyter-like experience with an AI agent that can be used to generate code and run code on the user's behalf. The agent has access to the entire notebook environment as its context, allowing it to make smart decisions about the code to generate and run. It can even debug itself and fix errors so that you don't have to. When the agent wants to use a library that isn't installed, it can even install it automatically.
Beyond that, Beaker solves one of the major challenges presented by coding notebooks--it introduces a true undo mechanism so that the user can roll back to any previous state in the notebook. Beaker also lets you swap effortlessly between a notebook style coding interface and a chat style interface, giving you the best of both worlds. Since everything is interoperable with Jupyter, you can always export your notebook and use it in any other Jupyter-compatible environment.
Beaker is powered by Archytas, our framework for building AI agents that can interact with code and advanced users can generate their own custom agents to meet their specific needs. These agents can have custom ReAct toolsets built in and can be extended to support any number of use cases.
We like to think of Beaker as a (much better!) drop in replacement for workflows where you'd normally rely on Jupyter notebooks and we hope you'll give it a try and let us know what you think!
Getting Beaker up and running is easy! All you need to do is install the Beaker with:
pip install beaker-kernelNext, you'll run beaker config update to set up your configuration. This will create a beaker.conf file in your home directory's .config folder. You can leave everything as the default except for the LLM_SERVICE_TOKEN which you'll need to set to your OpenAI API (or other LLM provider) key.
Now that you've got things installed and set up, just simply run:
beaker notebookYour notebook server will start up and Beaker will be ready to use at localhost:8888.
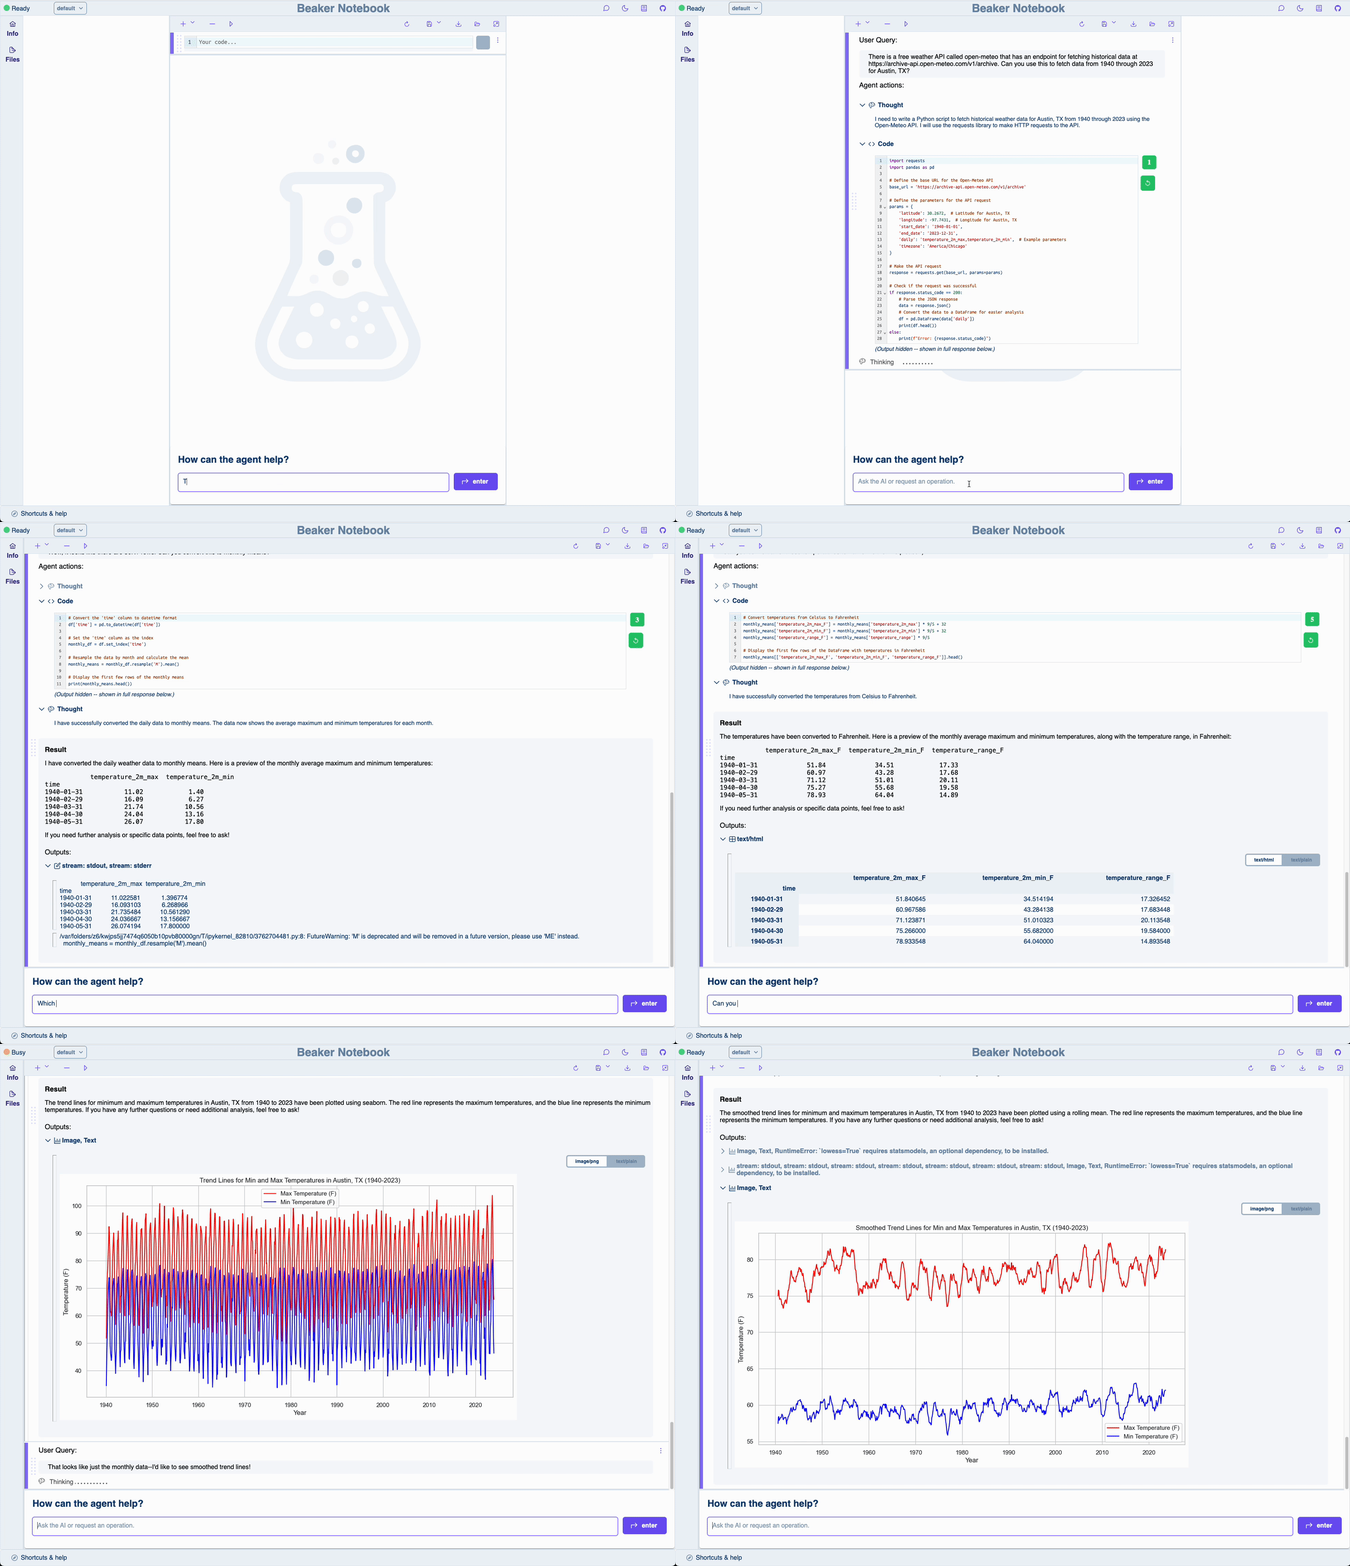
Here is a quick demo of using Beaker to interact with a free weather API, fetch some data, perform some data transformations and a bit of analysis. This is really just scratching the surface of what you can do with Beaker, but it gives you a sense of the kinds of things it can do.
There is a lot more to Beaker than what we've covered here, so we've put together more detailed docs that cover how to customize and extend Beaker in more detail. These include information on how to build your own custom contexts, toolsets, and subkernels to make Beaker meet your specific needs and usecases. It also gets into the basics of using the Beaker TypeScript SDK to build your own custom front-ends around Beaker.
