You will be using Red Hat CodeReady Workspaces, an online IDE. Changes to files are auto-saved every few seconds, so you don't need to explicitly save changes.
To get started, access the CodeReady Workspaces Dashboard and log in using the username and password you've been assigned.
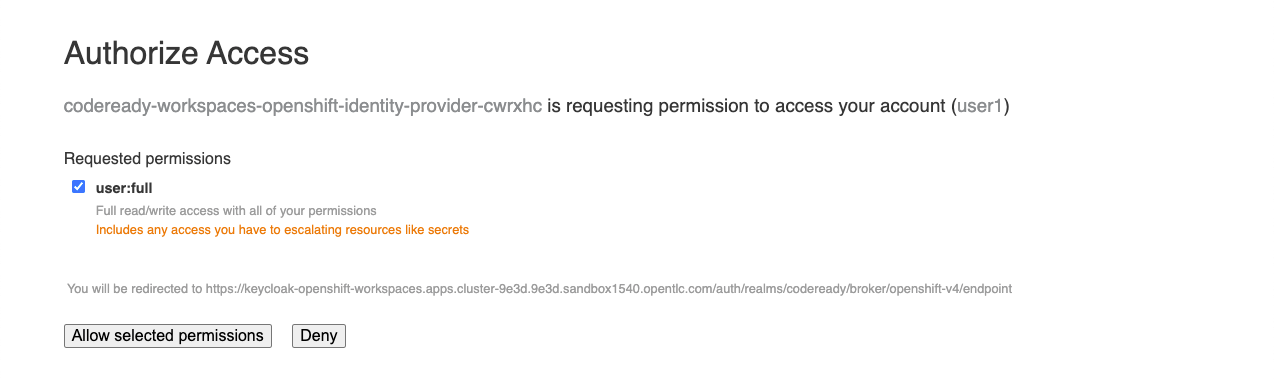
If this is the first time logging in with an account, CodeReady Workspaces will request the user to authorize access to the account, click on the Allow selected permissions button to continue.
| Name | URL |
|---|---|
| OCP Console | |
| CodeReady Workspaces Dashboard |
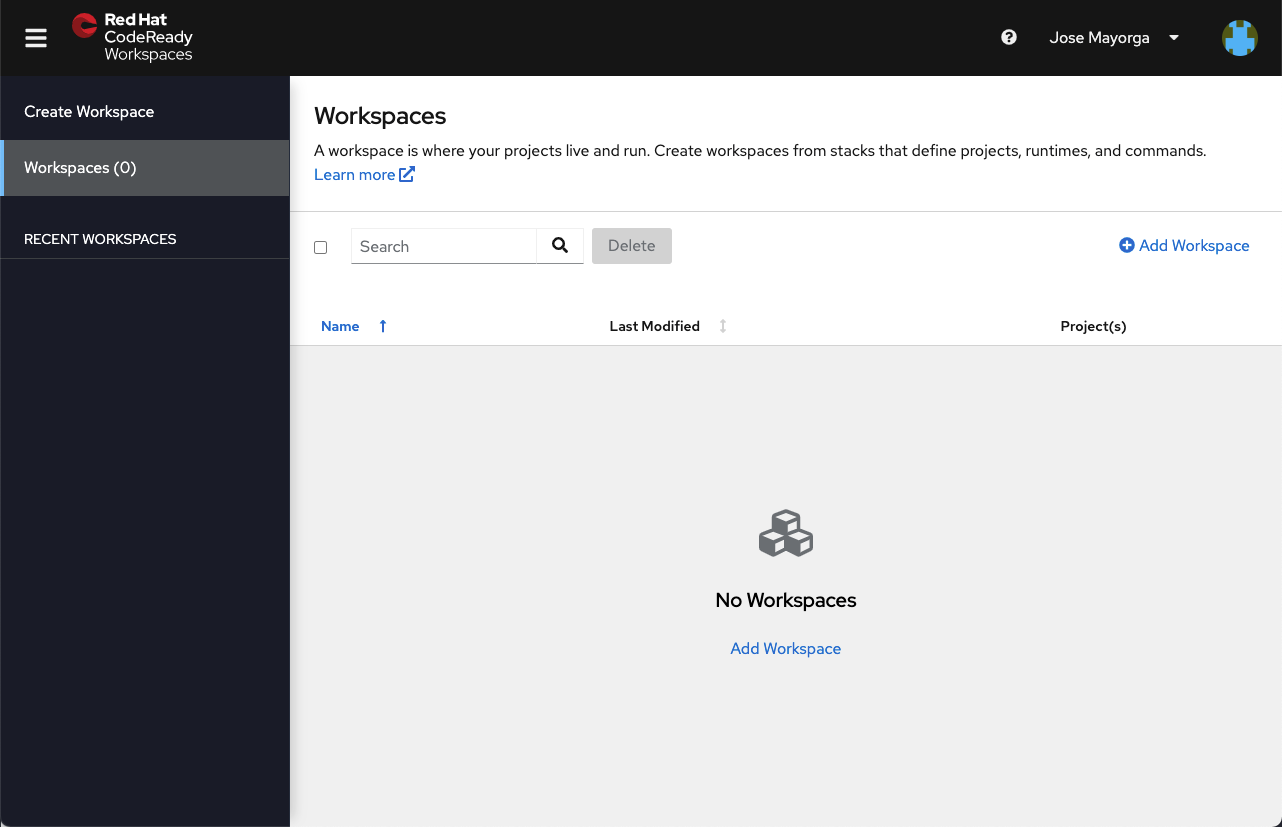
Once you log in, you'll be placed on your personal dashboard.
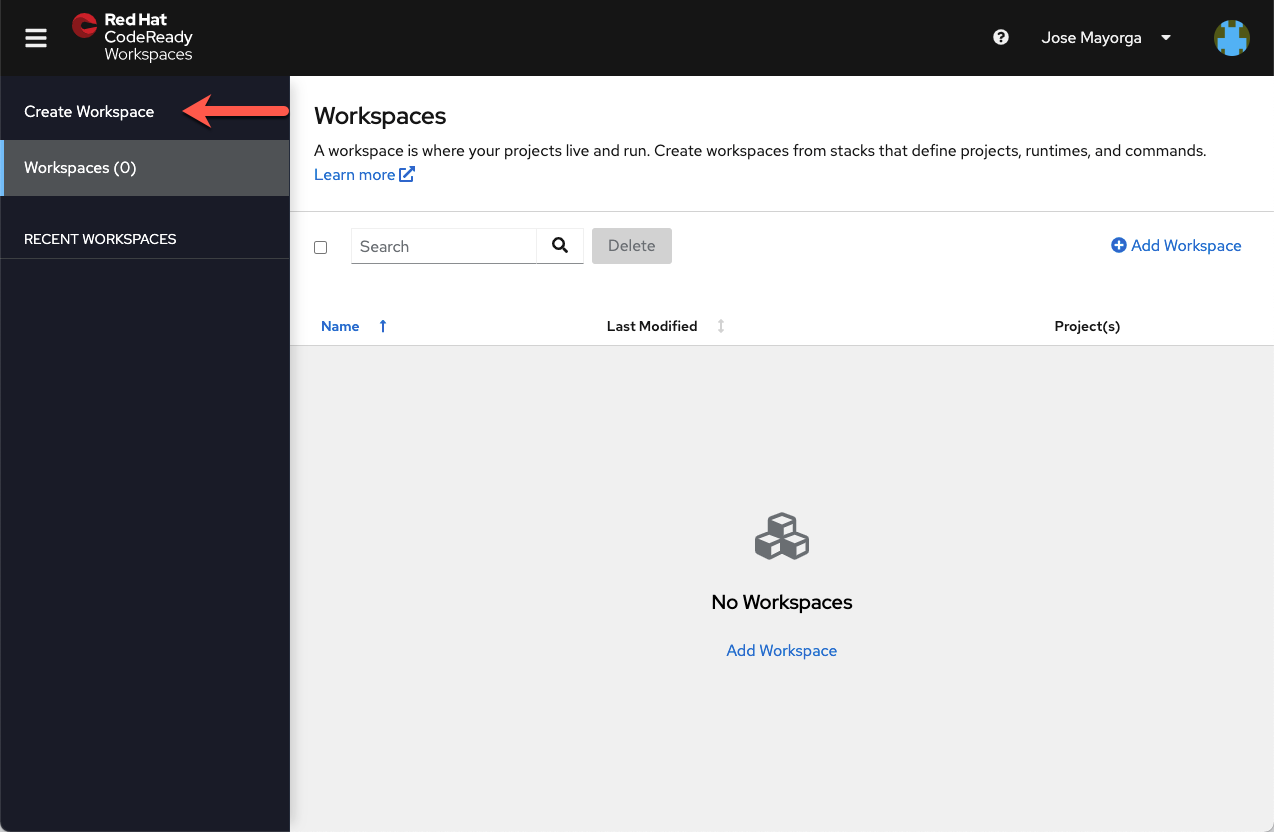
Click on the Create Workspace item on the left menu
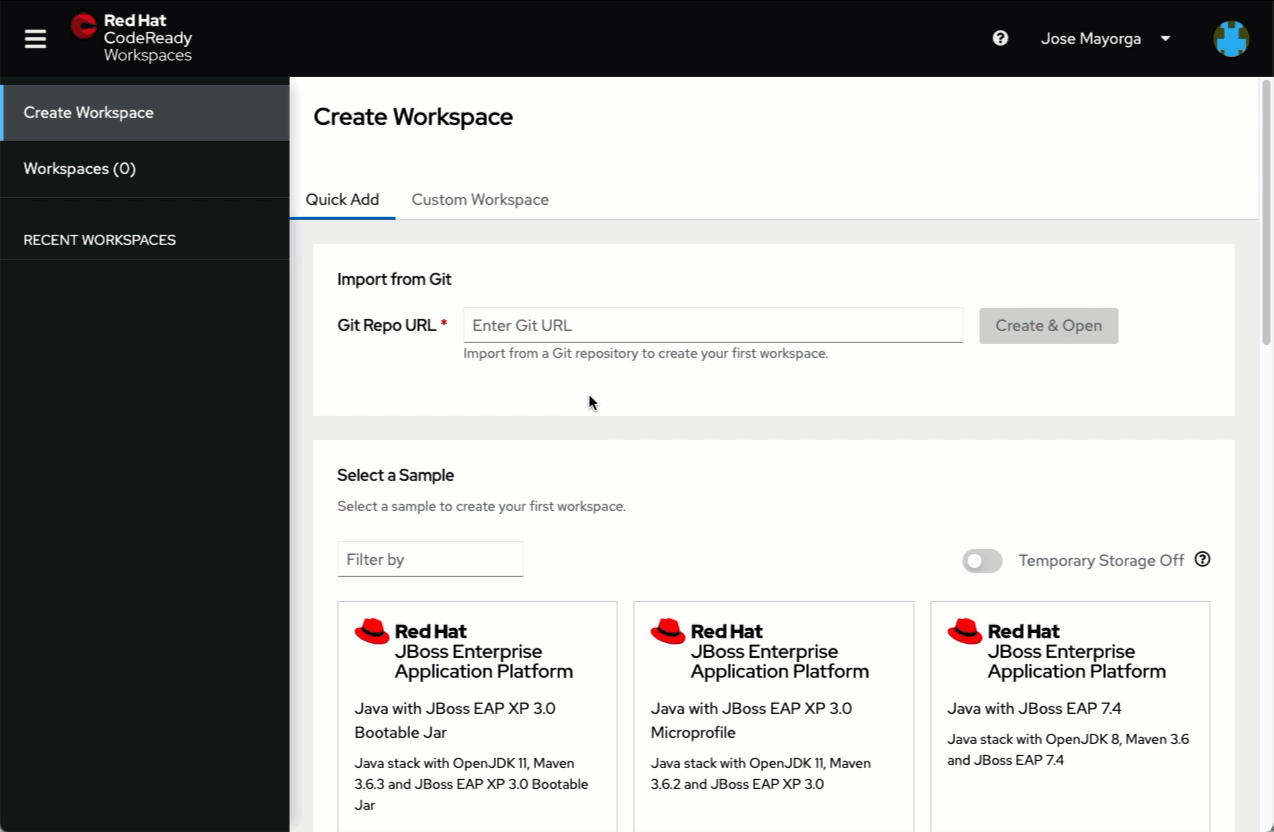
You will create a workspace from an existing repository from GitHub.
In the Git Repo URL text field, enter the following Devfile URL and click the Create & Open button.
https://raw.githubusercontent.com/jlmayorga/crw-workshop-quarkus/main/devfile.yaml
After a couple of minutes a new Workspace will be created and the IDE will be displayed.
The Devfile used to create the Workspace has multiple elements that define the configuration and behavior of the Workspace.
Can you identify them in your Workspace? (Expand below for answer)
Click to expand!
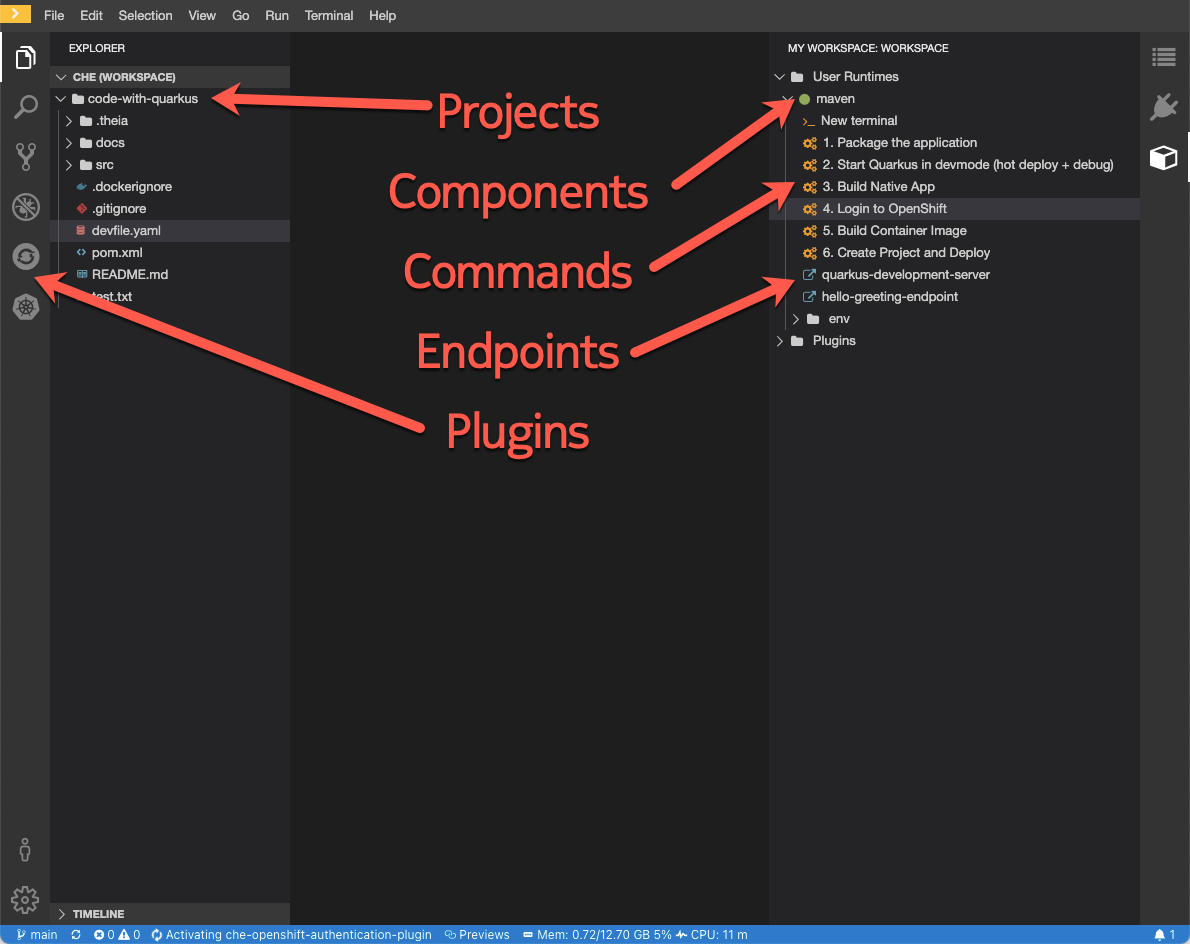
Commands are actions that can be executed in the containers of the Workspace pod.
The Workspace commands can be found in the Workspace Panel located on the right side of the IDE.
The Devfile used to create the Workspace of this workshop has multiple commands defined in it.
- Package the application
- Start Quarkus in dev mode
- Build native app
- Login to OpenShift
- Build container image
- Create OpenShift project and deploy
To run the application, open the Workspace Panel and click on the Start Quarkus in dev mode item.
A new panel will open at the bottom of your IDE and will execute the following command in the maven container of the Workspace pod.
mvn compile quarkus:dev -Dquarkus.http.host=0.0.0.0 -Dquarkus.live-reload.instrumentation=false -f ${CHE_PROJECTS_ROOT}/code-with-quarkusOnce the application is running, CodeReady Workspaces will detect that the process is listening on port 8080 and it will display a prompt asking the user if it should open the endpoint in a browser window or in the preview panel.
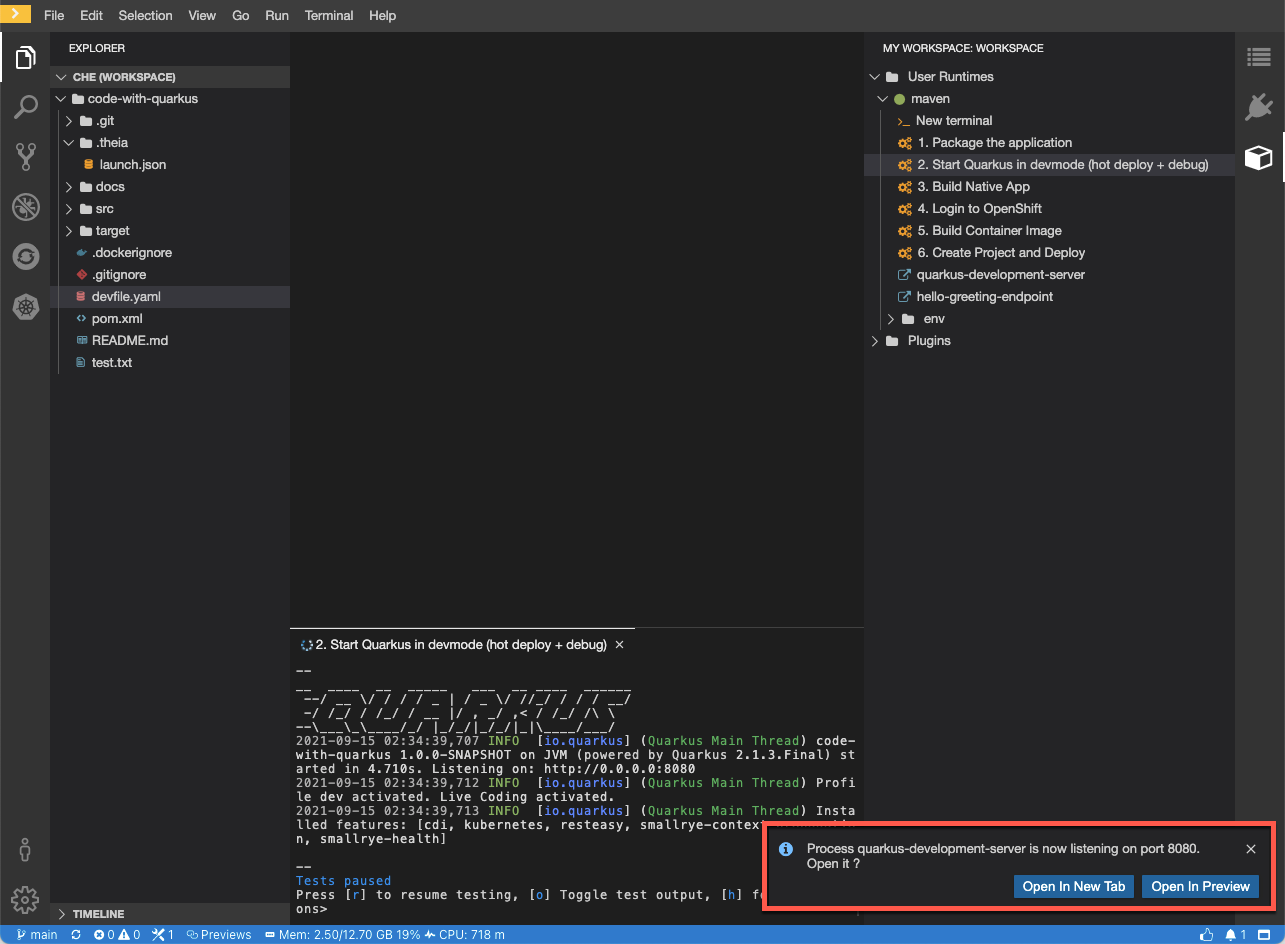
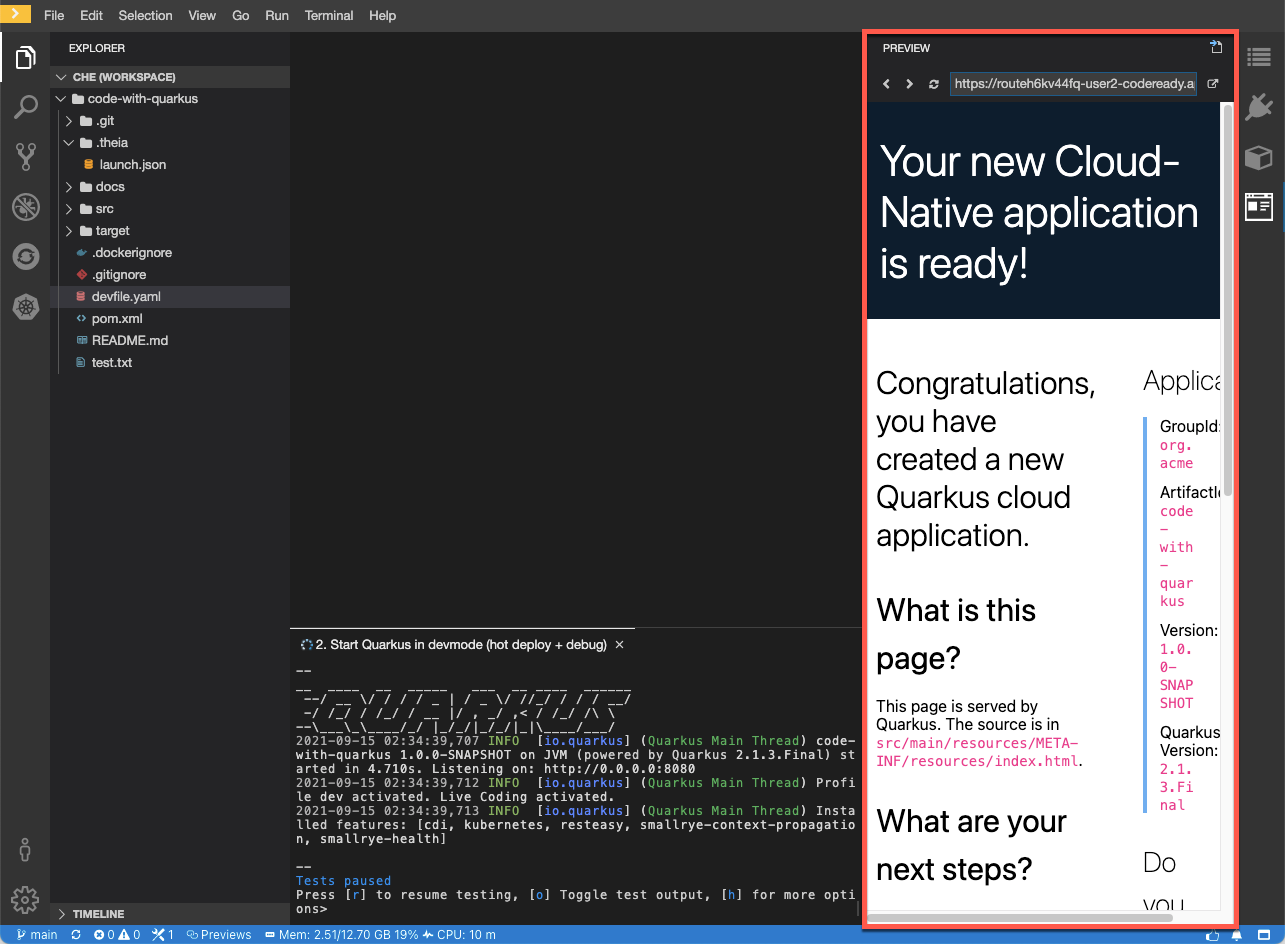
Click on the button labeled Open in Preview and the preview panel will be displayed.
✔️ CodeReady Workspaces does all the heavy lifting for you by creating OpenShift resources for your Workspace elements.
ℹ️ If the endpoint defined in the Devfile is configured as public, CodeReady Workspaces will automatically create an OpenShift Route and make the service externally available.
Since we are using Quarkus in this example, the command used to start the application is configured to run in development mode.
This enables hot deployment with background compilation, which means that when you modify your Java files and/or your resource files and refresh your browser, these changes will automatically take effect without having to restart the application.
Open the file named GreetingResource.java that is located in the path src/main/java/org/acme of the project.
Add a new method to the GreetingResource class below the hello method using the following code:
    @GET
    @Produces(MediaType.TEXT_PLAIN)
    @Path("/greeting/{name}")
    public String greeting(@PathParam String name) {
        return "Hello, " + name;
    }
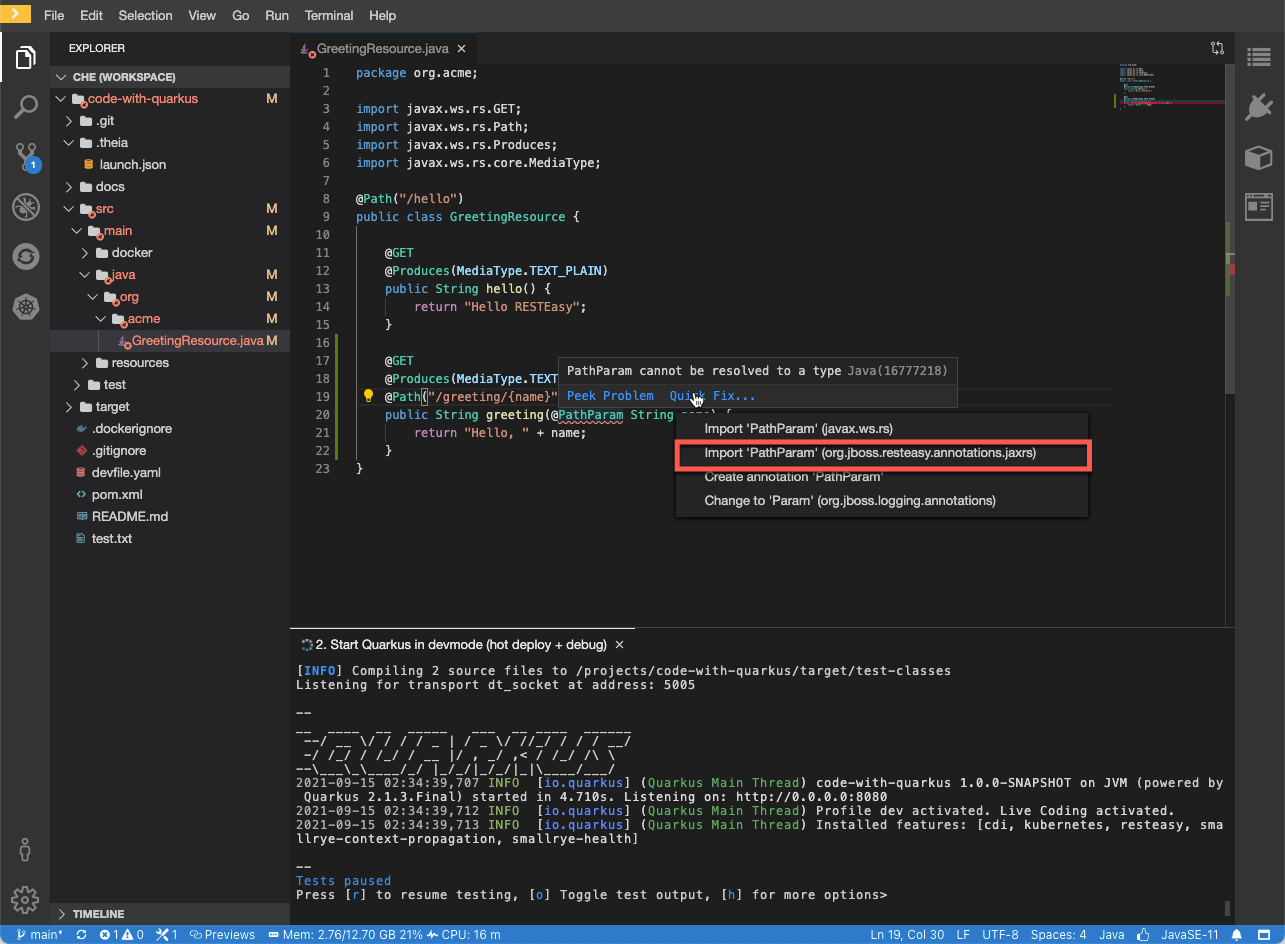
You will notice that the @PathParam annotation will have a red line below it. This means that the annotation has not been imported.
To quickly fix this issue we can use the CodeReady Workspaces built-in code assistance feature.
Hover over the @PathParam annotation and a pop-up dialog will be displayed. Click on the Quick Fix... option and the editor will suggest importing the PathParam annotation.
Select the option from the org.jboss.resteasy.annotations package.
To verify that this change has been applied, open a new terminal from the Workspace Panel and execute the following command:
curl http://localhost:8080/hello/greeting/John
The service should reply with the following text:
Hello, John
The Devfile used to create the Workspace of this workshop has VS Code launch configuration to attach a remote debugger to the application.
- name: Attach remote debugger
    actions:
      - referenceContent: |
          {
            "version": "0.2.0",
            "configurations": [
              {
                "type": "java",
                "request": "attach",
                "name": "Attach to Remote Quarkus App",
                "hostName": "localhost",
                "port": 5005
              }
            ]
          }
To attach the debugger to the application start the debug mode from the top menu 'Run > Start Debugging'.
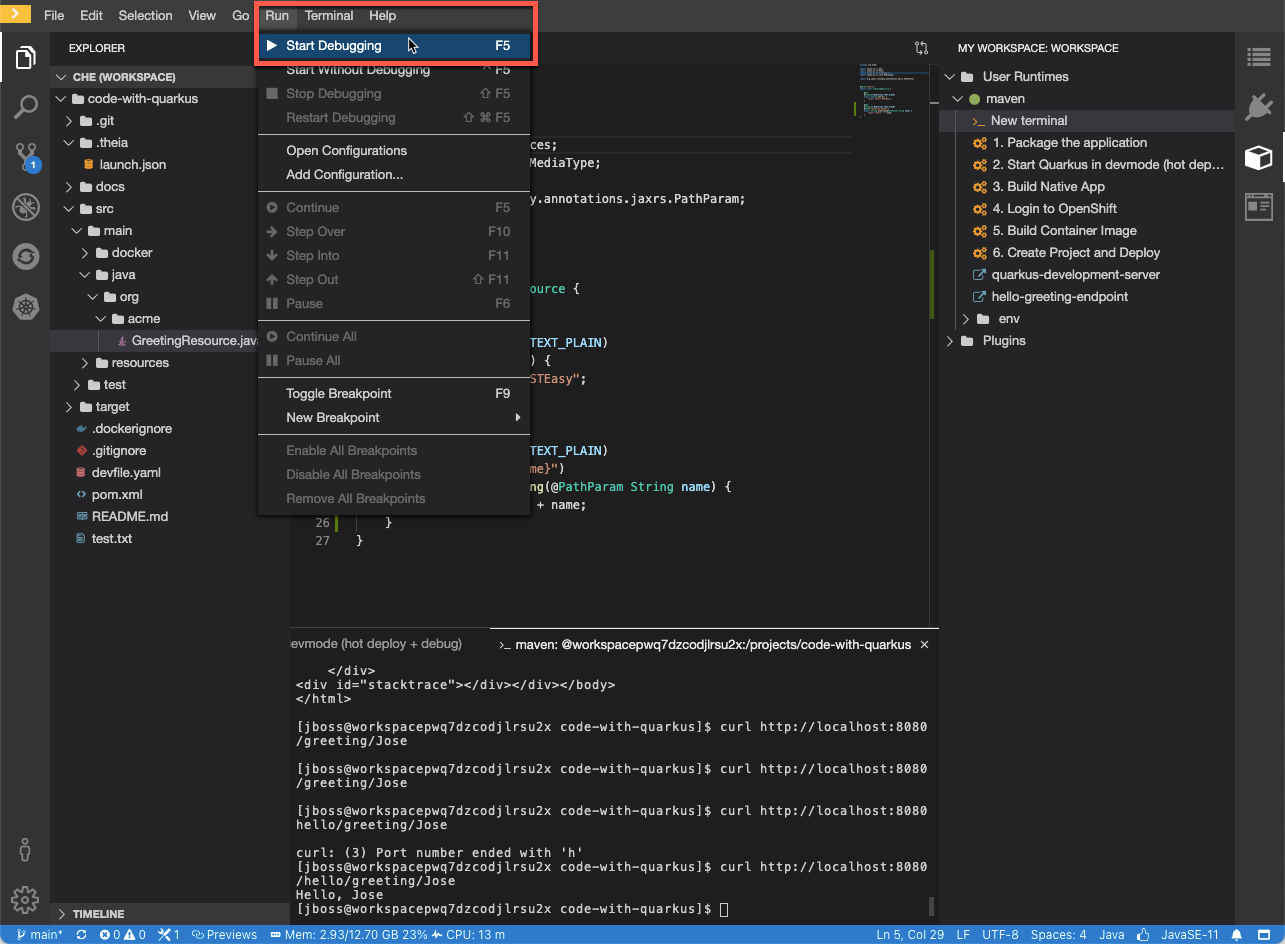
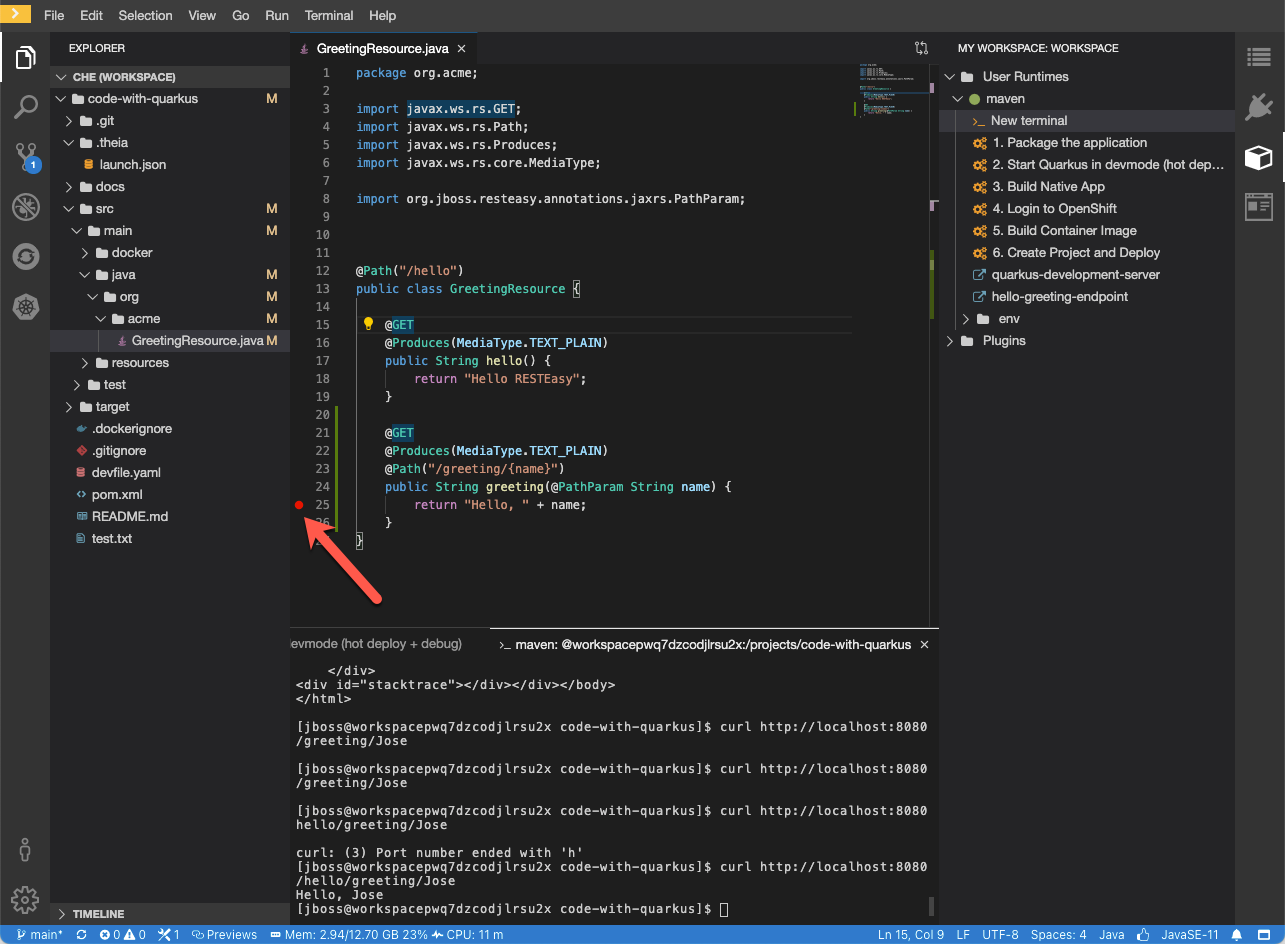
Add a breakpoint to the GreetingResource.java file by clicking to the left of the line number as shown below:
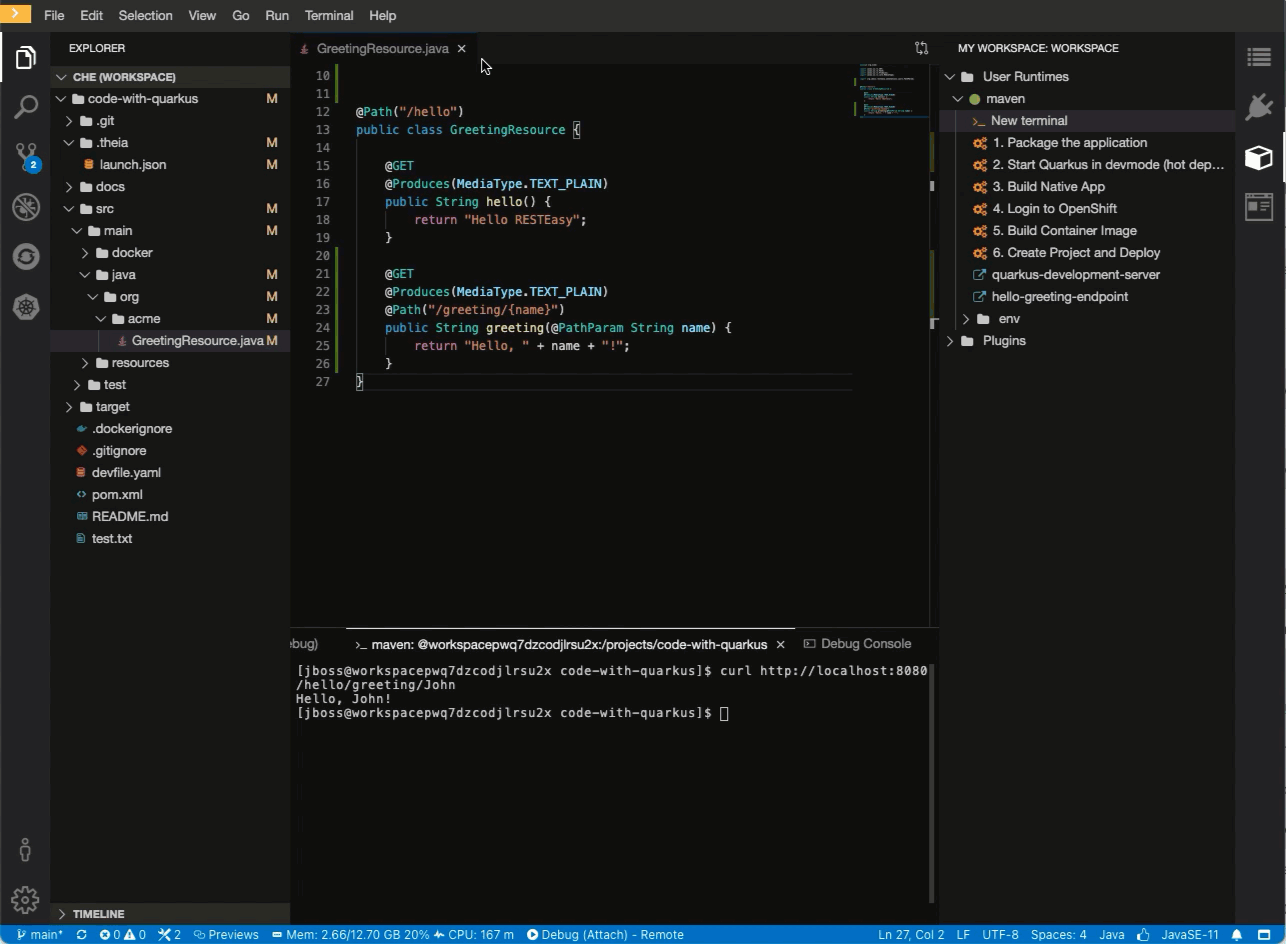
Open a new terminal from the Workspace Panel and execute the following command:
curl http://localhost:8080/hello/greeting/John
CodeReady Workspaces should pause the execution at the breakpoint.
Click on the "Continue" button in the debug view, the application should continue with the execution and return a response.
Hello, John
In this section you will use the OpenShift CLI (oc) that is bundled inside the runtime container of your Workspace to create an additional OpenShift Project and deploy your application to it.
This proces will be broken down in two parts:
- Create a container image
- Create an OpenShift project and deploy the application
ℹ️ The Devfile used to create the Workspace of this workshop has preconfigured commands for this.
Since the Workspace project is a Quarkus application, we can take advantage of the S2I and OpenShift Quarkus extensions to perform a container build inside the OpenShift cluster.
To add the extension to the project, open a terminal window and execute the following command:
mvn quarkus:add-extension -Dextensions="openshift"After a few seconds you should see a BUILD SUCCESS message.
Once the extension has been added to the project you can execute the command named Build Container Image from the Workspace Panel.
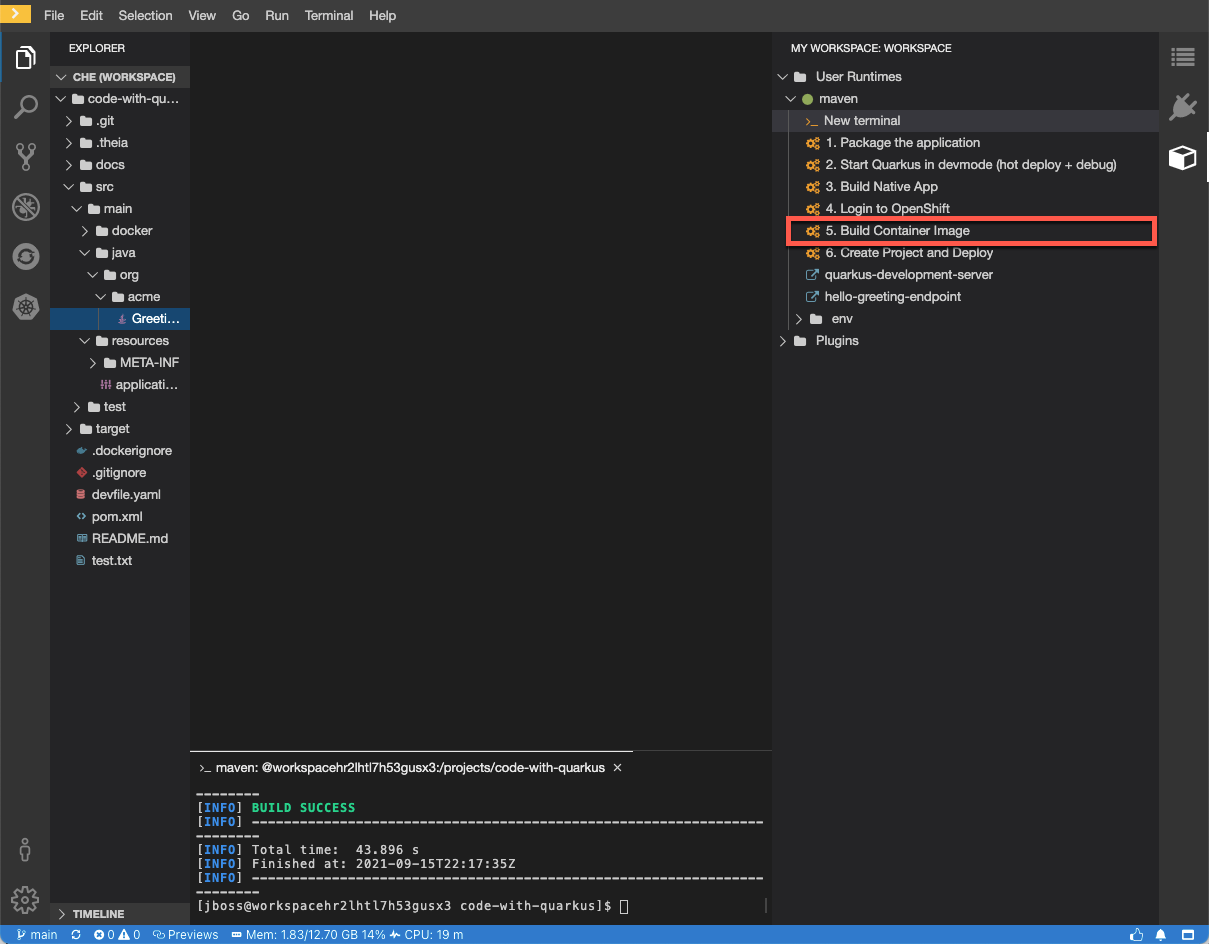
This commands takes a couple of minutes to finish, meanwhile you can login to the OpenShift Console in a new browser tab, using the same username and password assigned to you and go to the Administrator view.
Once the process of building the container image is completed follow these steps:
- Go to the Administrator view
- Select the namespace named
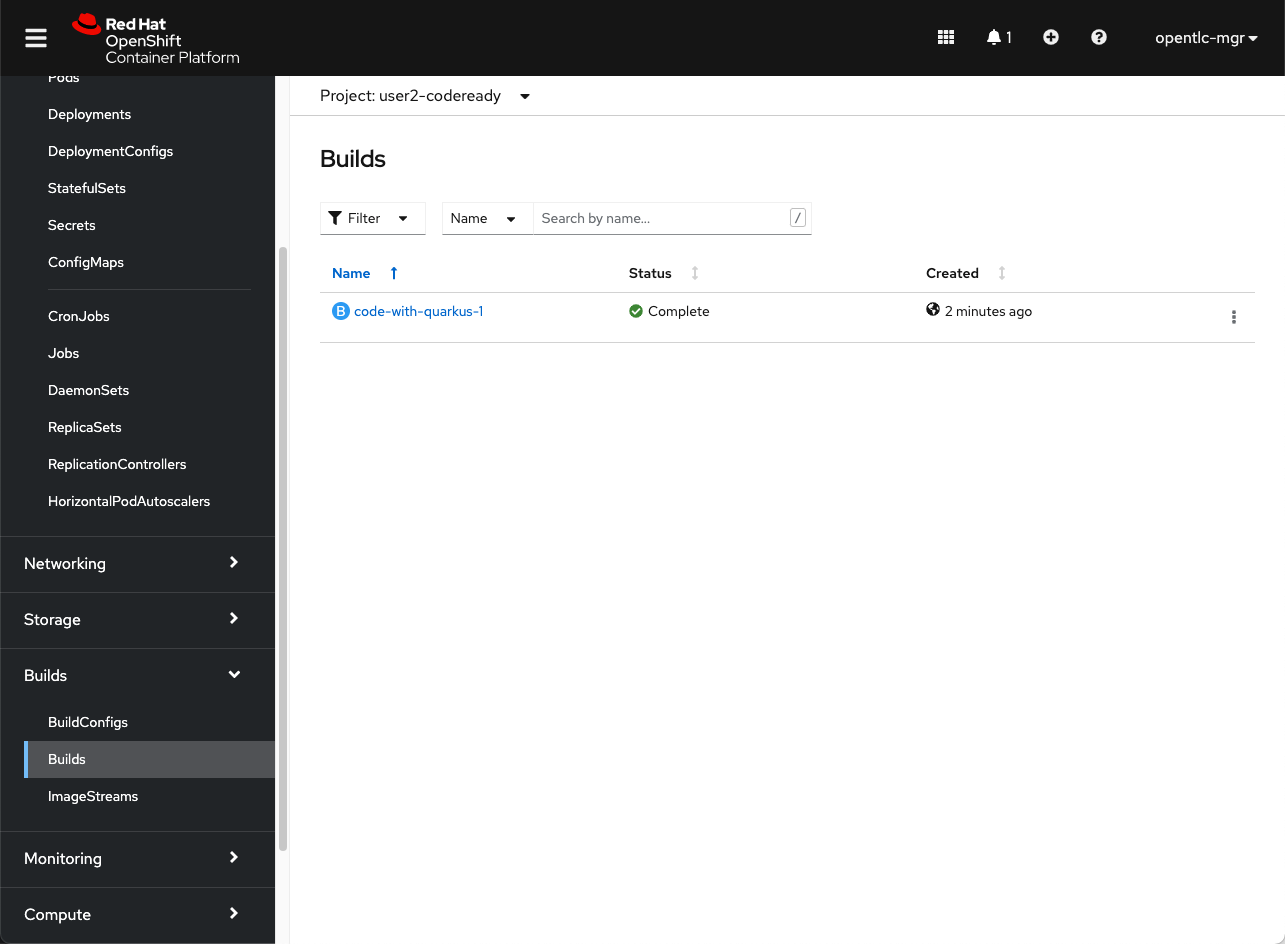
<your user ID>-codeready - Select Builds > BuildConfigs from the left panel
- You should see a new Build Configuration named code-with-quarkus
- Navigate to Builds and you should se a new build for the code-with-quarkus Build Configuration
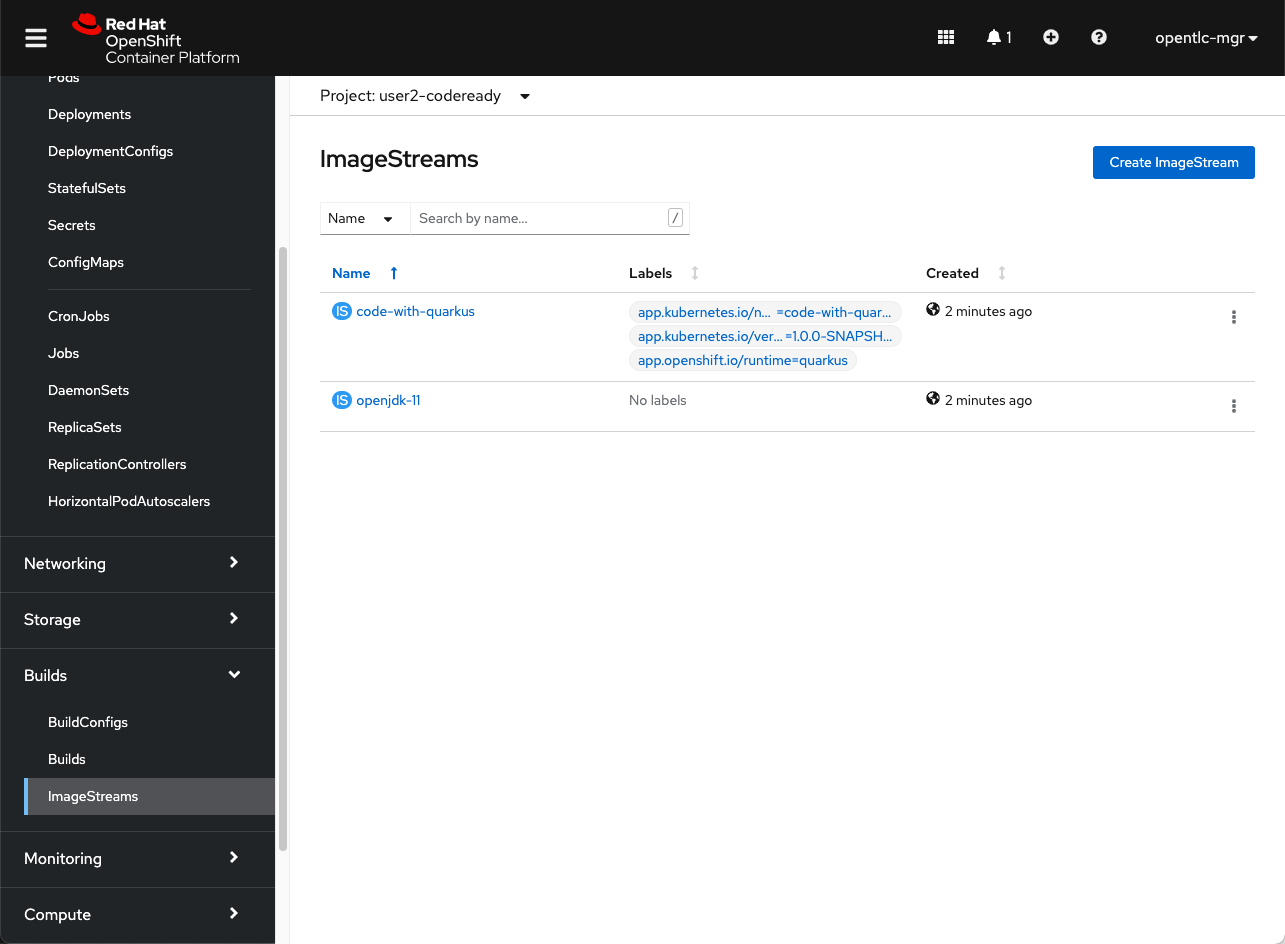
- Navigate to *ImageStreams and you should see a new image stream named code-with-quarkus
A new container image with the application code has been pushed to the OpenShift internal container registry.

The process of deploying the application to OpenShift is similar to the previous step, a command has already been configured in the Workspace's Devfile that will take care of this.
To start the deployment of the application to the OpenShift cluster, click on the command named Create project and Deploy from the Workspace Panel.
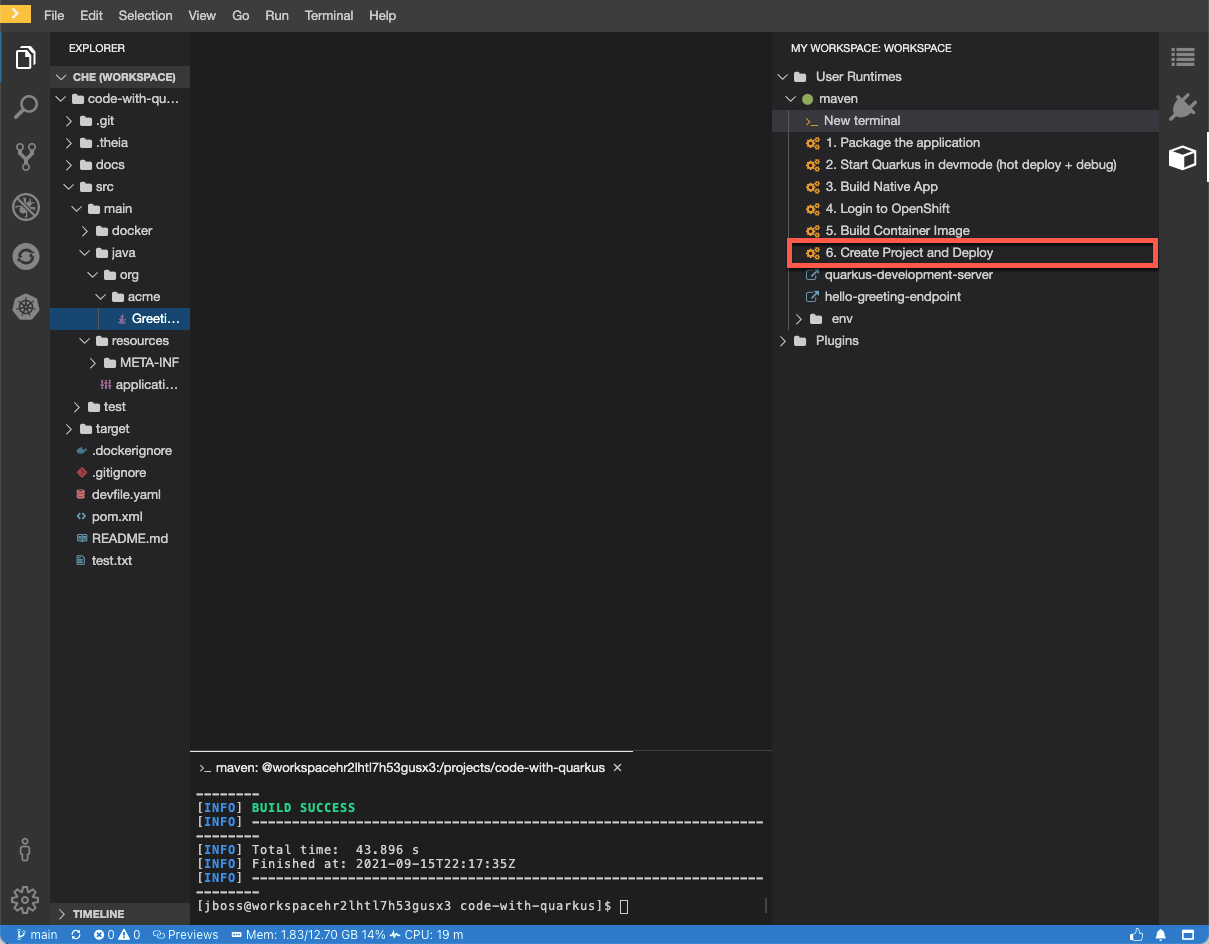
After a couple of minutes you should see a success message in the terminal where the command was executed.
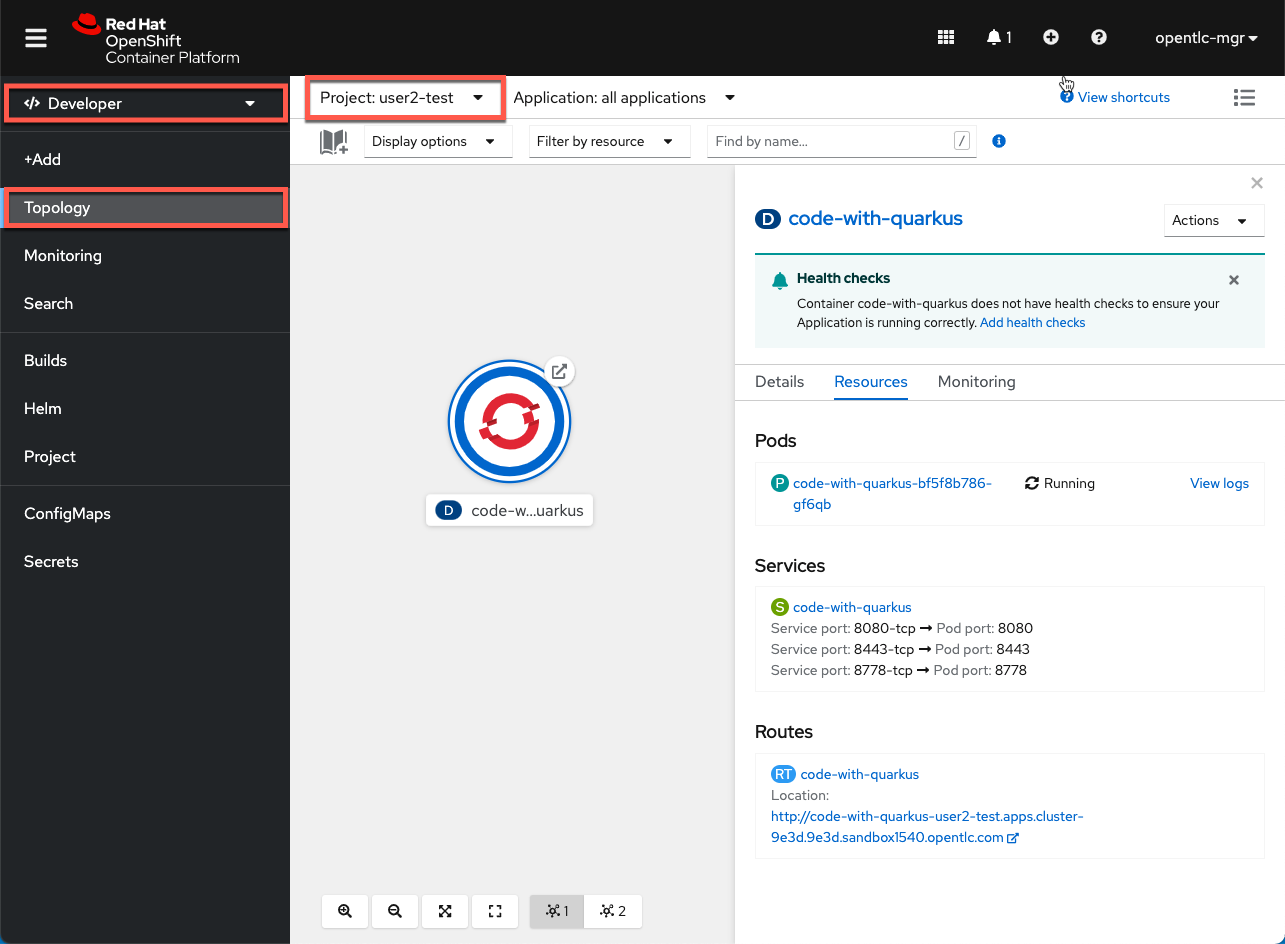
This command creates the following OpenShift resources:
- A new Project named
<your user ID>-test - A new Deployment named
code-with-quarkus - A Service named
code-with-quarkus - A Route named
code-with-quarkus
You can verify that these resources were created by going to the OpenShift console > -test Project > Topology
You have completed the CodeReady Workspaces workshop. If you want to learn more please review the documentation.
Try the CodeReady Workspaces in the Red Hat Sandbox without setup or configuration.