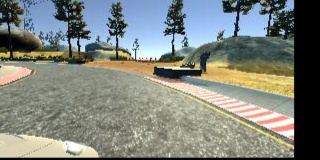
The goal of this project was to explore the Behavioral Cloning techniques within Deep Learning. Behavioral Cloning refers to adopting existing Deep Neural Network architecture for use in a similar but slightly different purpose than the network was originally designed for. The objective of this project is to adopt and fine tune a Deep Neural Network to train a simulated car to drive autonomously around a simulated track.
First, the user generated training data by driving the car around the track via remote control. The training data consisted of 3 on-board camera images from the car and the corresponding steering angle. Next, the camera images and steering angle acted at the training data and labels, respectively, as input into the Deep Neural Network. The network was trained to accept camera images and predict a single output, steering angle, to keep the car within the bounds of the track. After the network was trained, the model was implemented in the same simulator, this time with the network autonomously driving the car.
There were many challenges that ensued within this project. Because the only output is the steering angle, its tough to gauge exactly where the data augmentation, data pre-processing, or network training needs to be adjusted. There were many iterations performed.
This project showed that the Deep Learning is all about the data. In the words of my coworker, Sunil Bharitkar, "Garbage in is garbage out." There were different methods of collecting data. At first, it was easy to think that driving the car down the center of the track multiple times teaches the DNN the identical process. Upon further examination, the car needed to learn how to recover from all sorts of situations. Therefore, the data included recoveries and windy track laps. Also, the track primarily included left hand turns, but rather than drive the track in reverse, the images and corresponding steering angles were flipped prior to sending to the network for training.
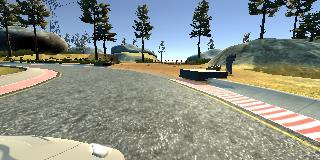
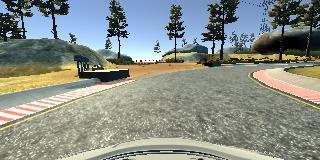
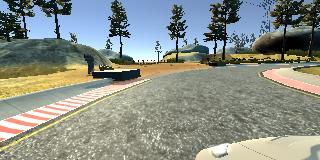
At each given moment during user driving, three camera images were collected. Images were categorized as left, center, and right images and had dimension 320x160x3.
The images were cropped 40% from the top and 15% from the bottom. This was performed in order to help the neural network to focus on recognizing features on the road and eliminate features from the sky, trees, hood of the car, etc. Below is the center camera image after cropping.
The images were then resized to 100x100 dimension. By making the image smaller, the DNN will learn a smaller number of feature and feature relationships. This is quite the art in DNN, as the image feature recognizer needs to be good enough to work, but larger images will lead the training to be very time consuming.
Cropped and Resized Left Camera Image: 
Cropped and Resized Center Camera Image: 
Cropped and Resized Right Camera Image: 
The same cropping and resizing was performed in drive.py, line 86, the python file which runs the trained model through the simulator.
The training course has a large bias of left hand turns. In an attempt to remove the bias of left hand driving, during training, the images were randomly flipped around the middle of the image if the steering angle was not zero. The steering angle was also negated. Note: Although the flipped images are of the original images, the cropped and downsized 100x100 images were flipped during training.
The car can only cover so many positions in the track during training, and the car will be at different positions on the track during autonomous driving. The images were shifted horizontal and vertically to simulate moving vertical or horizontal along the track. The steering angle had to be adjusted in a similar fashion, i.e. taking +/-0.002 degrees for each horizontal shift.
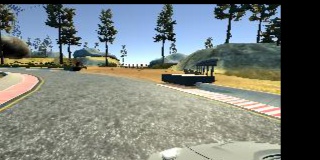
The training environment led to many different shadows and brightness levels on the track. Each image was augmented with a random brightness in order to retard the network from learning patterns from features on the lanes associated with shadows or different brightnesses.
Random Brightness Left Camera Image: 
Random Brightness Center Camera Image: 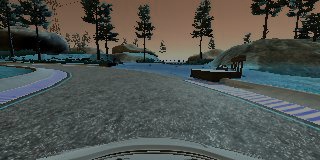
Random Brightness Right Camera Image: 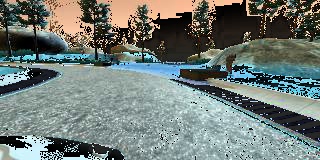
Again, at any give moment, three different camera angles are capturing images. During the training cycle, either a left, right or center camera image was randomly chosen to go through the learning pipeline. Of course, the paired steering angle had to be adjusted if the camera was either left or right image. This step adds an aspect of recovery to the training.
def get_rand(center_pic, left_pic, right_pic, angle, image_size):
    # Randomly chooses between center, left, or right picture and adjust steering angle
    rand_pic = np.random.randint(3)
    if (rand_pic == 0):
        path = left_pic.strip()
        angle += 0.25
    if (rand_pic == 1):
        path = center_pic.strip()
    if (rand_pic == 2):
        path = right_pic.strip()
        angle -= 0.25
    path = center_pic.strip()
The inspiration for my model was from the NVIDIA End to End Learning for Self Driving Cars paper.
The input NVIDIA used is 66x200x3 RGB colored images with an output of the inverse of steering angle. The input to this project's network is 100x100x3 RGB colored image with the a single neuron output of steering angle. Three 5x5 convolution layers, followed by three 3x3 convolution layers, followed by 4 fully connected layers were implemented in this project. Sub-sampling or max pooling was used within each convolution. The activation function used in each neuron is RELU. Dropout of 50% was used after each set of convolutions and within each fully connected layer to combat over fitting. The Adam optimizer was chosen with default parameters and the chosen loss function was mean squared error (MSE).
def NVIDIA_model():

    # input shape=64x64x3
    model = Sequential()

    # Lambda Layer
    model.add(Lambda(lambda x: x / 127.5 - 1., input_shape=(64, 64, 3)))

    model.add(Convolution2D(3, 1, 1))

    # Add three 5x5 convolution layers (output depth 24, 36, and 48), each with 2x2 stride
    model.add(Convolution2D(16, 5, 5, subsample=(2,2), activation='relu'))
    model.add(Convolution2D(36, 5, 5, subsample=(2,2), activation='relu'))
    model.add(Convolution2D(48, 5, 5, subsample=(2,2), activation='relu'))
    #model.add(Dropout(0.50))

    # Add two 3x3 convolution layers (output depth 24, 36, and 48), each with 2x2 stride
    model.add(Convolution2D(64, 3, 3, activation='relu'))
    model.add(Convolution2D(64, 3, 3, activation='relu'))

    model.add(Dropout(0.50))

    #add flatten layer
    model.add(Flatten())

    # Add three fully connected layers (depth 100, 50, 10), tanh activation (and dropouts)
    model.add(Dense(1164, activation='relu'))
    model.add(Dropout(0.50))
    model.add(Dense(100, activation='relu'))
    model.add(Dropout(0.50))
    model.add(Dense(50, activation='relu'))
    model.add(Dense(10, activation='relu'))

    #output layer
    model.add(Dense(1))

    model.summary()
    adam_op = Adam(lr=1e-4, beta_1=0.9, beta_2=0.999, epsilon=1e-08, decay=0.0)

    model.compile(loss='mean_squared_error', optimizer=adam_op, metrics=['mean_absolute_error'])

    return model
The model was built using keras and used an Adam Optimizer with 1e-4 learning rate. The model is trained on 8 epochs with 50,000 samples per epoch, with a batch size of 250. Loss is computed as mean_squared_error. The advantage of using mean_absolute_error is that it gives a real representation of how far off your predicted values are from the targeted values.
The model performed well, as the car was able to continuously drive around the track. The final validation loss was 0.0681. The final mean_absolute_error of validation was 0.2138. Both of these values were very close to the final training values, which lead us to believe that our model was well equipped in predicting correct steering angles for the track.
To run the model, activate the simulator and run:
python drive.py model.py
Watch my car drive on my youtube channel.


