ESP32 Based GPS Navigator.
- Note: Under development
For the moment we have two Icenav models, with the next hardware setup and specs:
- ESP32 WROVER with 4Mb PSRAM / 16 Mb Flash
- ILI9488 TFT (320x480) - SPI Mode
- SD/MicroSD reader
- HCM5883L Magnetometer
- BME280 Temperature / Humidity sensor
- MPU6050 Accelerometer and Gyroscope IMU
- HT1818Z3G5L GPS Module (AT6558D)
- LVGL UI + LovyanGFX
- ESP32-S3-WROOM-1 with 2Mb PSRAM / 16 Mb Flash
- ILI9488 TFT (320x480) - 16bit Parallel Mode
- MicroSD reader
- FT6236 Capactive Touch Panel Driver
- HT1612Z3M3L GPS Module (AT6558D)
- MPU9250 (Compass+IMU)
- LVGL UI + LovyanGFX
   Pinout (ESP32-WROVER)
   HCM5883L      BME280        MPU6050       ILI9488        SD CARD        VBAT             GPS
   -----------------------------------------------------------------------------------------------------
   VCC 3,3v      VCC 5v        VCC 3.3v      VCC  3,3v      VCC  3,3v      GPIO34           VCC  3,3v
   GND GND       GND GND       GND GND       GND  GND       GND  GND       ADC1_CHANNEL_6   GND  GND
   SDA GPIO21    SDA GPIO21    SDA GPIO21    LED  GPIO33    CS   GPIO4     (Resist. div)    RX   GPIO25
   SCL GPIO22    SCL GPIO22    SCL GPIO22    MISO GPIO27    MISO GPIO19                     TX   GPIO26
                                             SCK  GPIO14    SCK  GPIO12
                                             MOSI GPIO13    MOSI GPIO23
                                             DC   GPIO15
                                             RST  GPIO32
                                             CS   GPIO2
                                             LED  GPIO33
                                             TCH  GPIO18
                                             TIRQ GPIO5

   Pinout (ESP32S3-MakerFabs)
   GPS (HT1612Z3M3L)  MPU9250
   -----------------------------------------------------------------------------------------------------
   VCC 3,3v           VCC 3.3v
   GND GND            GND GND
   TX  GPIO17         SDA GPIO38
   RX  GPIO18         SCL GPIO39
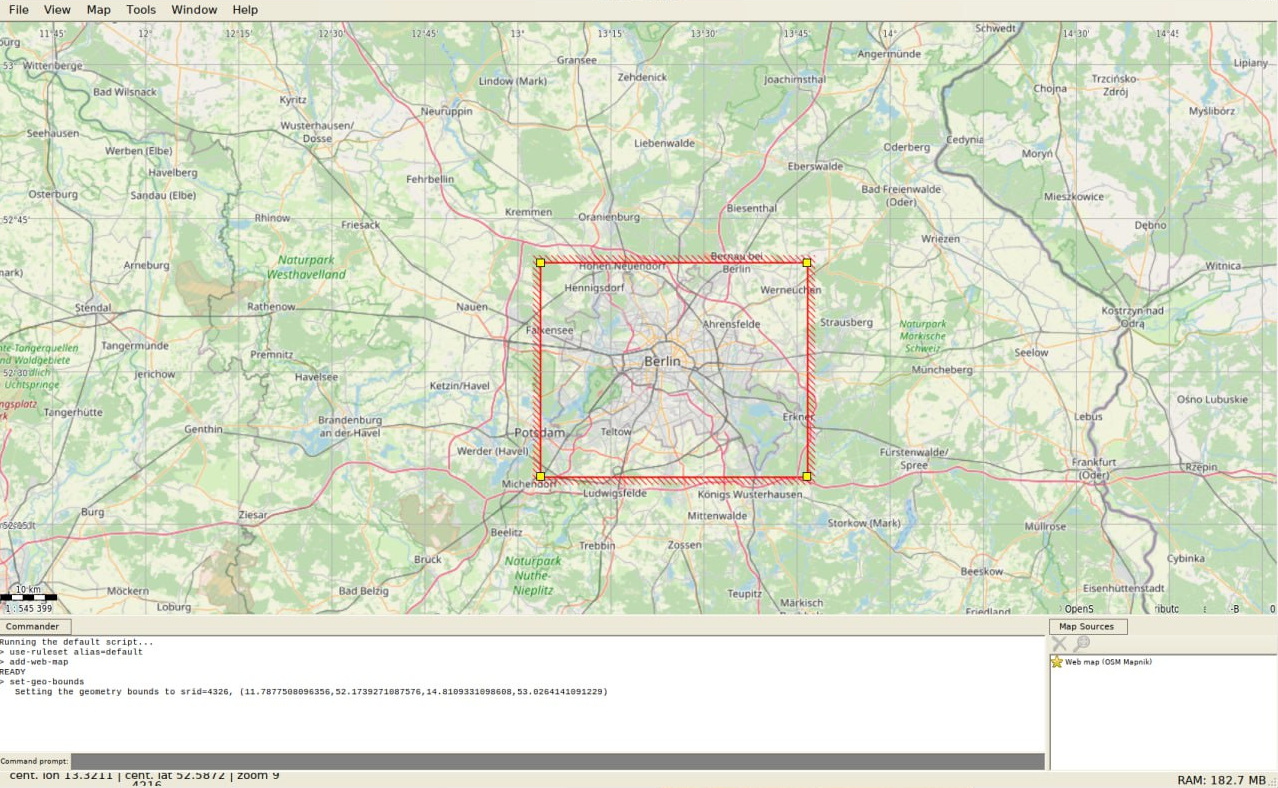
Using Maperitive select your zone and generate your tiles. For that enter to MAP-> Set Geometry bounds draw or expand the square of your zone and run the command generate-tiles minzoom=6 maxzoom=17, It could takes long time, maybe 1 hour or more depending your area.
After that, copy the contents of directory Tiles into your SD in a directory called MAP.
On SD Card map tiles (256x256 PNG Format) should be stored, in these folders structure:
  [ MAP ]
     |________ [ zoom folder (number) ]
                          |__________________ [ tile X folder (number) ]
                                                         |_______________________ tile Y file.png
Please install first PlatformIO open source ecosystem for IoT development compatible with Arduino IDE and its command line tools (Windows, MacOs and Linux). Also, you may need to install git in your system.
For custom ESP32 board run:
pio run --target uploadFor ESP32S3 Makerfab board:
pio run -e MAKERF_ESP32S3 --target uploadAfter the first run, load the icons and assets with:
pio run --target uploadfsOptional, for map debugging version with specific coordinates, build and install the firmware with the next environment variables, like this:
export ICENAV3_LAT=52.5200
export ICENAV3_LON=13.4049
pio run --target upload
Note: For production version don't forget unset these environment variables.
If the GPS module supports multiple GNSS, uncomment the following flag in the platformio.ini file under the build_flags section
-D MULTI_GNSS=1- Added support to Makerfabs ESP32-S3 Parallel TFT with Touch 3.5" ILI9488 (thanks to @hpsaturn)
- Improved documentation (thanks to @hpsaturn)
- Improved auto mainScreen selection from env variable preset (thanks to @hpsaturn)
- Improved getLat getLon from environment variables (thanks to @hpsaturn)
- 3DPrint case for an ESP32S3 Makerfabs Parallel board (thanks to @hpsaturn)


