Material for Students for the Lecture "Software Development and Software Engineering".
Project 2 is larger and more sophisticated than Project 1. Therefore, we manage its otherwise extremely tedious installation and setup process with the software project management tool Apache Maven.
Basically, you have two options for setting up the project to then start working on it, i.e., by (1) installing Maven directly into your IDE or by (2) simply using the command line (no further preparation required).
Which option you choose is up to you, although one could argue that the IDE route will speed up your development process slightly.
Navigate to the "portunus" root folder (i.e., the one where the bash script file "mvnw" is contained) in your command line.
- Install the project via
./mvnw clean installon UNIXmvnw.cmd clean installon Windows (or run the above command in WSL)
- Subsequently, you will be able to start the project from the command line via
./mvnw javafx:run -pl launcheron UNIXmvnw.cmd javafx:run -pl launcheron Windows
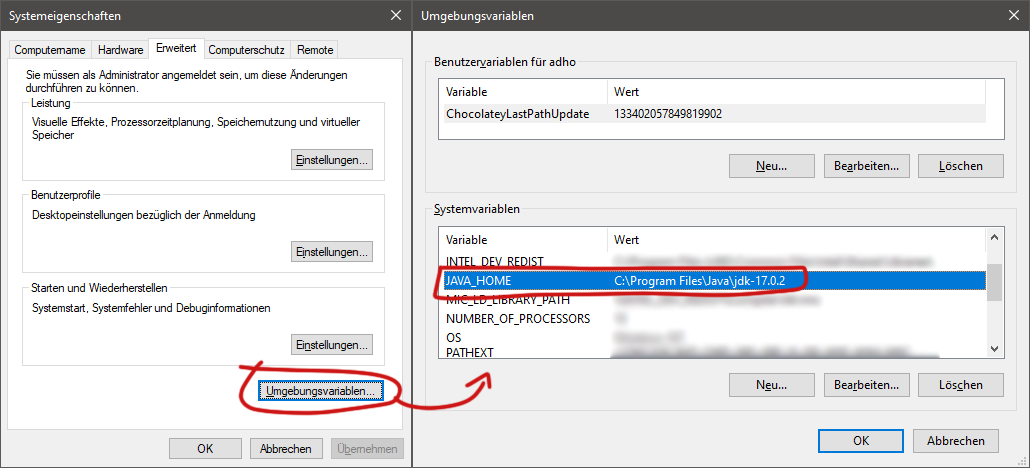
Windows Users: You might need to set an environment variable to your java installation (see Screenshot 4)
Beware: You might need to install a Java version that matches the version specified in Maven (and configure it as default Java version for your OS - Windows users, see Screenshot 4). Otherwise, Maven will print a respective messages to the console, please read the error message in case the installation fails.
We are going to use Eclipse as demonstrated IDE, but other IDEs should also work (differently).
What you have to do in Eclipse is:
Step 1) Install the Maven plugins
- Go to "Help" > "Eclipse Marketplace"
- Search for "Maven"
- Install "Eclipse m2e - Maven support in Eclipse IDE Latest" (if it is not installed already - in that case, proceed with step 2 beneath)
- Eclipse will guide you through an installation process in a dialog
- At some point, the dialog will close, but the installation will continue (see bottom-right corner of IDE window)
- You might need to restart the IDE
Step 2) Import the projects (mind the screenshots below and refer to this this tutorial for more details)
- Make sure to use the option "Existing Maven Projects"
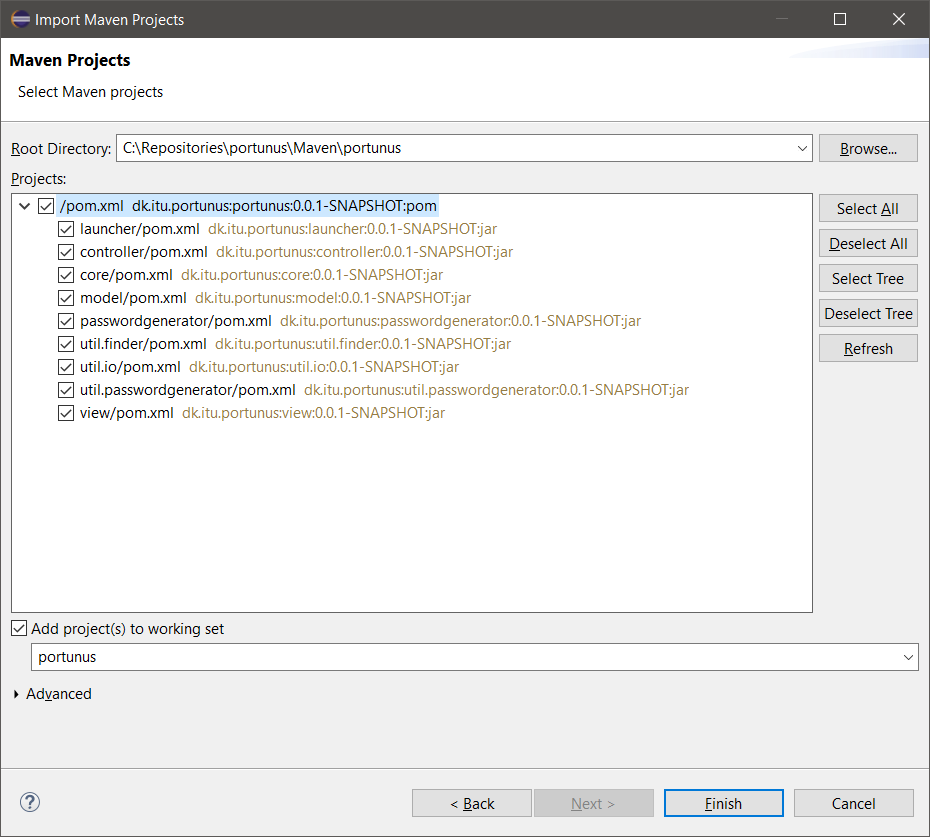
- Choose the "portunus" folder as "Root Directory" in the dialog (see Screenshot 1)
- Once the projects are imported, right-click the project "portunus" (is the root project)
- In the context menu, select "Run As" > "Maven Install"
- This process will setup up the projects - most notably, it will install all dependencies for you
- (If you run into trouble, check the beware not beneath)
- You can now launch the application!
- Right-click the project "portunus" again
- In the context menu, select "Run As" > "Maven build..."
- A dialog will open
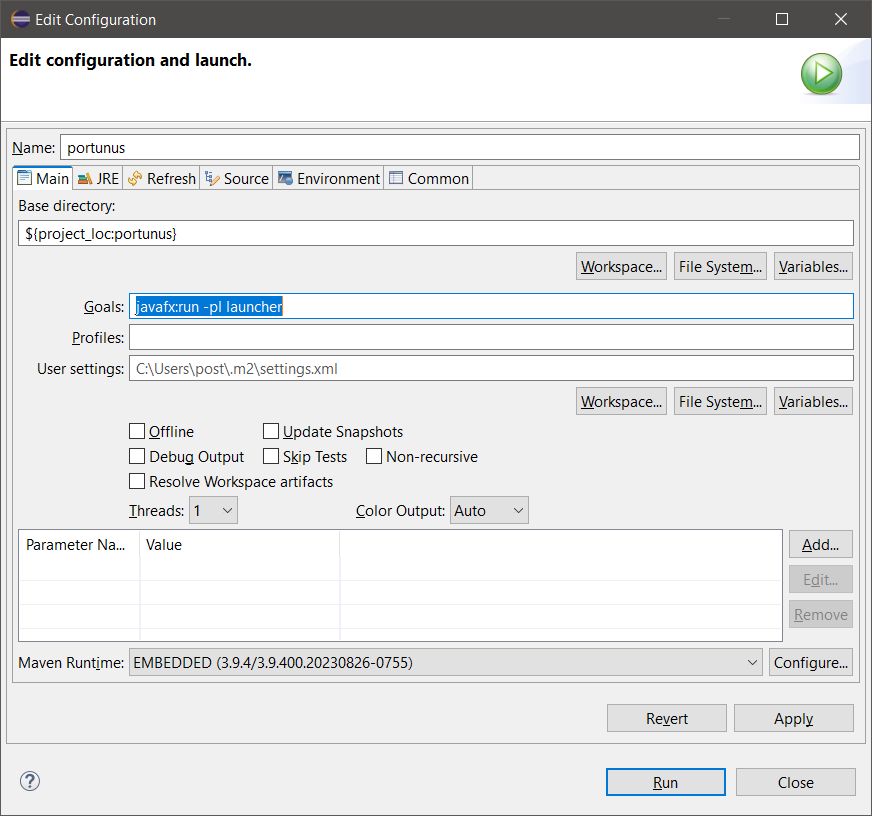
- Paste into the text field "Goals" the following:
javafx:run -pl launcher(see Screenshot 2) - Apply you changes and run the application
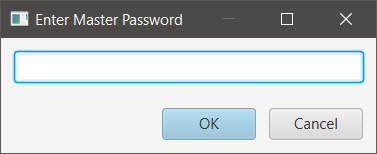
- Everything worked if a small window appears that asks you for a password (see Screenshot 3)
- Paste into the text field "Goals" the following:
Beware: You might need to install a Java version that matches the version specified in Maven (and configure it as default Java version for your OS). Maven will refuse to work if this causes problems and print respective messages to the console.
That's it, you can now work on the project. You can launch it via the green play button (or use CTRL+F11).
Screenshot 1: Project Import Dialog

Screenshot 2: The Maven Launch Configuration (note the highlighted text in blue!)

Screenshot 3: Portunus Startup UI (what you see when it works)

Screenshot 4: How to set the Java Home Variable in Windows. Get to the left windows by searching for "Environment Variables" in your Windows start menu - please excuse the German, "Umgebungsvariablen" means "Environment Variables", the button will be at the same location.
