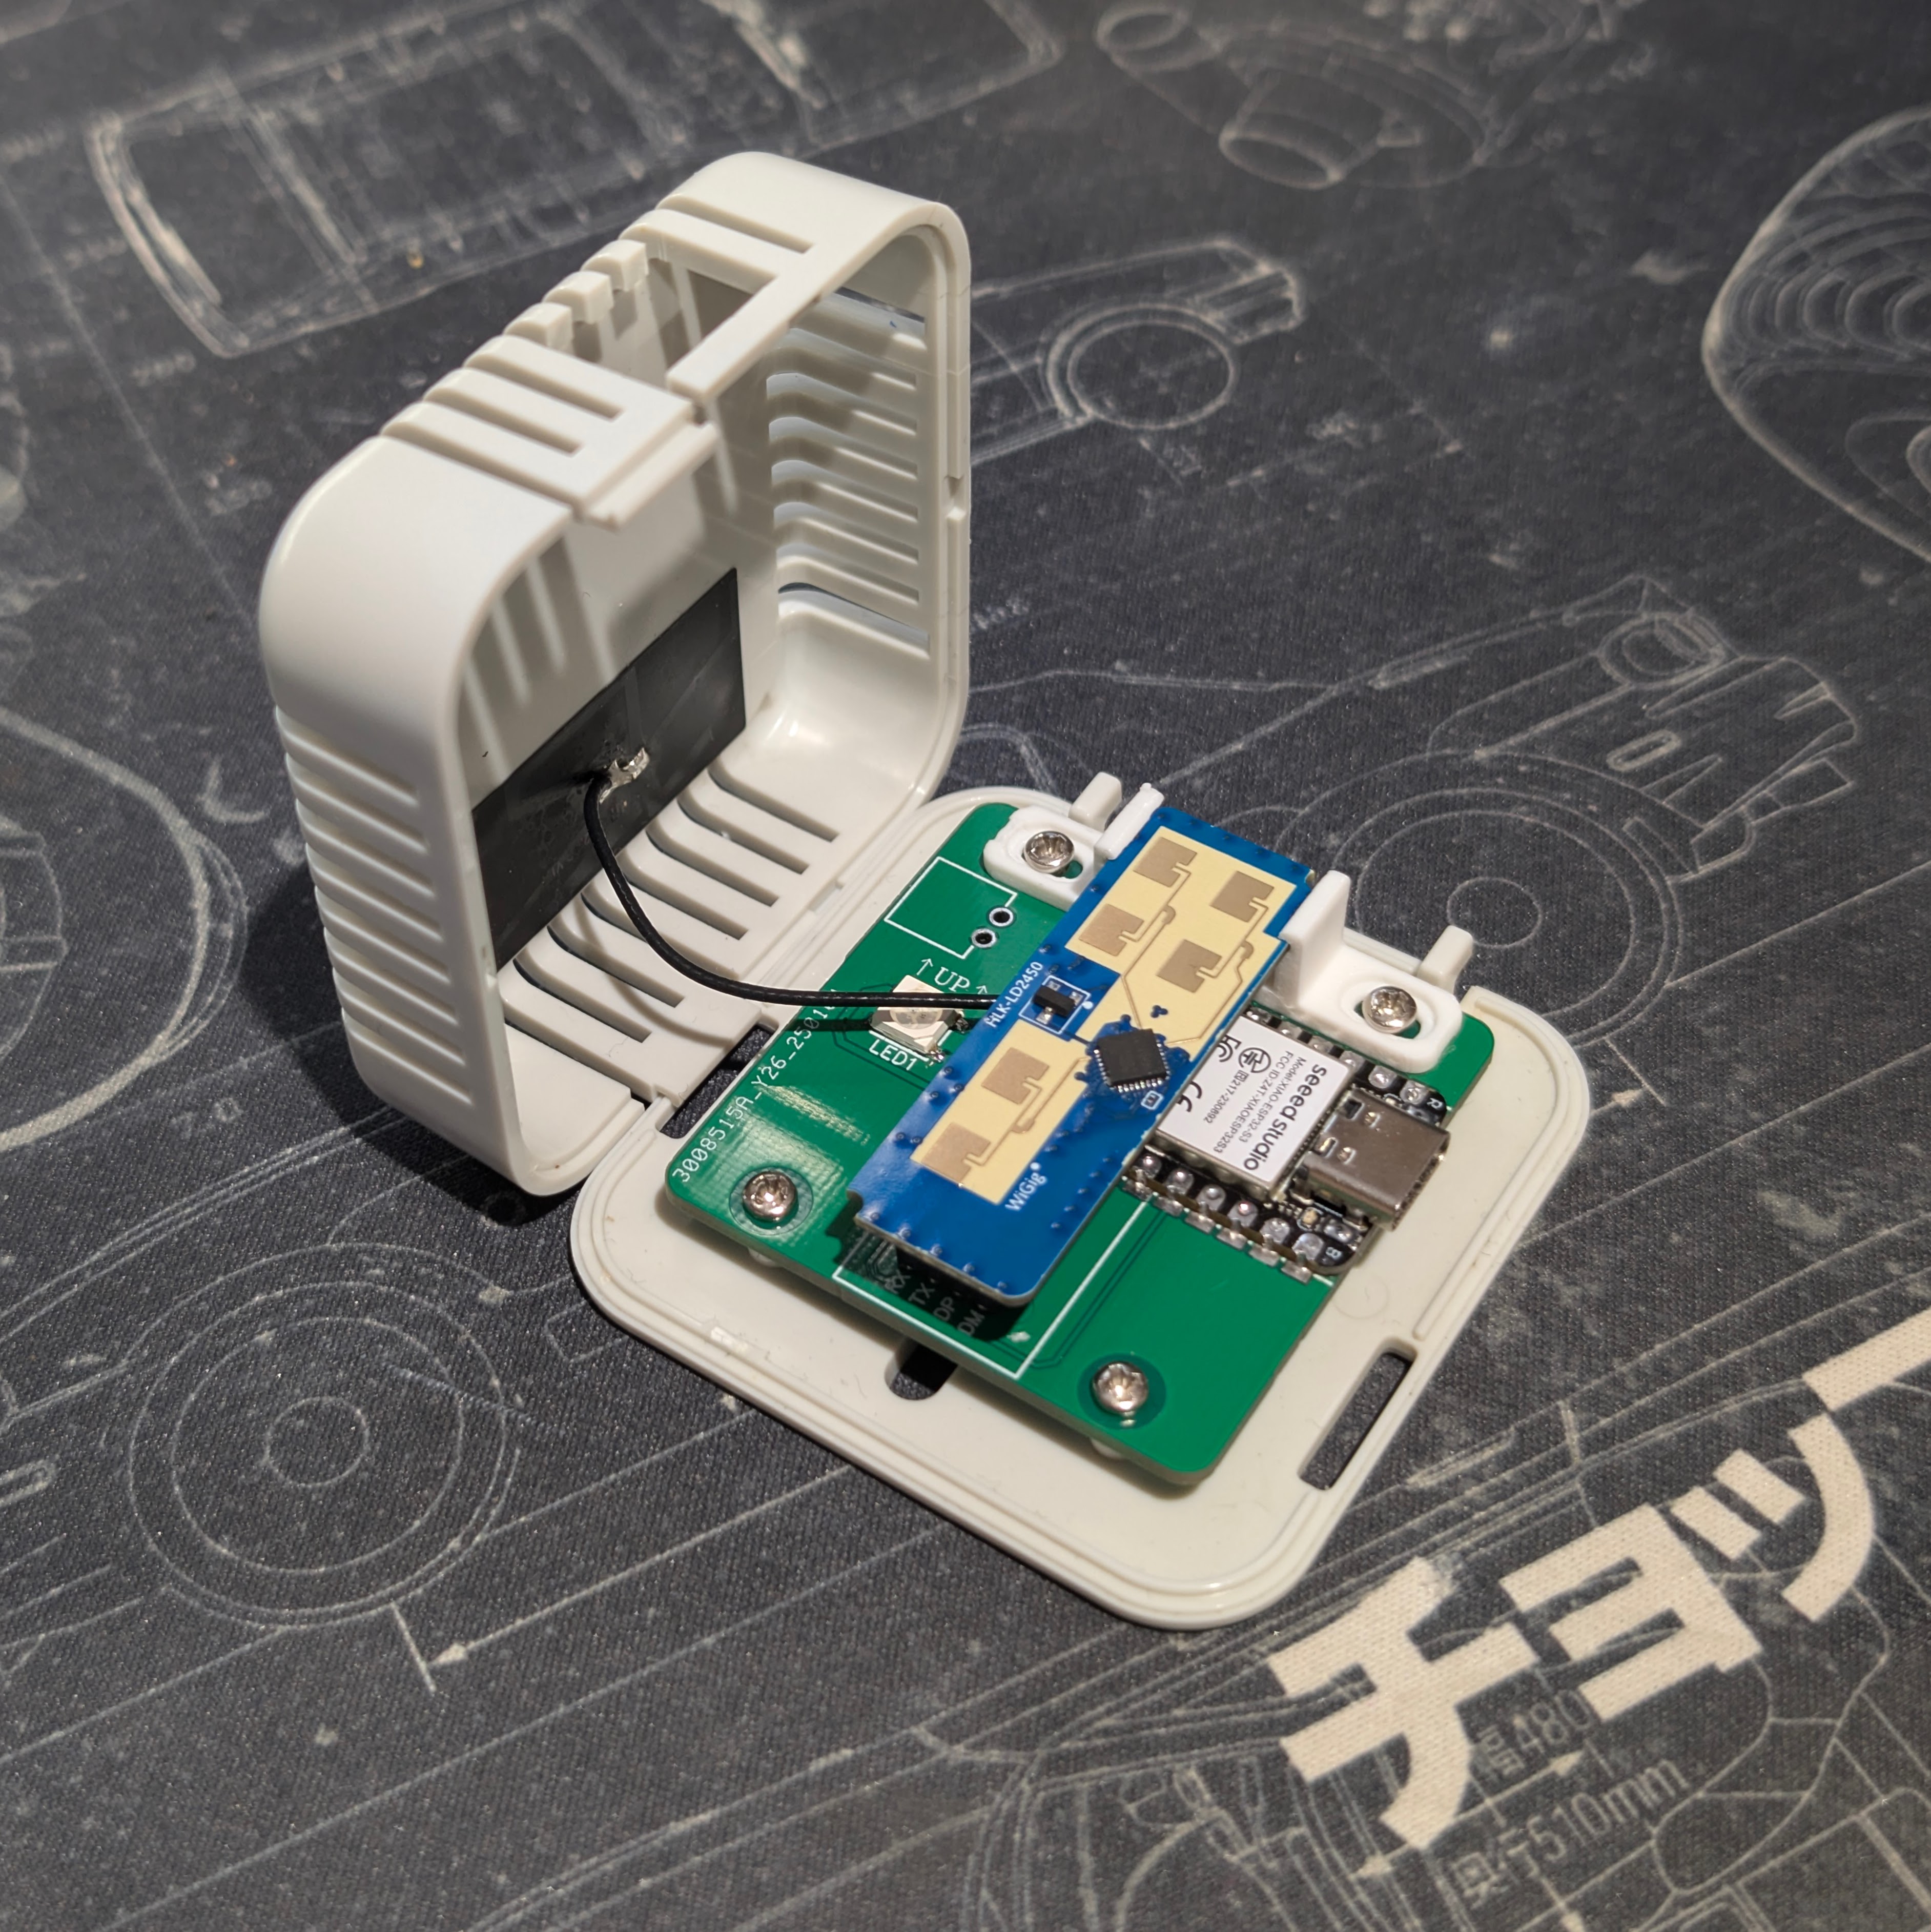
This project includes the PCB Gerber files, BOM, STL and ESPHome YAML for building a compact ESPHome LD2450 mmWave Radar sensor, the board has been designed to surface mount a Xiao ESP32 S3 using the Castellated pin pads, an HLK-LD2450 module is connected via a female header connector and an optional onboard WS2812B LED. The PCB was designed specifically to fit inside a Hammond 1551V3GY vented case. It runs ESPHome firmware for easy integration with Home Assistant however note that the LD2450 is NOT yet officially supported in ESPHome.
The code was mostly borrowed from EverythingSmartHome with some changes to suit my use case and is still a work in progress so I won't share it just yet but it will be added to this repo as soon as I've finalised the LED behaviour. https://github.com/EverythingSmartHome/everything-presence-lite/blob/main/common/ld2450-base.yaml
- Microcontroller: Xiao ESP32 S3 (C3 should also work)
- RF Module: HLK-LD2450 24Ghz mmWave Radar Sensor
- Indicator LED: WS2812B connected to GPIO04
- Power: USB-C directly on the Xiao ESP32 or a JST-style connector for hardwired power.
- Case Compatibility: Designed for Hammond 1551V3GY vented or unvented cases.
- Bracket: STL for 3D printable bracket to support HLK-LD2450 module.
- Firmware: Pre-configured ESPHome YAML file for quick deployment.
- PCB's, make yourself or order via a manufacturing service such as JLCPCB or PCBWay, the pictured PCB's were made by JLCPCB.
- Access to a 3D printer to print the support bracket.
- ESPHome installed on your local system or through Home Assistant.
- Xiao ESP32 S3
- HLK-LD2450 module
- Hammond 1551V3GY vented case (unvented would should be ok but I chose vented to help with heat management)
- USB-C cable for power
- WS2812B LED (Optional)
- JST-style connector for power (Optional)
-
PCB Manufacturing
- Use the Gerber files in the
gerbers/directory to manufacture the PCB. - Recommended settings: 1.0 or 1.2mm thickness.
- Use the Gerber files in the
-
3D Printing
- Print the STL file from the
stl/directory to create a bracket that supports the HLK-LD2450 module. - Use PLA or PETG for strength and durability.
- Print the STL file from the
-
Component Placement
- Solder the Xiao ESP32 S3, 8 pin header, WS2812B LED, and JST connector to the PCB as per the silkscreen and schematic.
-
Case Assembly
- Fit the assembled PCB into the Hammond 1551V3GY case using 4x M2.5 6mm screws.
- Fit the bracket to the top side of the board using the top screws to secure the bracket.
- Connect the LD2450 to the pin header then snap it into the bracket.
- If your Xiao S3 has an external antenna instead of an embedded antenna stick it to the inside of the front half of the case (not the back half as the PCB has top and bottom ground plane although it would probably work ok behind I haven't tested it), make sure its off to the side rather than directly infront of the LD2450, it seems to work fine like this as the LD2450 is only 3-4mm away from the front of the case.
- Cut some vent "bars" out to make access to the USB connector, alternatively use the JST header for power and find a way to get power wires into the case.
- Ensure proper soldering of components to avoid electrical issues.
- Use vented cases for better thermal management.
This project is open-source under the MIT License. Feel free to use, modify, and distribute the files as needed.