This is a starting point for running and administrating multiple Apache Tomcat using a central Configuration Repository - here etcd.
The main subject under test&sample is confd. It is a tiny useful tool to move distributed local configuration files to a central configuration repositories. Various other configuration repositories like etcd, redis, consul, dynamodb, zookeeper could be used instead of etcd if required.
Here we use Apache httpd as a reverse proxy for load balancing. Why? It is since 1996 the most popular WebServer and it works fine :)
Feel free to compare this confd sample with my tomcat-consul sample.
Apache Tomcat uses config files e.g. tomcat-users.xml to define access rights to the manager webapp or server.xml to define connectors. Here the admin credentials shall be configured centrally, so we can change them within etcd.
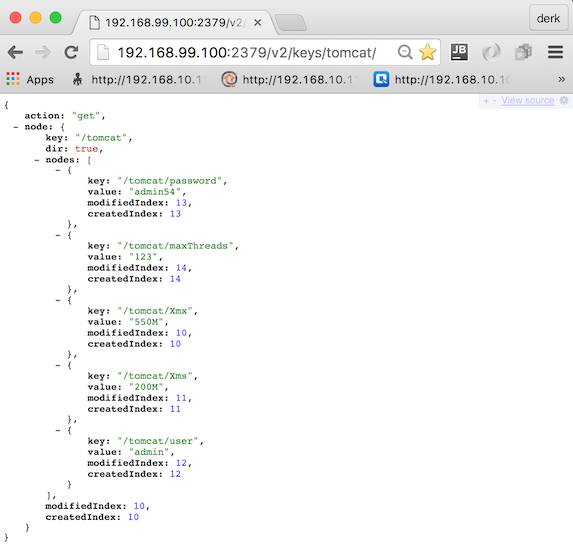
The full list of confd responsible configurations - all of them stored in etcd under the prefix 'tomcat':
Xmx: maximum heap sizeXms: initial heap sizeusername: manager webapp usernamepassword: manager webapp passwordmaxThreads: count of threads for a connectorjvmRoute: here Tomcat hostname (as defined in docker-compose.yml)
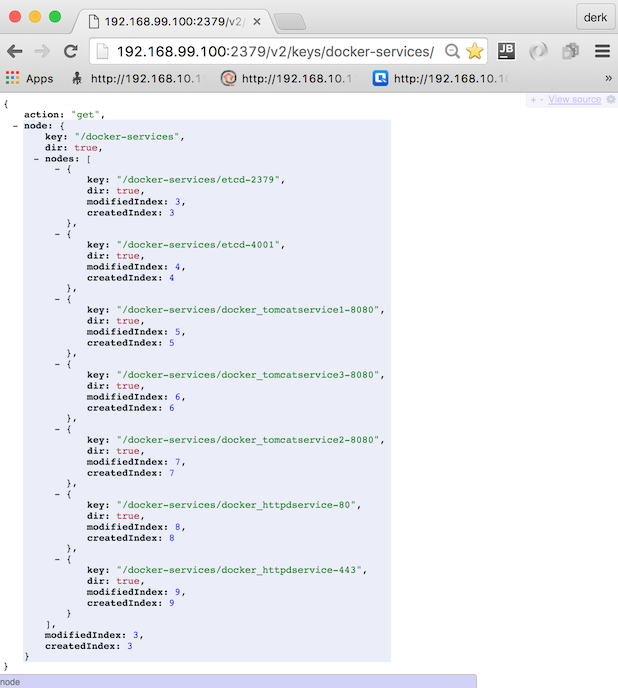
Apache httpd is forwarding requests via mod_proxy_ajp to the Tomcats. To register all running Containers gliderlabs/registrator will be used.
This sample uses Vagrant and VMware or VirtualBox. Vagrant is optional - you can build and run the Containers via docker-compose.yml also directly in your prefered Docker environment. A Docker-Compose file exists for that.
vagrant plugin list
vagrant plugin install vagrant-docker-compose
Clone this repo, run it
git clone https://github.com/muenchhausen/tomcat-confd.git
cd tomcat-confd
vagrant up
Find out the IP of your VM - e.g. login into the VM (sometimes credentials vagrant vagrant are required)
vagrant ssh
ifconfig
cd tomcat-confd/docker
docker-compose build
docker-compose up
Open your Browser, go to Tomcat Manager
http://192.168.99.100:8081/manager/
login with credentials admin and admin
try also second Tomcat Manager http://192.168.99.100:8082/manager/ login with same credentials as above
Look to your Tomcat keys and Values: http://192.168.99.100:2379/v2/keys/tomcat/
Look what gliderlabs/registrator added: http://192.168.99.100:2379/v2/keys/docker-services/
Look to Apache server-status: http://192.168.99.100/server-status/
Access the Tomcat default Sample over httpd: http://192.168.99.100/examples/servlets/servlet/SessionExample You will see that the session id alternates if you refresh the browser
here are the slides and the presentation
Besides the automatic vagrant up way, you can play around with manual steps. Here some ideas...
manually rebuild everything within the VM
sudo su -
cd /vagrant/docker
docker-compose stop && docker-compose rm -f && docker-compose build && docker-compose up --force-recreate
open another bash - fill in the required etcd keys - after doing this tomcat should start
if using vagrant:
curl -L http://localhost:2379/v2/keys/tomcat/Xmx -XPUT -d value='1024M' && \
curl -L http://localhost:2379/v2/keys/tomcat/Xms -XPUT -d value='512M' && \
curl -L http://localhost:2379/v2/keys/tomcat/user -XPUT -d value='admin' && \
curl -L http://localhost:2379/v2/keys/tomcat/password -XPUT -d value='admin' && \
curl -L http://localhost:2379/v2/keys/tomcat/maxThreads -XPUT -d value='123'
if using docker tools - find out ip with docker-machine env then run e.g.
curl -L http://192.168.99.100:2379/v2/keys/tomcat/Xmx -XPUT -d value='1024M' && \
curl -L http://192.168.99.100:2379/v2/keys/tomcat/Xms -XPUT -d value='512M' && \
curl -L http://192.168.99.100:2379/v2/keys/tomcat/user -XPUT -d value='admin' && \
curl -L http://192.168.99.100:2379/v2/keys/tomcat/password -XPUT -d value='admin' && \
curl -L http://192.168.99.100:2379/v2/keys/tomcat/maxThreads -XPUT -d value='123'
debug confd - e.g. test if templates are ok
/usr/local/bin/confd -onetime -backend etcd -node docker_etcdservice_1:4001
- try latest confd version v0.12 and define default values getv within template files.
- how to handle consistent configuration changes with confd
- confd for Windows :)


