Groundstation for the Fossasat-1 Satellite
- Heltec WiFi LoRa 32 V1
- Heltec WiFi LoRa 32 V2 https://heltec.org/project/wifi-lora-32/
- TTGO LoRa32 V1
- TTGO LoRa32 V2
This project is ready to use with Platformio. It will take care of all dependencies automatically when building the project. It can also be used with Arduino IDE.
Arduino ide instructions bellow.
Platformio can be installed as a plugin for many IDEs. You can find a complete list here: https://docs.platformio.org/en/latest/ide.html#desktop-ide
My recommendation is to use VSCode or Atom, you can find installation guides here:
- VSCode: https://docs.platformio.org/en/latest/ide/vscode.html
- Atom: https://docs.platformio.org/en/latest/ide/atom.html
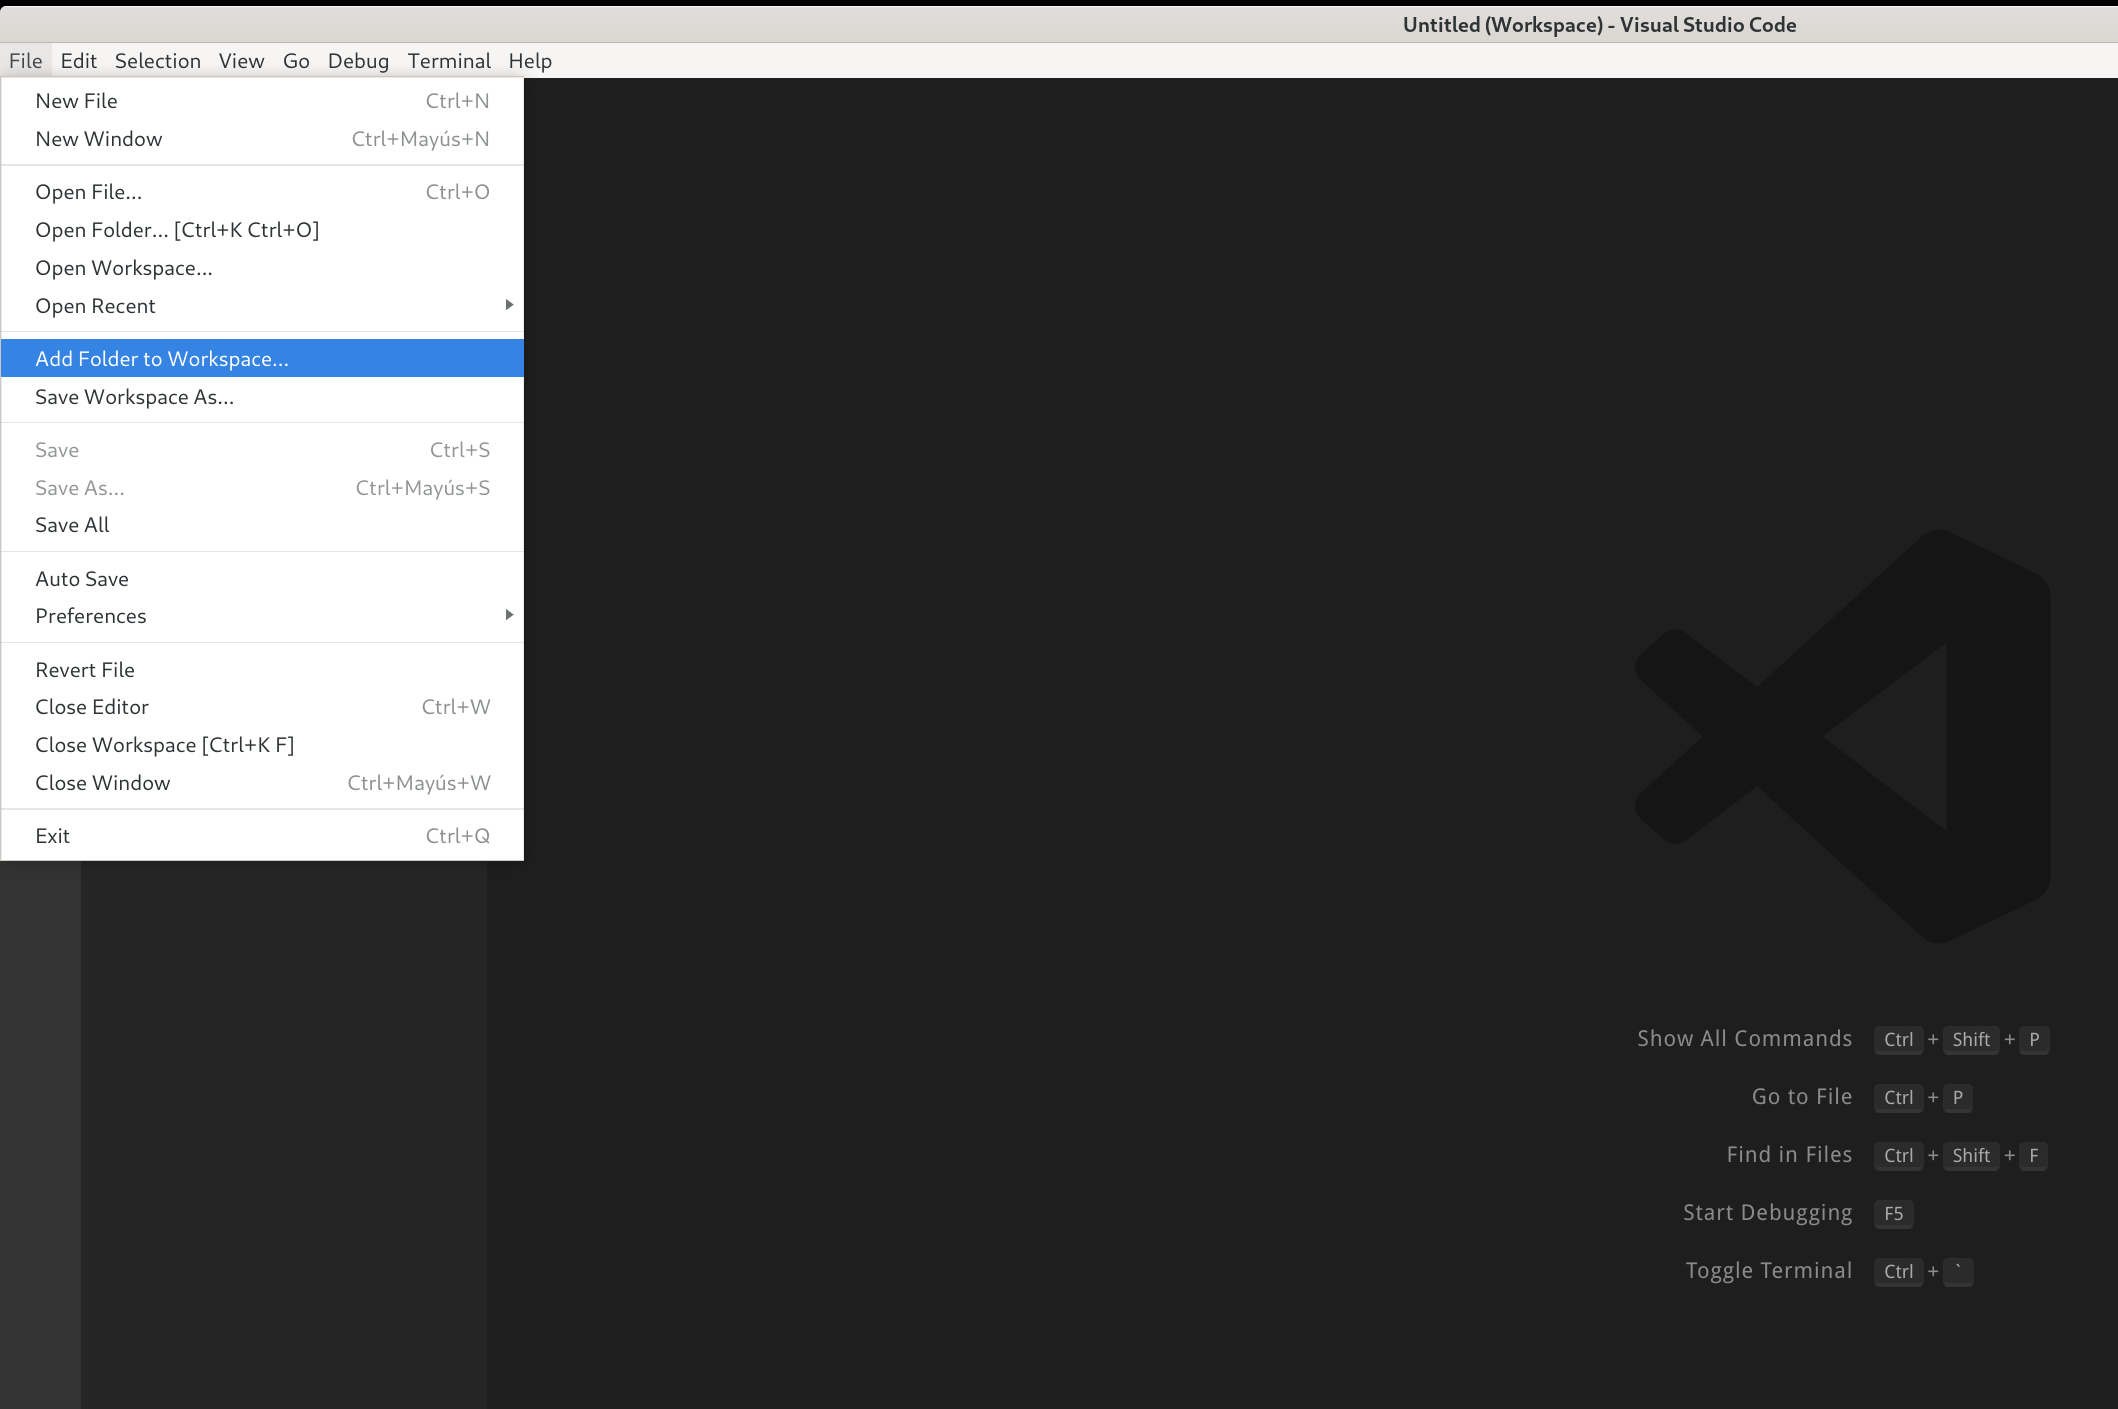
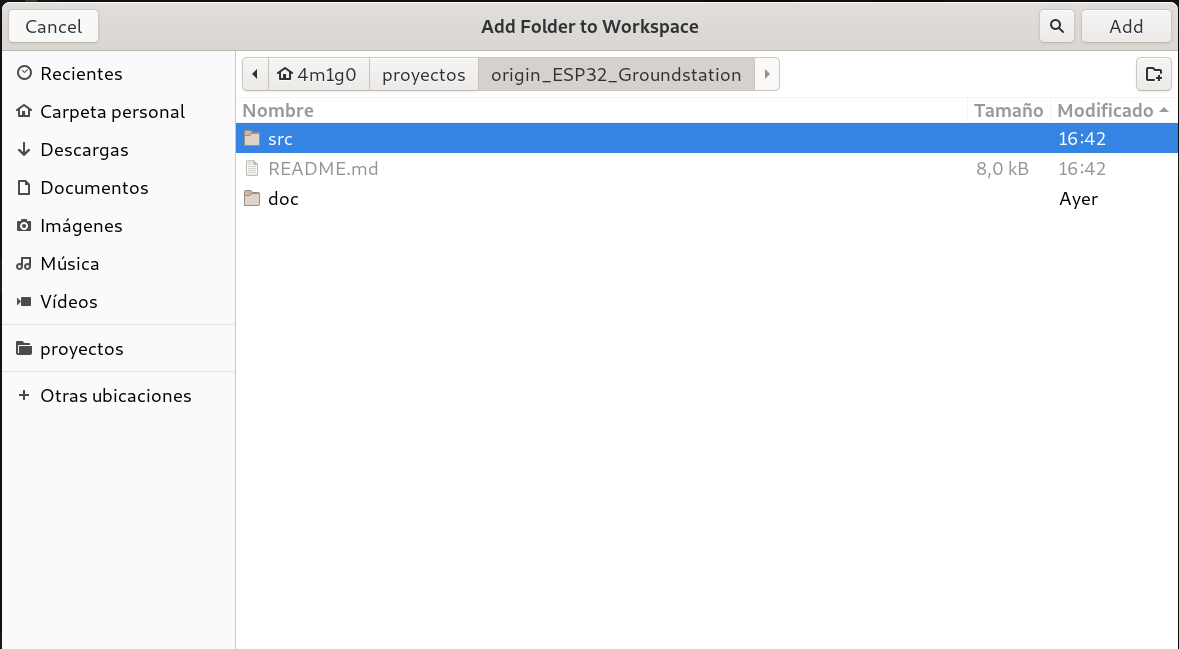
Once you have cloned this project to a local directory, you can open it on Visual Studio code in File > Add folder to workspace.
Then select the src folder inside the repository and click open.
After that, the project should be loaded in visual studio and ready to configure and build.
First we need to select the board. To do so, open the src/Fossa_GroundStation/platformio.ini file and uncomment one of the lines at the beggining of the file depending on the board you are going to use TTGO or Heltec.
default_envs =
; Uncomment by deleting ";" in the line below to select the board
;   heltec_wifi_lora_32
;   ttgo-lora32-v1
Once the configuration is done, connect the board to the computer and click on the upload button from the platformio toolbar, or go to Terminal -> Run Task -> Upload.
All the dependencies will be downloaded and installed automatically.
Note that if you are a Linux used like me and it is your first time using platformio, you will have to install the udev rules to grant permissions to platformio to upload the program to the board. You can follow the instructions here: https://docs.platformio.org/en/latest/faq.html#platformio-udev-rules
You can install the Arduino IDE by downloading it from arduino.cc, we recommend the last version, but you should use v1.6 or above.
First step is to install support for ESP32 based boards on the Arduino IDE through the Board Manager.
- Start Arduino and open Preferences window.
- Enter
https://dl.espressif.com/dl/package_esp32_index.jsoninto Additional Board Manager URLs field. You can add multiple URLs, separating them with commas. - Open Boards Manager from Tools > Board menu and find esp32 platform.
- Select the version you need from a drop-down box.
- Click install button.
This project relies on several third party dependencies that must be installed in order to be able to build the binaries you can find the dependencies list below:
- RadioLib (recomended v2.0.1) https://github.com/jgromes/RadioLib
- ArduinoJson (recomended v6.13.0 Required >v6.0) https://github.com/bblanchon/ArduinoJson
- ESP8266_SSD1306 (recomended v4.1.0) https://github.com/ThingPulse/esp8266-oled-ssd1306
- AsyncTCP (recomended v1.1.1) https://github.com/me-no-dev/AsyncTCP.git
- ESPAsyncWebServer (recomended v1.2.3) https://github.com/me-no-dev/ESPAsyncWebServer.git
- ESPAsyncWiFiManager (recomended v0.22) https://github.com/alanswx/ESPAsyncWiFiManager.git
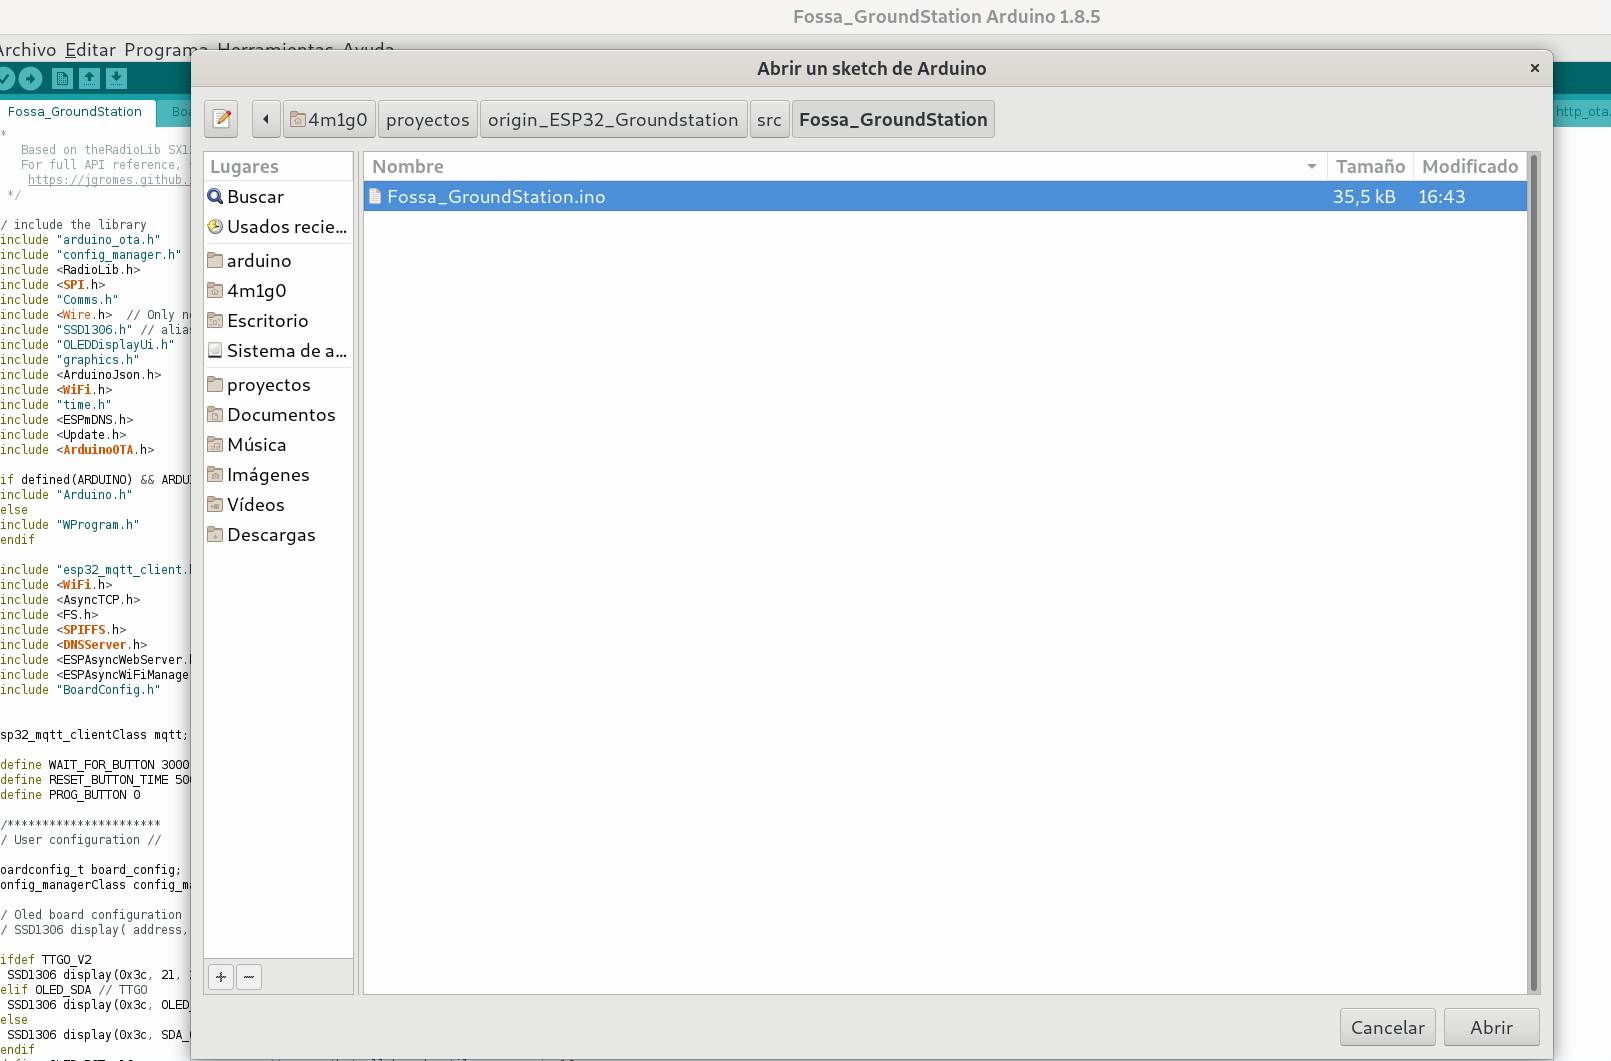
Once you have cloned this project to a local directory, you can open it from the Arduino IDE in File > Add folder to workspace. And select the .ino file which is located in src > Fossa_GroundStation > Fossa_GroundStation.ino
The next step is to open the project file src/Fossa_GroundStation/BoardConfig.h and uncomment the line matching your board by removing the leading //
// uncomment the line matching your board by removing the //

//#define TTGO_V1
//#define TTGO_V2
//#define HELTEC
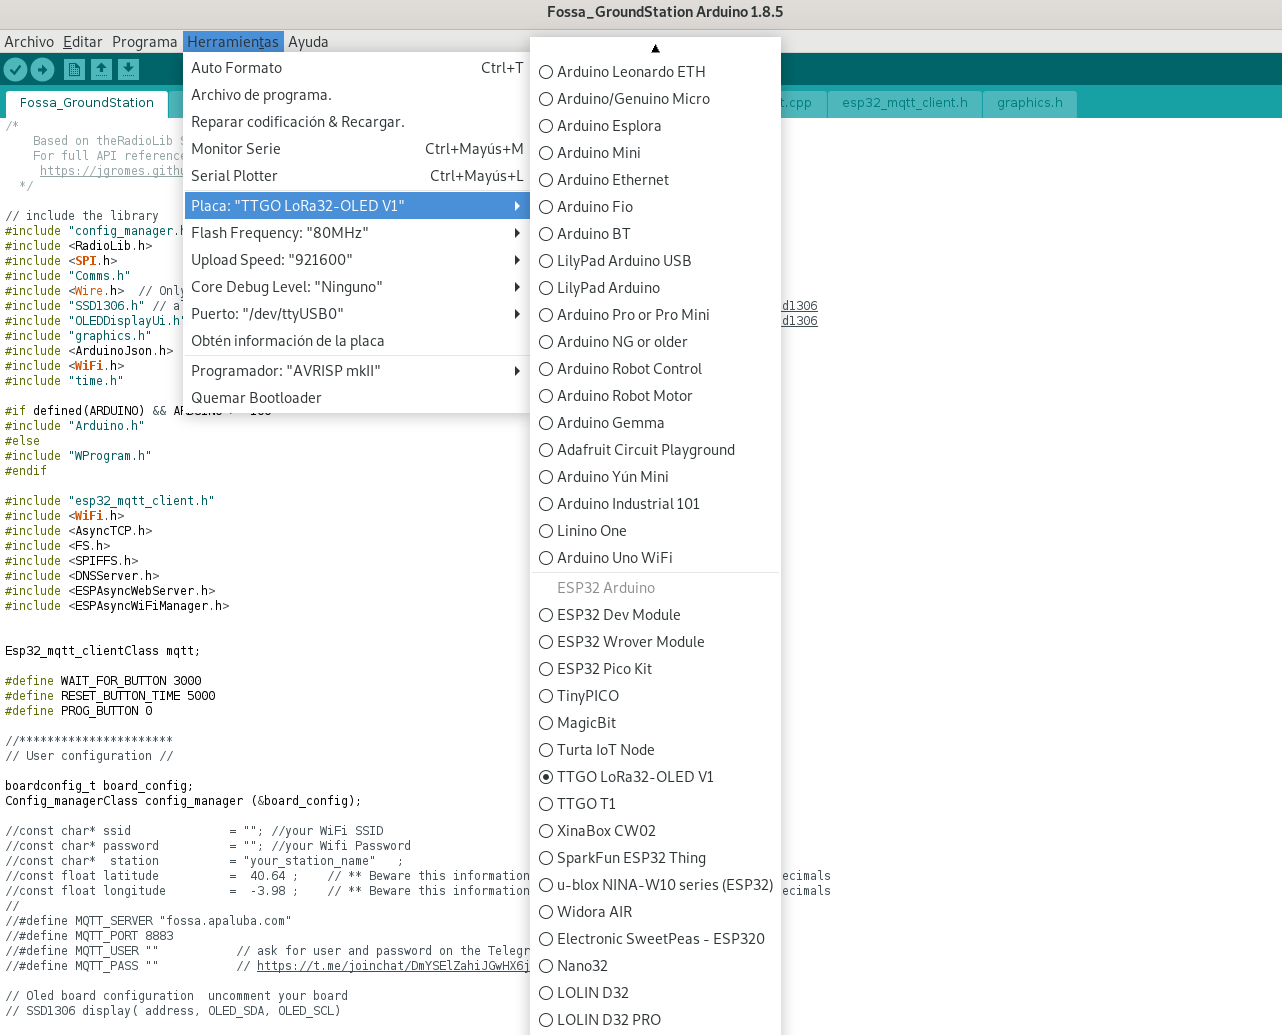
Connect the board to the computer, select your board in the Arduino IDE Tools > Boards
Then select the port where the board is connected to the computer in Tools > Ports
And finally click on the rounded arrow button on the top to upload the project to the board or go to Program > Upload (Ctl+U)
The first time the board boot it will generate an AP with the name: FossaGroundStation. Once connected to that network you should be prompted with a web panel to configure the basic parameters of your station. If that were not the case, you can access the web panel using a web browser and going to the url 192.168.4.1.
The parameters that must be filled are the following:
- SSID and PASSWORD: The configuration parameters of you home WiFi AP so that the ground station can connect to internet.
- STATION NAME: The name of your ground station. If you have registered yours in the Fossa Ground Station Database, the name should match.
- LATITUDE and LONGITUDE: The geographical coordinates of the ground station. This serves the purpose of locating your ground station when you receive a package from the satellite.
- MQTT_SERVER and MQTT_PORT: These are the address and port of the MQTT server of the project you should not change them if you want the Ground Station to be able to connect the main server.
- MQTT_USER and MQTT_PASS: These are the credentials of the project MQTT server, the purpose is to be able to collect the most packets from the satellite and manage all groundStations from this central server. You can ask for user and password in this telegram group: https://t.me/joinchat/DmYSElZahiJGwHX6jCzB3Q
This project implements OTA updates with both Arduino IDE and Platformio. To use this method the board and the computer have to be connected to the same network and be visible to each other.
In order to upload a new version through OTA in platformio, the platformio.ide file has to be edited uncommenting two lines to enable OTA and set the current IP Address of the station (it can be seen on the OLED display).
# Uncomment these 2 lines by deleting ";" and edit as needed to upload through OTA
;upload_protocol = espota
;upload_port = IP_OF_THE_BOARD
Once this is done, the new firmware can be uploaded using the upload button normally as if the board were connected through USB.
To upload a new version through OTA un Arduino, you have to navigate to Tools > port and, if the computer is in the same network it should detect a network port for the ESP32. If that is the case, select the network port.
Once this is done, the new firmware can be uploaded normally using the upload button or navigating to Program > upload
Arduino


