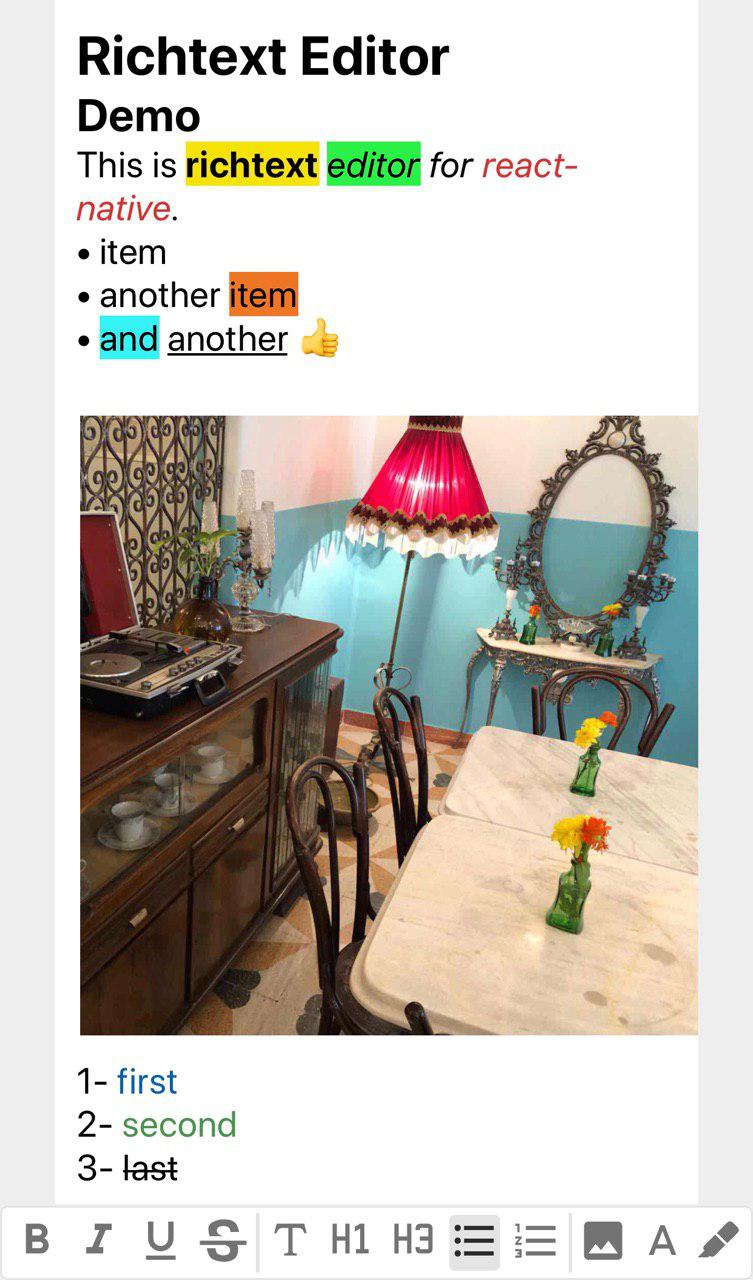
Richtext editor for react native
npm i react-native-cn-richtext-editor
yarn add react-native-cn-richtext-editor
Here is a simple overview of our components usage.
import React, { Component } from 'react';
import { View, StyleSheet, Keyboard
, TouchableWithoutFeedback, Text
, KeyboardAvoidingView } from 'react-native';

import  CNRichTextEditor , { CNToolbar, getInitialObject , getDefaultStyles } from "react-native-cn-richtext-editor";

const defaultStyles = getDefaultStyles();

class App extends Component {

    constructor(props) {
        super(props);

        this.state = {
            selectedTag : 'body',
            selectedStyles : [],
            value: [getInitialObject()]
        };

        this.editor = null;
    }

    onStyleKeyPress = (toolType) => {
        this.editor.applyToolbar(toolType);
    }

    onSelectedTagChanged = (tag) => {
        this.setState({
            selectedTag: tag
        })
    }

    onSelectedStyleChanged = (styles) => {
        this.setState({
            selectedStyles: styles,
        })
    }

    onValueChanged = (value) => {
        this.setState({
            value: value
        });
    }


    render() {
        return (
            <KeyboardAvoidingView
            behavior="padding"
            enabled
            keyboardVerticalOffset={0}
            style={{
                flex: 1,
                paddingTop: 20,
                backgroundColor:'#eee',
                flexDirection: 'column',
                justifyContent: 'flex-end',
            }}
            >
                <TouchableWithoutFeedback onPress={Keyboard.dismiss} >
                    <View style={styles.main}>
                        <CNRichTextEditor
                            ref={input => this.editor = input}
                            onSelectedTagChanged={this.onSelectedTagChanged}
                            onSelectedStyleChanged={this.onSelectedStyleChanged}
                            value={this.state.value}
                            style={{ backgroundColor : '#fff'}}
                            styleList={defaultStyles}
                            onValueChanged={this.onValueChanged}
                        />
                    </View>
                </TouchableWithoutFeedback>

                <View style={{
                    minHeight: 35
                }}>

                    <CNToolbar
                        size={28}
                        bold={<Text style={[styles.toolbarButton, styles.boldButton]}>B</Text>}
                        italic={<Text style={[styles.toolbarButton, styles.italicButton]}>I</Text>}
                        underline={<Text style={[styles.toolbarButton, styles.underlineButton]}>U</Text>}
                        lineThrough={<Text style={[styles.toolbarButton, styles.lineThroughButton]}>S</Text>}
                        body={<Text style={styles.toolbarButton}>T</Text>}
                        title={<Text style={styles.toolbarButton}>h1</Text>}
                        heading={<Text style={styles.toolbarButton}>h3</Text>}
                        ul={<Text style={styles.toolbarButton}>ul</Text>}
                        ol={<Text style={styles.toolbarButton}>ol</Text>}

                        selectedTag={this.state.selectedTag}
                        selectedStyles={this.state.selectedStyles}
                        onStyleKeyPress={this.onStyleKeyPress} />
                </View>
        </KeyboardAvoidingView>
        );
    }

}

var styles = StyleSheet.create({
    main: {
        flex: 1,
        marginTop: 10,
        paddingLeft: 30,
        paddingRight: 30,
        paddingBottom: 1,
        alignItems: 'stretch',
    },
    toolbarButton: {
        fontSize: 20,
        width: 28,
        height: 28,
        textAlign: 'center'
    },
    italicButton: {
        fontStyle: 'italic'
    },
    boldButton: {
        fontWeight: 'bold'
    },
    underlineButton: {
        textDecorationLine: 'underline'
    },
    lineThroughButton: {
        textDecorationLine: 'line-through'
    },
});


export default App;You need to put more effort :) to use more advanced features of CNRichTextEditor such as:
- Image Uploading
- Highlighting Text
- Change Text Color
Actually we did not implement 'Toolbar buttons and menus' and 'Image Uploading Process' because it totally depends on using expo or pure react-native and also what other packages you prefer to use.
To see an example of how to implement more advanced feature of this editor please check this Link.
Also be noticed that this example is writen with expo and required 'react-native-popup-menu' package.
| Name | Description | Required |
|---|---|---|
| onSelectedTagChanged | this event triggers when selected tag of editor is changed. | No |
| onSelectedStyleChanged | this event triggers when selected style of editor is changed. | No |
| onValueChanged | this event triggers when value of editor is changed. | No |
| onRemoveImage | this event triggers when an image is removed. Callback param in the form { uri, id }. |
No |
| value | an array object which keeps value of the editor | Yes |
| styleList | an object consist of styles name and values (use getDefaultStyles function) | Yes |
| ImageComponent | a React component (class or functional) which will be used to render images. Will be passed style and source props. |
No |
| Name | Required | Description |
|---|---|---|
| selectedTag | Yes | selected tag of the editor |
| selectedStyles | Yes | selected style of the editor |
| onStyleKeyPress | Yes | this event triggers when user press one of toolbar keys |
| size | No | font size of toolbar buttons |
| bold | No | a component which renders as bold button |
| italic | No | a component which renders as italic button |
| underline | No | a component which renders as underline button |
| lineThrough | No | a component which renders as lineThrough button |
| body | No | a component which renders as body button |
| title | No | a component which renders as title button |
| ul | No | a component which renders as ul button |
| ol | No | a component which renders as ol button |
| image | No | a component which renders as image button |
| highlight | No | a component which renders as highlight button |
| foreColor | No | a component which renders as foreColor button |
| Name | Param | Returns | Description |
|---|---|---|---|
| getInitialObject | - | javascript object | create a initial value for the editor. |
| convertToHtmlString | array | string | this function converts value of editor to html string (use it to keep value as html in db) |
| convertToObject | string | array | converts html back to array for RichTextEditor value (use this function only for html string created by convertToHtmlString function) |
| getDefaultStyles | - | javascript object | creates required styles for the editor. |
Checkout the expo-demo App on Expo which uses react-native-cn-richtext-editor components. If you are looking to test and run expo-demo App locally, click here to view the implementation & run it locally.
ISC
