This is a collection of InDesign scripts that I use to improve my DTP workflow, which often involves repetitive, tedious, or time-consuming tasks. Designed primarily for single-page documents rather than long, text-heavy ones, these simple scripts run with minimal user interaction (except for essential warnings) and are designed to be triggered via keyboard shortcuts. Tested in Adobe InDesign CC 2020–2025 on Mac.
I'm a graphic designer, not a programmer (I started doing this at the beginning of the Covid-19 pandemic), so be prepared for bugs and oversights (please create an issue if you encounter one, though!).
Most scripts require at least one open document, and some require at least one object to be selected.
Data files: Several scripts read data from TSV files, searching in this order: local files (current or parent folder; local files starting with _ are prioritized), then default ones (on the desktop, in the script folder or Indentz root).
These TSV data files can have several non-standard features that will confuse Excel et al.:
- Blank lines are ignored; everything after a
#is ignored (comments); - The fields can be visually aligned with spaces that will be ignored at processing (I use VS Code with Rainbow CSV to work with TSVs);
- A very long line can be broken into multiple lines with a backslash (
\) added at the end of each segment; - A line may also be a directive:
@includepathbase/path/– sets a base path for subsequent@includedirectives with relative paths; the path may be absolute or relative to the data file folder;@includepath/to/another.tsv– includes another TSV file at this position; the path may be absolute or relative to the data file folder (or to abase/path/set previously);@defaults– includes the default data file (see above).
Visible area or Safety area: These are frames that I use to visually mark the visible part of a layout or its safety/type area; several scripts take them into account for some actions. The frames can be created manually (just name them <visible area> or <safety area>), or can be automatically generated from the document name or page margins (more details below). The Export section contains scripts that can show or hide these frames.
Libs: Many scripts use dynamically linked functions from lib/, which means that the folder structure should be preserved after downloading the repository. If you download releases1 (which are statically linked), you can use every script stand-alone.
Because there are quite a lot of files, the files are organized into categories based on their scope: document/spread/page-level, object-level, and miscellaneous.
Scripts that operate at the document, spread or page level.
Layers, swatches, fonts, links etc.
Adds a set of layers defined in a 7-columns TSV data file named layers.tsv (sample):
| Name | Color | Visible | Printable | Locked | Order | Variants |
|---|---|---|---|---|---|---|
| .visible area | Yellow | yes | yes | yes | above | nicht sicht*, rahmen, sicht*, *vi?ib* |
| dielines | Magenta | yes | yes | yes | above | cut*, decoupe, die, die*cut, stanz* |
| text | Green | copy, headline*, hl, text*, txt, typ? | ||||
| artwork | Light Blue | no | yes | above | aw, design, element?, layout* | |
| bg | Red | below | back, *background*, bgg, fond, hg, hintergrund* | |||
| .reference | Black | no | no | yes | bottom | refer*, template, vorlage |
| ... |
Legend:
- Name: Layer name; a dot prefix lets QuickExport optionally hide the layer during document export;
- Color: Layer color (defaults to
Light Blue); - Visible:
yesorno(defaults toyes); - Printable:
yesorno(defaults toyes); - Locked:
yesorno(defaults toyes); - Order:
aboveorbelowexisting layers, ortop/bottom(defaults toabove); - Variants: A list of layers separated by commas that will be merged with the base layer; it's case insensitive and can take simple wildcards (
?for exactly one character and*for zero or more characters).
🎓 You can use
DumpLayersto save a tab delimited list of swatches from the active document.
💡 The script will display a report if run while holding down the Ctrl key.
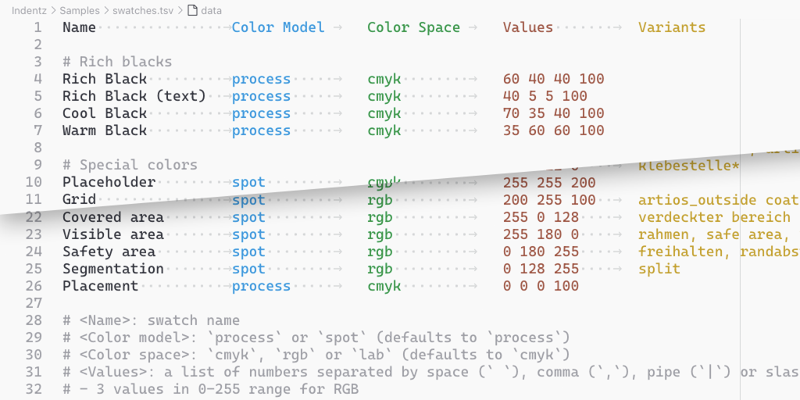
Adds a set of swatches defined in a 5-columns TSV data file named swatches.tsv (sample):
| Name | Color Model | Color Space | Values | Variants |
|---|---|---|---|---|
| Rich Black | process | cmyk | 60 40 40 100 | |
| RGB Grey | process | rgb | 128 128 128 | |
| Cut | spot | cmyk | 0 100 0 0 | couper, die*cut |
| Visible area | spot | rgb | 255 180 0 | safe*area, vis*mark |
| ... |
Legend:
- Name: Swatch name;
- Color Model:
processorspot(defaults toprocess); - Color Space:
cmyk,rgborlab(defaults tocmyk); - Values: a list of numbers separated by space (
,), pipe (|) or slash (/):- 3 values in 0–255 range for RGB;
- 4 values in 0–100 range for CMYK;
- 3 values in 0–100 (L), –128–127 (A and B) range for Lab.
- Variants: a list of swatches separated by commas that will be replaced by the base swatch; it's case insensitive and can take simple wildcards (
?for exactly one character and*for zero or more characters).
Every swatch automatically gets three implicit variants: its lowercase name (this also fixes case variations), its Color Value Name ('C=X M=X Y=X K=X' or 'R=X G=X B=X' or 'L=X a=X b=X') and its alternative spelling ('cXmXyXkX' or 'rXgXbX' or 'lXaXbX'). So, if you have this line:
| Name | Color Model | Color Space | Values | Variants |
|---|---|---|---|---|
| Rich Black | process | cmyk | 60 40 40 100 |
all document swatches named rich black (and all case variations), C=60 M=40 Y=40 K=100, or c60m40y40k100 will be merged with Rich Black.
🎓 You can use
DumpSwatchesto save a tab delimited list of swatches from the active document.
💡 The script will display a report if run while holding down the Ctrl key.
Replaces document fonts using a 4-columns TSV data file named fonts.tsv (sample):
| Old font family | Style | New font family | Style |
|---|---|---|---|
| Arial | Regular | Helvetica Neue | Regular |
| Arial | Bold | Helvetica Neue | Bold |
| ... |
🎓 You can use
ShowFontsto get a tab delimited list of document fonts.
💡 The script will display a report if run while holding down the Ctrl key.
📍 Suggested shortcut: ⌥F8
Replaces document links using a 2-columns TSV data file named links.tsv (sample):
| Relink to | Links |
|---|---|
| /absolute/path/to/img1.psd | img1_lowres.jpg, img1-rgb.* |
| img2.psd | img2.* |
@includepath base/path/ |
|
| img3.psd | |
| subfolder/img4.psd | |
| ... |
Legend:
- Relink to:
- An absolute path of the form
/absolute/path/to/img1.psd; - A relative path which is:
- relative by default to the document
Linksfolder (e.g.,img2.psd); - relative to the
base/path/defined by a previous@includepathdirective (e.g.,img3.psdandsubfolder/img4.psd).
- relative by default to the document
- An absolute path of the form
- Links: A list of file names separated by commas, that if present in the document, will be replaced with the link from the first column; it's case insensitive and can take simple wildcards (
?for exactly one character and*for zero or more characters). The script will also automatically match the file names from the first column, so Links can be empty – e.g., ifimg4.psdappears in the document, it will be replaced by the one insubfolder/(which is actuallybase/path/subfolder/, because the@includepathabove it redefines the base path).
Warning: If a file name contains commas you must quote it.
🎓 You can use
DumpLinksto save a list of links from the active document.
💡 The script will display a report if run while holding down the Ctrl key.
📍 Suggested shortcut: ⌥F6
Replaces a list of text snippets using a 5-columns TSV data file named snippets.tsv (sample):
| Find what | Change to | Case sensitive | Whole word | Scope |
|---|---|---|---|---|
| English instructions | Deutsche anleitung | yes | yes | |
| The sample is for free | Das Sample ist kostenlos | yes | yes | _DE?$ |
| The sample is for free | L'échantillon est gratuit | yes | yes | _FR?$ |
| 12.06.22 | 13.11.2022 | |||
| ... |
Legend:
- Find what: Text to be replaced (you can use special characters);
- Change to: The replacement text;
- Case sensitive:
yesorno(defaults toyes); - Whole word:
yesorno(defaults toyes); - Scope: Replacement will only be done if the document name matches the regular expression (case sensitive).
Example: 'The sample is for free' will be replaced with 'Das Sample ist kostenlos' in Document_DE.indd, and with 'L'échantillon est gratuit' in Document_FR.indd.
💡 The script will display a report if run while holding down the Ctrl key.
Resets the visible/printable/locked state of the document layers using the same data file used by AddLayers.
Saves a TSV file compatible with AddLayers containing the names and properties of the active document layers.
Saves a TSV file compatible with ReplaceLinks containing the links of the active document.
Saves a TSV file compatible with AddSwatches containing the names and properties of the active document swatches.
Document export and related.
📍 Suggested shortcut: ⌃E
Batch exports all open .indd documents or all documents from a selected folder using up to two customizable PDF presets. While Peter Kahrel's Batch Convert script is like a 'Swiss Army knife' export tool, this script is specifically designed to streamline workflows that need frequent PDF setting adjustments. It reduces the tedious clicking through multiple tabs and options in InDesign's native export dialog. (It also gave me a great opportunity to explore ScriptUI development ;)).
Two workflows are available, with options organized into several categories:
Source folder: By default, the script exports all open documents. If no documents are open, you can select a source folder, optionally including its subfolders.
Workflow: Choose which workflow(s) to use – at least one must be selected. The label is only informative.
Preset options: Select an Adobe PDF Preset and customize specific settings as needed.
Document actions:
-
Update out of date links: Updates all modified links before export.
-
Skip do-not-print layers: Excludes layers whose names start with a dot or hyphen (like .safety area) and layers from the default do-not-print list (see
DNPLayersHidebelow). You can modify this list using the Edit list button. -
Run a script: Executes a JavaScript or AppleScript before export – e.g., one of the other scripts from this sectio. ;)
Output options:
-
Export in a custom folder: Choose a different output location instead of the default source document folder.
-
Add a suffix: Appends this text to the exported file names.
🎓 Add a suffix to a preset by including it after the last underscore. For example, selecting preset
X4_350dpi_39L300_HighReswill automatically set the suffix toHighRes. -
Sort files into subfolders by suffix: Creates subfolders named after the suffix and sorts files accordingly.
🎓 It only uses the text before the first
+character – for example, it createsHighRes/for the suffixHighResandHighRes/for the suffixHighRes+Diecut. -
Sort files into subfolders by date: Creates subfolders named
MM.DD(current month/day) and sorts files accordingly. -
Export as separate pages/spreads: Creates individual PDF files for each page or spread instead of a single multi-page document.
-
Overwrite existing files: Overwrites files with matching names if saved to the same location. If unchecked, files will get unique names with incremented numbers – for example, if
Document_LowRes2.pdfexists anywhere in the export folder or its subfolders, the new file will be namedDocument_LowRes3.pdf.
Source update:
-
Save modified documents: Preserves changes made during export, including any script modifications.
-
Use 'Save as...' to reduce size: Helps minimize file size, especially for frequently edited documents, as regular saves can accumulate and increase the file size.
Global options:
- Upgrade [Converted] documents: Converts documents from older InDesign versions to the current version.
🎓 Settings are automatically saved each time you run the script. However, holding the Opt/Alt key while clicking Start will prevent settings from updating during the current session.
Hides all layers starting with either a dot or a hyphen, plus a hard-coded list of do-not-print layers (see below). Additionally, it moves all page objects from varnish, uv, foil, silver and white to separate spreads and labels the spreads.
💡 The script is designed to be run with
QuickExport.
Shows or hides all layers starting with either a dot or a hyphen, plus a hard-coded list of do-not-print layers:
- covered area*
- visible area, rahmen, sicht*, *vi?ib*
- safe*area, safe*margins, segmentation
- fold, falz
- guides, grid, masuratori
💡 The scripts are designed to be run with
QuickExport.
Defaults and clean-up.
Sets some preferences for the active document. You should customize them to your workflow by editing the script. Unfortunately the preferences are scattered in so many places that it's difficult for me to guide you – but this will definitely help.
Many scripts in this collection assume these settings as defaults because they suit my environment – e.g., trying to scale a locked object/guide the script will fail for you but not for me, because I have Prevent Selection of Locked Objects enabled.
Preferences
Application:
Preferences ‣ General: Prevent Selection of Locked Objects
Preferences ‣ Display Performance: Preserve Object-Level Display Settings
Preferences ‣ File Handling: Always Save Preview Images with Documents
View ‣ Screen Mode: Normal
View ‣ Grids & Guides: Snap to Guides; Smart Guides
Windows ‣ Layers: Ungroup Remembers Layers; Paste Remembers Layers
Windows ‣ Objects & Layout ‣ Transform: Reference Point: Center; Adjust Stroke Weight when Scaling; Adjust Effects when Scaling
Windows ‣ Output ‣ Preflight: Off
Document:
Adjust Layout: Off
Document Intent: Print
Rulers: Zero Point: Reset
Preferences ‣ Type: Use Typographer's Quotes; Apply Leading to Entire Paragraphs
Preferences ‣ Units & Increments ‣ Keyboard Increments: Cursor Key: 0.2 mm; Size/Leading: 0.5 pt; Baseline Shift: 0.1 pt; Kerning/Tracking: 5/1000 em
Preferences ‣ Units & Increments ‣ Ruler Units: Origin: Spread; Units: Millimeters
Preferences ‣ Units & Increments ‣ Other Units: Stroke: Points
Preferences ‣ Grids: Baseline Grid Color: R=230 G=230 B=230
Preferences ‣ Guides & Pasteboard: Preview Background Color: Light Gray
Edit ‣ Transparency Blend Space: Document CMYK
View: Show Rulers
View ‣ Extras: Show Frame Edges
View ‣ Grids & Guides: Show Guides; Unlock Guides; Snap to Guides
Windows ‣ Color: Fill: None; Stroke: None
Windows ‣ Effects: Blending Mode: Normal; Opacity: 100%
Windows ‣ Output ‣ Attributes: Nonprinting: Off
Windows ‣ Pages: Allow Document Pages to Shuffle
Windows ‣ Text Wrap: No text wrap
Windows ‣ Type & Tables ‣ Paragraph: Shading: Off
📍 Suggested shortcut: F2
Performs a sequence of actions designed to bring the document to an approximately 'clean' state:
- Sets default preferences by running
DefaultPrefs; - Unlocks all objects and resets their scaling to 100%;
- Deletes hidden objects (after confirmation);
- Deletes empty frames (after confirmation);
- Deletes unused swatches, layers and spreads;
- Converts empty text frames to generic frames;
- Converts empty frames to graphic frames;
- Resets default transparency effects;
- Resets the visible/printable/locked status of layers;
- Hides 'invisible' characters;
- Turns off URLs auto-updating;
- Sets the pasteboard margins.
Sometimes objects that have a script label attached are reused, which may create problems later. The script deletes the labels of the selected objects, or all objects in the document if nothing is selected.
Unnaplies paragraph/character/object styles from the selected objects, or all objects in the document if nothing is selected.
💡 The script will display a report if run while holding down the Ctrl key.
📍 Suggested shortcut: ⇧F2
Converts process RGB swatches to CMYK and renames them to 'C= M= Y= K=' format. It also deletes unused swatches and removes duplicates. Spot colors are not changed.
Concocted with code written by Marc Autret, Dave Saunders and others.
Page labels and miscellaneous info.
Adds a custom label on the current page slug, on the info layer (Helvetica Regular 6 pt, fill Registration, stroke Paper 0.4 pt).
Example:
Adds a label on each page's slug showing the page size ratio, visible area ratio (when defined), and margin ratio.
Shows all fonts used in the active document.
Shows all color profiles available to InDesign.
📍 Suggested shortcut: F1
Shows properties and methods of a selected object for debugging purposes.
Inspired by showProps() by Gregor Fellenz and pub.inspect() from basil.js.
Page geometry, guides and markings.
When objects are selected, adds guides around their boundaries.
When nothing is selected, adds guides at page edges and margin centers. Running the script again removes these guides.
🎓 If Opt is also pressed, it will use spread guides.
Moves all guides to the .guides layer.
Deletes all guides from the document.
Creates a frame around the page margins that visually marks the safety area of a page. It's a stroked frame named <safety area> on the .safety area layer. It uses an existing Safety area swatch or creates one with R=0 G=180 B=255.
💡 This script is designed to be run with
QuickExport.
Creates a frame around the page margins that visually marks the visible area of a page. It's a stroked frame named <visible area> on the .visible area layer. It uses an existing Visible area swatch or creates one with R=255 G=180 B=0.
💡 This script is designed to be run with
QuickExport.
📍 Suggested shortcut: ⌥F3
Sets the page margins and optionally a reserved area on the bottom, getting the values from the script name, in percentages of the visible area or page size.
This template it's designed to be duplicated and renamed using one or two numbers separated by HW. The first number sets the page margins, while an optional second number defines the bottom area. HW can be omitted (defaults to 0%) or used alone (defaults to 10%).
Example:
| Script name | Margins | Bottom area |
|---|---|---|
| MG5.jsx | 5% | – |
| MG5HW.jsx | 5% | 10% |
| MG5HW10.jsx | 5% | 10% |
Sets the current page margins from the selected objects.
📍 Suggested shortcut: F3
Adjusts page size, margins, and bleed based on the document name. It also creates a stroked frame named <visible area> around page margins on the .visible area layer. Uses an existing Visible area swatch or creates one with R=255 G=180 B=0.
It works with file names structured like this:
<Name>_<Total size WxH>[_<Visible area WxH>][_<Bleed>].indd
Dimensions use WxH format (e.g., 000x000, where 000 represents one or more digits, optional decimals, and optional mm or cm units). The first pair sets page size, the second pair (if present) defines the visible area, and a following one- or two-digit number sets bleed. The script handles extra spaces and characters flexibly.
⚠️ Warning: For now the units are ignored: dimensions are always in millimeters.
Example:
| File name | Total size | Visible area | Bleed |
|---|---|---|---|
| Document1_315x55.indd | 315×55 | – | – |
| Document2_1400x400_700x137mm.indd | 1400×400 | 700×137 | – |
| Document3_597x517_577x500.5_3mm V4.indd | 597×517 | 577×500.5 | 3 |
Resizes the current page to its margins.
📍 Suggested shortcut: ⇧F3
Resizes the current page to the selected objects.
Juggling layers and spreads.
📍 Suggested shortcut: ⇧⌘F7
Combines all open documents, sorted alphabetically by name.
Moves each layer of the active document to a separate spread (the document must have a single spread).
Saves each spread of the active document to a separate file.
When a document name ends with a separator (space, dot, underscore, or hyphen) followed by characters matching the number of spreads, each split file will include the corresponding character in its name. For example, Document_ABC.indd with three spreads becomes Document_A.indd, Document_B.indd, and Document_C.indd. If no sequence is detected, you'll be prompted to provide one.
🎓 The index is added to the end of the file name by default, but placing a
#anywhere in the file name determines where the index will appear instead.
📍 Suggested shortcut: ⌥⌘F7
Splits one spread into multiple spreads or combines multiple spreads into one, using predefined layers (default: DE, FR, IT). When splitting, each new spread contains items from its corresponding layer. When joining, items from each spread are distributed into their respective layers in the combined spread. Other layers remain unchanged.
🎓 Edit the variable
layers.masterto customize the predefined layers to your needs.
Zooming pages and objects.
📍 Suggested shortcut: ⇧F4
Invokes Window ‣ Arrange ‣ Tile All Vertically, Tile All Horizontally, or Tile, depending on the current spread orientation.
📍 Suggested shortcut: ⌘3
Zooms current layout window to 300%. It complements the predefined 100% (⌘1), 200% (⌘2) and 400% (⌘4) zoom levels.
📍 Suggested shortcut: F4
It resembles Fit Selection in Window (⌥⌘=), but:
- It brings the selection a little closer;
- If the cursor is in a text frame, zooms on the whole frame;
- Without anything selected zooms on the current spread.
It's sort of hack-ish and it assumes that UI Sizing is set to Small and Application Frame is used. Also, the variables HC and VC must be customized to your particular workspace. Very helpful, though. :)
📍 Suggested shortcut: ⌥F4
Zooms on the first 3 spreads.
Scripts that operate at the object level.
Align objects using the numeric keypad.
📍 Suggested shortcuts: Num digits
| Left | Key | Center | Key | Right | Key |
|---|---|---|---|---|---|
| AlignToTL.jsx | Num7 | AlignToT.jsx | Num8 | AlignToTR.jsx | Num9 |
| AlignToL.jsx | Num4 | AlignToC.jsx | Num5 | AlignToR.jsx | Num6 |
| AlignToBL.jsx | Num1 | AlignToB.jsx | Num2 | AlignToBR.jsx | Num3 |
Use the numeric keypad to align the selected objects, with a single keystroke, to the Align To setting (see below).
📍 Suggested shortcut: Num0
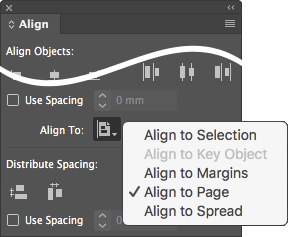
Toggles Align To between selection, margins, page, or spread (just run it repeatedly):
📍 Suggested shortcut: ⌃Num0
Resets Align To to default (Align to Selection).
Insert or remove objects from clipping frames.
📍 Suggested shortcut: Num*
Inserts the selected objects into a clipping frame or, if already clipped, restores them.
⚠️ Warning: It uses the clipboard, so make sure you don't lose anything important.
📍 Suggested shortcut: ⌃Num*
Releases one or several objects from their clipping frames. If nothing is selected, it will release all clipped objects from the current spread.
Reframe objects to a target area.
📍 Suggested shortcuts: F11, F12 with modifiers
| Page | Key | Spread | Key |
|---|---|---|---|
| FitToPage.jsx | F11 | FitToSpread.jsx | F12 |
| FitToPageMargins.jsx | ⌥F11 | FitToSpreadMargins.jsx | ⌥F12 |
| FitToPageVisibleArea.jsx | ⌥⇧F11 | FitToSpreadVisibleArea.jsx | ⌥⇧F12 |
| FitToPageBleed.jsx | ⇧F11 | FitToSpreadBleed.jsx | ⇧F12 |
| FitToPageForced.jsx | ⌘F11 | FitToSpreadForced.jsx | ⌘F12 |
| FitToPageMarginsForced.jsx | ⌥⌘F11 | FitToSpreadMarginsForced.jsx | ⌥⌘F12 |
| FitToPageVisibleAreaForced.jsx | ⌥⇧⌘F11 | FitToSpreadVisibleAreaForced.jsx | ⌥⇧⌘F12 |
| FitToPageBleedForced.jsx | ⇧⌘F11 | FitToSpreadBleedForced.jsx | ⇧⌘F12 |
💡 F11: page • F12: spread • ⌥: margins • ⌥⇧: visible area • ⇧: bleed • ⌘: forced
These scripts reframe selected objects to fit the target area specified in the script name (page/spread, margins, bleed, or visible area) by:
-
Extending edges that touch or nearly touch a trigger zone (either the target area or the visible area); by default this zone is 1% of the visible area2;
-
Reducing edges that extend beyond the target area.
Simple rectangles and lines are directly reframed. Rotated objects, ovals, groups etc. are placed in clipping frames. Only clipped objects, straight frames, and lines will be extended. Frames with embedded content are limited to their content boundaries.
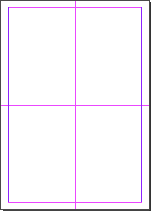
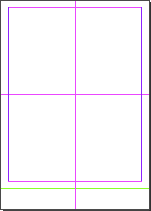
Example: Running FitToPageBleed with the following frames selected will extend the yellow one and will reduce the red one to the page bleed:
The *Forced variants simply reframe the objects to the target area.
📍 Suggested shortcut: F6
Auto-sizes the selected text frames to their content.
Running it repeatedly increases the auto-sizing levels (from None to Height Only to Height and Width), except for single lines which are always set to Height and Width. The reference point is determined by the first paragraph's alignment and the frame's vertical justification:
| Paragraph Alignment → ↓ Vertical Justification |
 |
 |
 |
|---|---|---|---|
 |
 |
 |
 |
 |
 |
 |
 |
 |
 |
 |
 |
🎓 Running it again while only changing alignment will maintain the current auto-sizing setting.
Set the reference point used for transformations.
📍 Suggested shortcuts: ⌃Num digits
| Left | Key | Center | Key | Right | Key |
|---|---|---|---|---|---|
| SetRefPointTL.jsx | ⌃Num7 | SetRefPointT.jsx | ⌃Num8 | SetRefPointTR.jsx | ⌃Num9 |
| SetRefPointL.jsx | ⌃Num4 | SetRefPointC.jsx | ⌃Num5 | SetRefPointR.jsx | ⌃Num6 |
| SetRefPointBL.jsx | ⌃Num1 | SetRefPointB.jsx | ⌃Num2 | SetRefPointBR.jsx | ⌃Num3 |
Use the numeric keypad to set the reference point used for transformations (similar to clicking the little proxy squares in the Control palette):
Scale selected objects to a target area.
📍 Suggested shortcuts: F5 with modifiers
| Page | Key | Page margins | Key | Spread bleed | Key |
|---|---|---|---|---|---|
| ScaleToPageSize.jsx | F5 | ScaleToPageMargins.jsx | ⌥F5 | ScaleToSpreadBleed.jsx | ⇧F5 |
| ScaleToPageSizeH.jsx | ⌘F5 | ScaleToPageMarginsH.jsx | ⌥⌘F5 | ScaleToSpreadBleedH.jsx | ⇧⌘F5 |
Scales all selected objects as a group to match the target area specified in the script name (page size, margins, or spread bleed).
*H and *W variants scale to the height or width of their target.
This is a slightly modified version of OffsetPath by Olav Martin Kvern, which uses a clever method to create paths around selected objects at a custom offset distance:
When you apply a Contour-type text wrap to an object, you’re creating a path around that object—and you can specify an offset distance. The text wrap path is accessible via scripting. That means that we could apply a text wrap with a given offset, then capture the path and path points of that path, turn off text wrap, and then create a new path from those geometric coordinates.
I fixed some bugs, added a default value, an option to join contours, and undo.
📍 Suggested shortcut: F9
Based on Konstantin Smorodsky's EAN Barcode Generator, that generates barcodes from a list provided by the user, this script gets a step further by automating the placement, scaling, and rotation of barcodes in a document, eliminating the need for manual adjustments.
It has two operating modes:
-
With no selection: creates a new document, placing one barcode per page (like the original script);
-
With objects selected: places barcodes sequentially into selected objects. If only one barcode is provided, it's applied to all selected objects.
Enter either one barcode number (8 or 13 digits) or a list of numbers. For add-ons, append a hyphen followed by 2 or 5 additional digits.
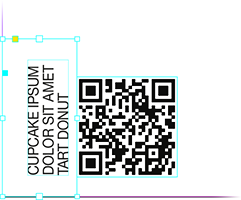
Adds a QR code on each spread of the active document (outside visible area, if possible), or to separate PDF files:
| On document | On file |
|---|---|
 |
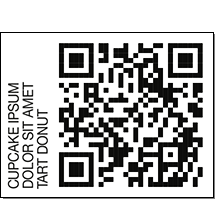 |
When the document name ends with a separator (space, dot, underscore, or hyphen) and a sequence of characters matching the number of spreads (a suffix), each generated file will include its corresponding character. For example, Document_ABC.indd with three spreads will create Document_A_QR.pdf, Document_B_QR.pdf, and Document_C_QR.pdf.
🎓 The script does a decent job breaking the label into multiple lines, but you can use
|to insert manual line breaks.
Does the same thing as QR but in a non-interactive way: retrieves a list of codes from a TSV data file named qr.tsv (sample) and adds them to existing documents, or creates separate files (the suffix thingy applies here as well):
| File name | Code | On doc |
|---|---|---|
| Document 1 | Code 1 | + |
| Document 2_ABC | Code 2 | + |
| Document 3_AC | Code 3 | |
| ... |
Legend:
- File name: document name;
- Code: any string;
- On doc: any string: on existing document; empty or missing: on separate file.
The TSV file must be saved locally (in the active document folder); files starting with _ take precedence.
Blank lines are ignored; everything after a # (comments) is ignored.
🎓 The script does a decent job of breaking the label into multiple lines, but you can use
|to insert manual line breaks.
- Clone or download from Code ‣ Download ZIP, or download the latest release.
- In InDesign open Window ‣ Utilities ‣ Scripts.
- Right-click on folder User and select Reveal in Finder/Explorer.
- Copy Indentz to this folder.
The code in this project would not have been possible without the InDesign ExtendScript API by Theunis de Jong and Gregor Fellenz, Mozilla's MDN Web Docs, and also blog posts, forum posts, tutorials, or code samples by Marc Autret, Dave Saunders, Peter Kahrel, Gregor Fellenz, Marijan Tompa, Richard Harrington, Konstantin Smorodsky, Olav Martin Kvern and many others. Some scripts are not originally created by me; credit is given in these cases.
Special thanks to Adrian Frigioiu and others for bug reports and feedback.
I also thank DeepL, Grammarly and lately Claude for helping me 'massage' my language into more natural English. :)
© 2020-2025 Paul Chiorean <[email protected]>.
The code is released under the MIT License.
Last updated: February 8, 2025
