Netuno Platform: Get Started
To install, follow the Get Started.
Quickly build applications adapted to your business logic.
In here you can find the source of all the Netuno core capabilities, such as CLI and Web Server.
Find more in netuno.org
Get Started · First Steps · Polyglot
Documentation highlights:
REST · OpenAPI · Cron Jobs · Monitor & Alerts
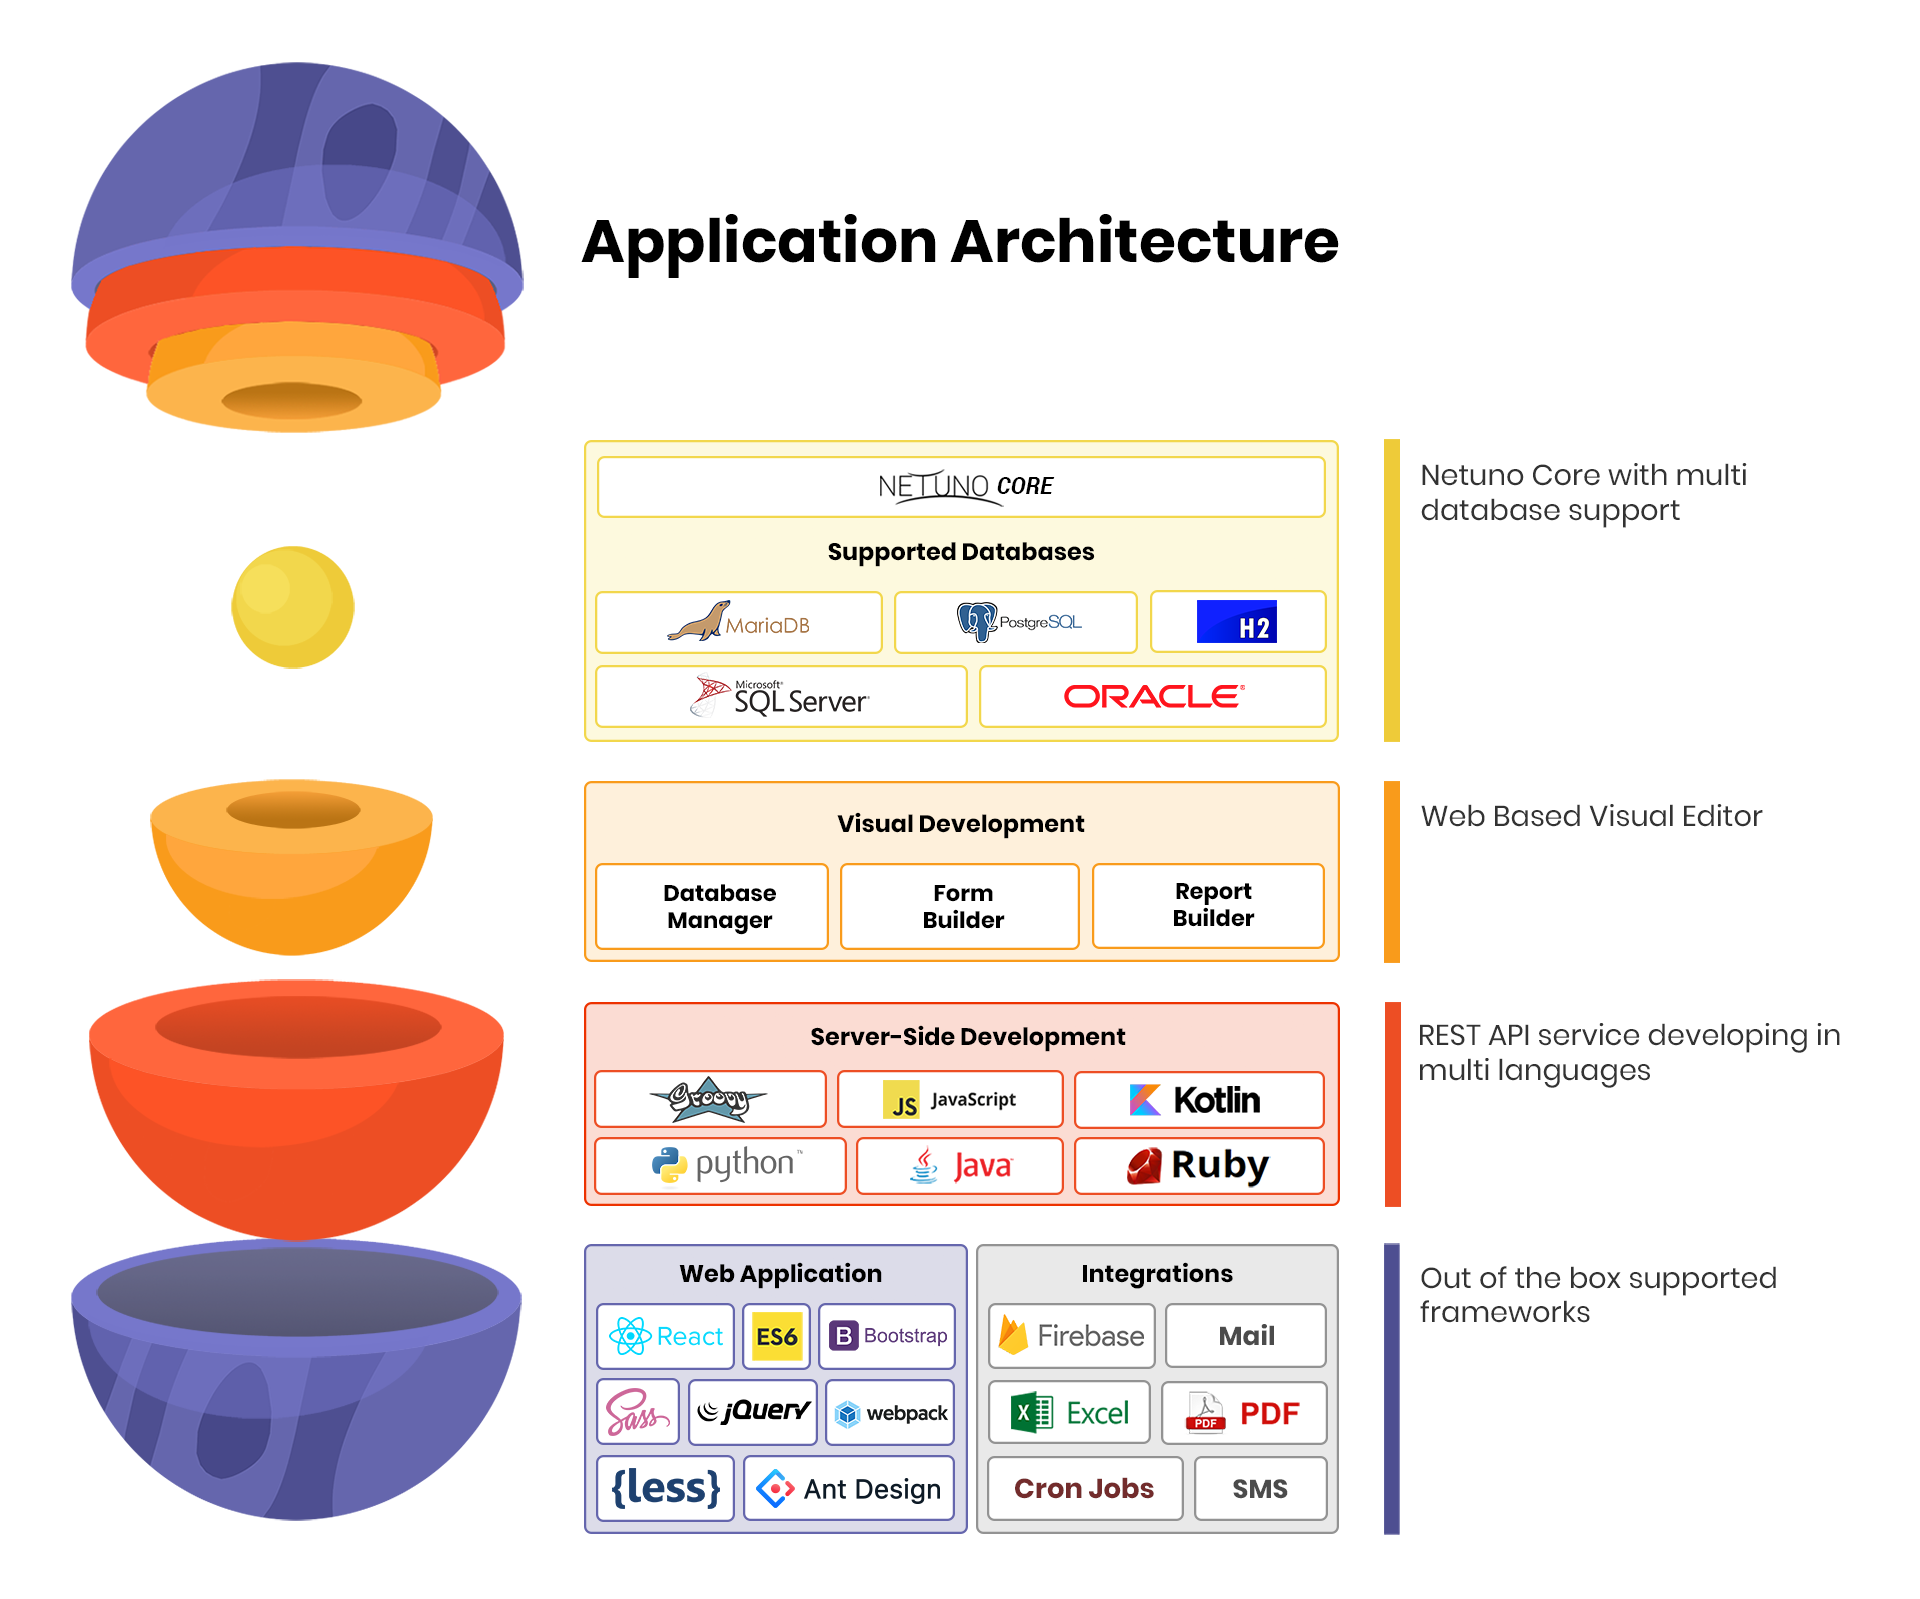
Netuno is written in Java and runs in GraalVM to facilitate web application development, it currently suppports the following programming languages:
😎 While you are programming you won't need to restart the server to compile the newly updated code.
All log outputs such as server-side, client-side (NPM
run watch) and other outputs are integrated in the same console. By having this feature you'll only need to look to one console thus easing your work.
- Linux or macOS;
- Maven
- NodeJS
- Java 11
Build scripts are currently not available for Windows, so we recommend a Linux/macOS based environment.
To install the Netuno Platform, please, follow the:
➡️ Get Started
Continue with the steps below if you want to compile from scratch and change the Netuno Platform, then start cloning this repository.
Allow permission to execute:
chmod +x setup.sh
Run the setup script:
./setup.sh
cd bundle
./publish.sh
The published Netuno version will be generated in bundle/dist/netuno* which is based on the final output generated in bundle/out/netuno.
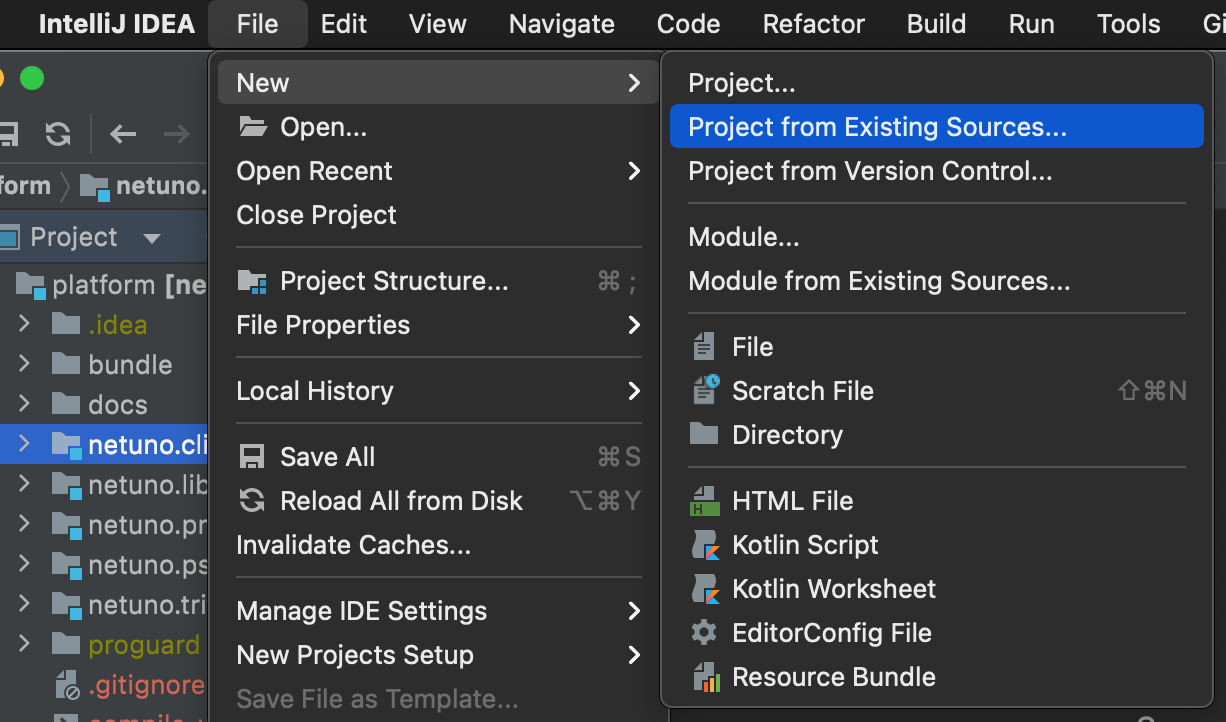
Create a new project in the menu File > New > Project from Existing Sources...
Choose the folder where this repository was cloned.
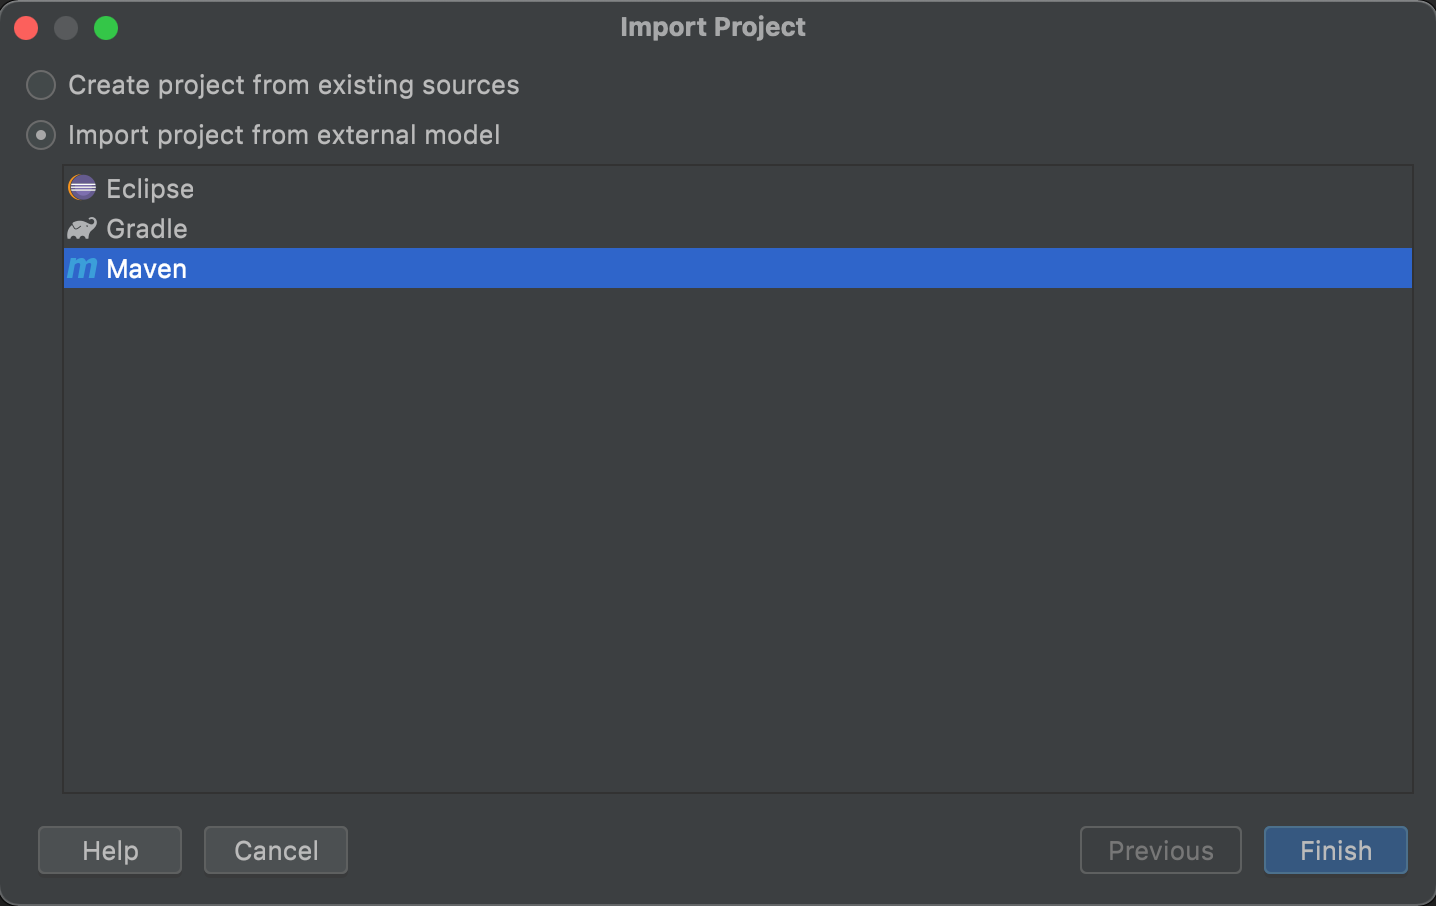
Now choose Import project from external model > Maven:
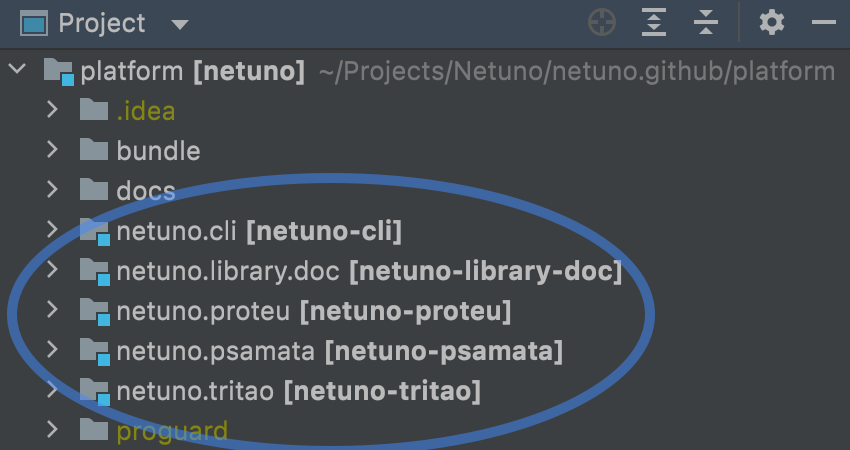
Your project panel should look like this:
These modules should be detected automatically:
- netuno.cli
- netuno.library.doc
- netuno.proteu
- netuno.psamata
- netuno.tritao
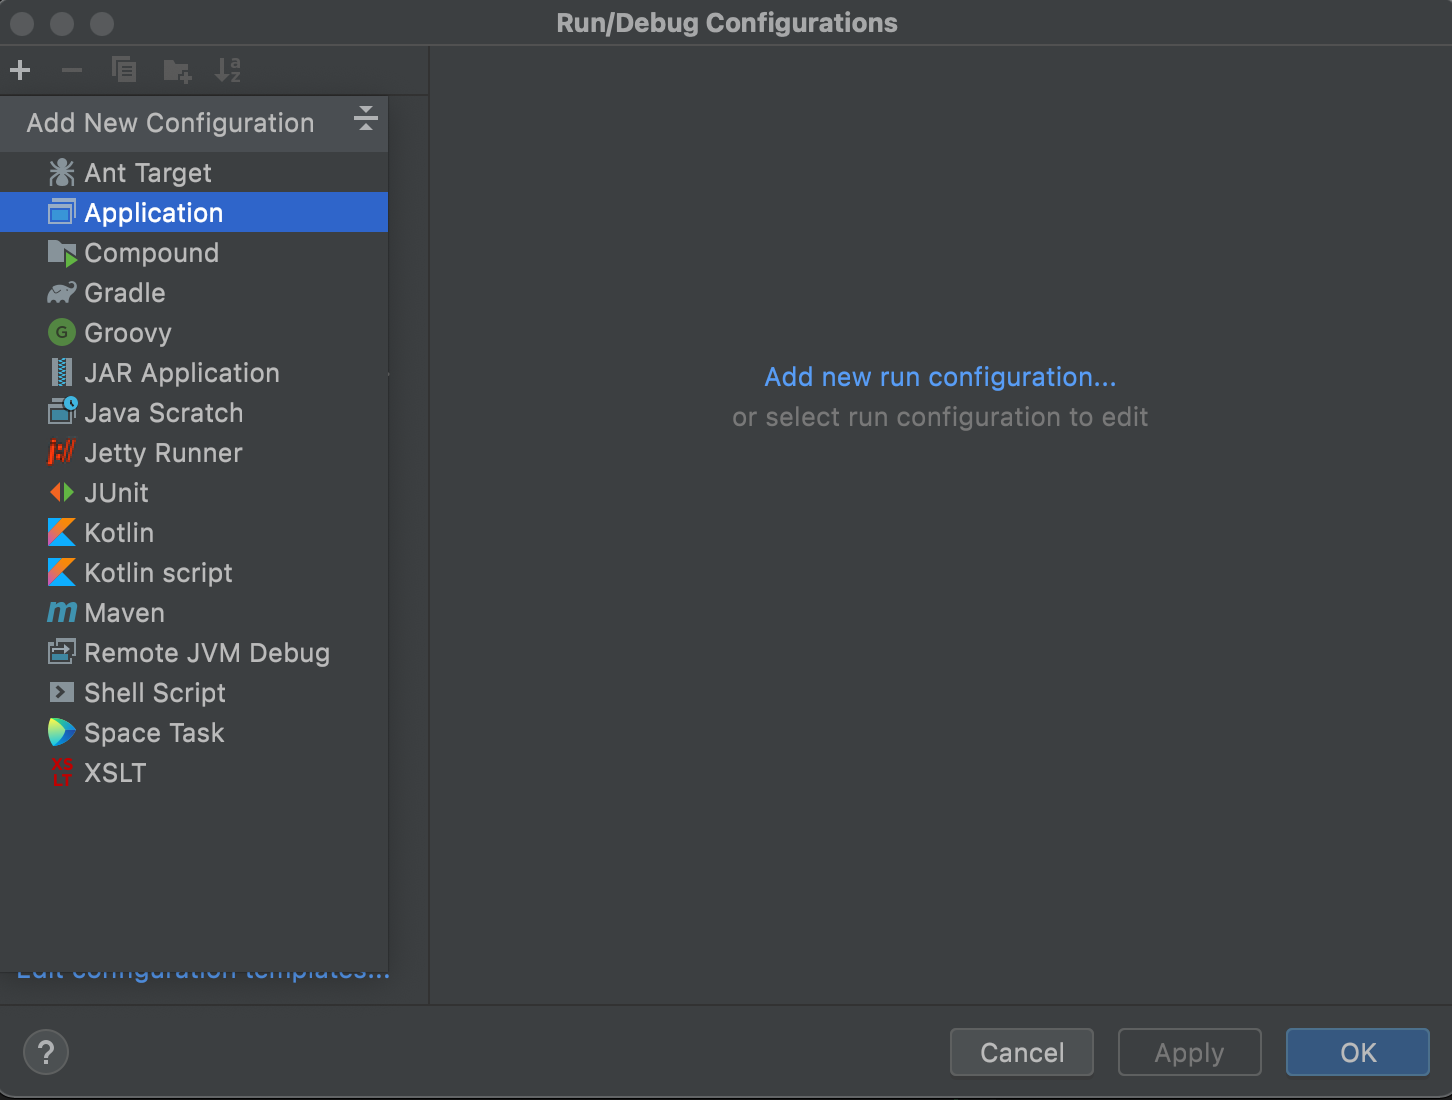
In the top bar click on Add Configuration...
Then click on the + (plus) button and choose the Application option:
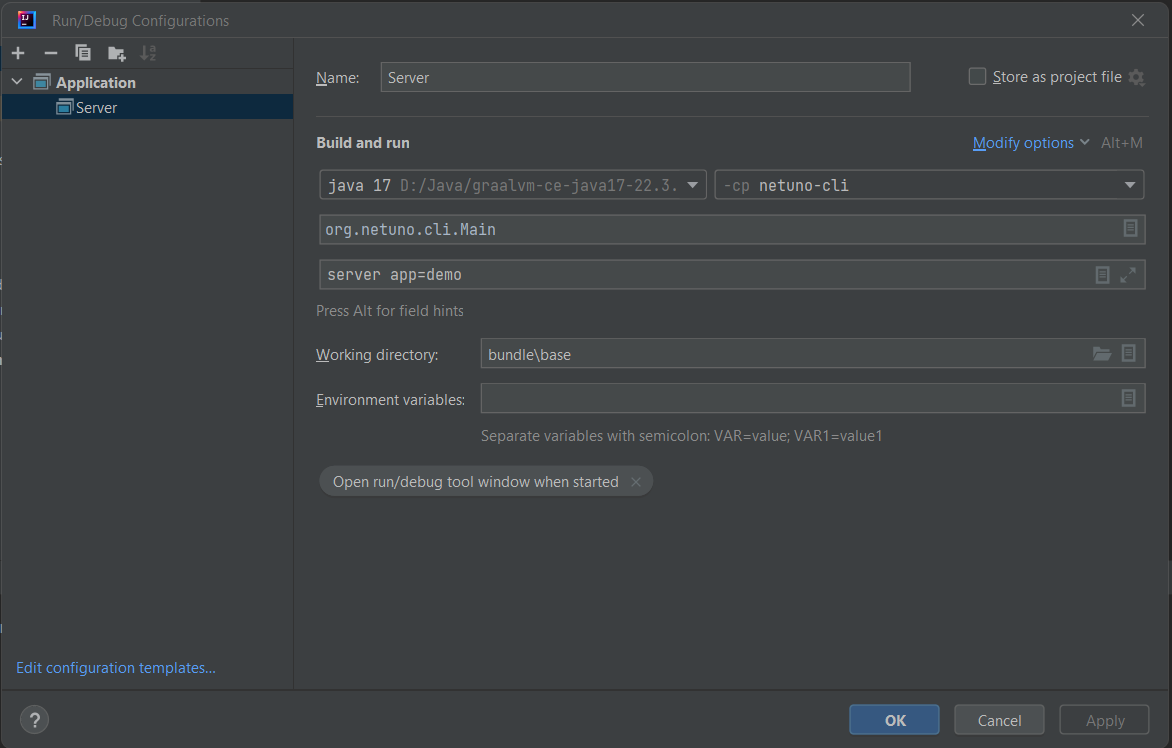
Configure the fields like this:
Make sure of:
- GraalVM with Java 11
- Module is
netuno-cli - Main class is
org.netuno.cli.Main - Working directory is
bundle/base
🎉 Have fun!
If you get this error:
Connected to the target VM, address: '127.0.0.1:62490', transport: 'socket'
Exception in thread "main" java.lang.NoClassDefFoundError: kotlin/TypeCastException
	at kotlinx.coroutines.debug.AgentPremain.<clinit>(AgentPremain.kt:26)
	at java.base/jdk.internal.reflect.NativeMethodAccessorImpl.invoke0(Native Method)
	at java.base/jdk.internal.reflect.NativeMethodAccessorImpl.invoke(NativeMethodAccessorImpl.java:62)
	at java.base/jdk.internal.reflect.DelegatingMethodAccessorImpl.invoke(DelegatingMethodAccessorImpl.java:43)
	at java.base/java.lang.reflect.Method.invoke(Method.java:566)
	at java.instrument/sun.instrument.InstrumentationImpl.loadClassAndStartAgent(InstrumentationImpl.java:513)
	at java.instrument/sun.instrument.InstrumentationImpl.loadClassAndCallPremain(InstrumentationImpl.java:525)
Caused by: java.lang.ClassNotFoundException: kotlin.TypeCastException
	at java.base/jdk.internal.loader.BuiltinClassLoader.loadClass(BuiltinClassLoader.java:581)
	at java.base/jdk.internal.loader.ClassLoaders$AppClassLoader.loadClass(ClassLoaders.java:178)
	at java.base/java.lang.ClassLoader.loadClass(ClassLoader.java:522)
	... 7 more
*** java.lang.instrument ASSERTION FAILED ***: "result" with message agent load/premain call failed at ./src/java.instrument/share/native/libinstrument/JPLISAgent.c line: 422
FATAL ERROR in native method: processing of -javaagent failed, processJavaStart failed
Disconnected from the target VM, address: '127.0.0.1:62490', transport: 'socket'

Process finished with exit code 134 (interrupted by signal 6: SIGABRT)
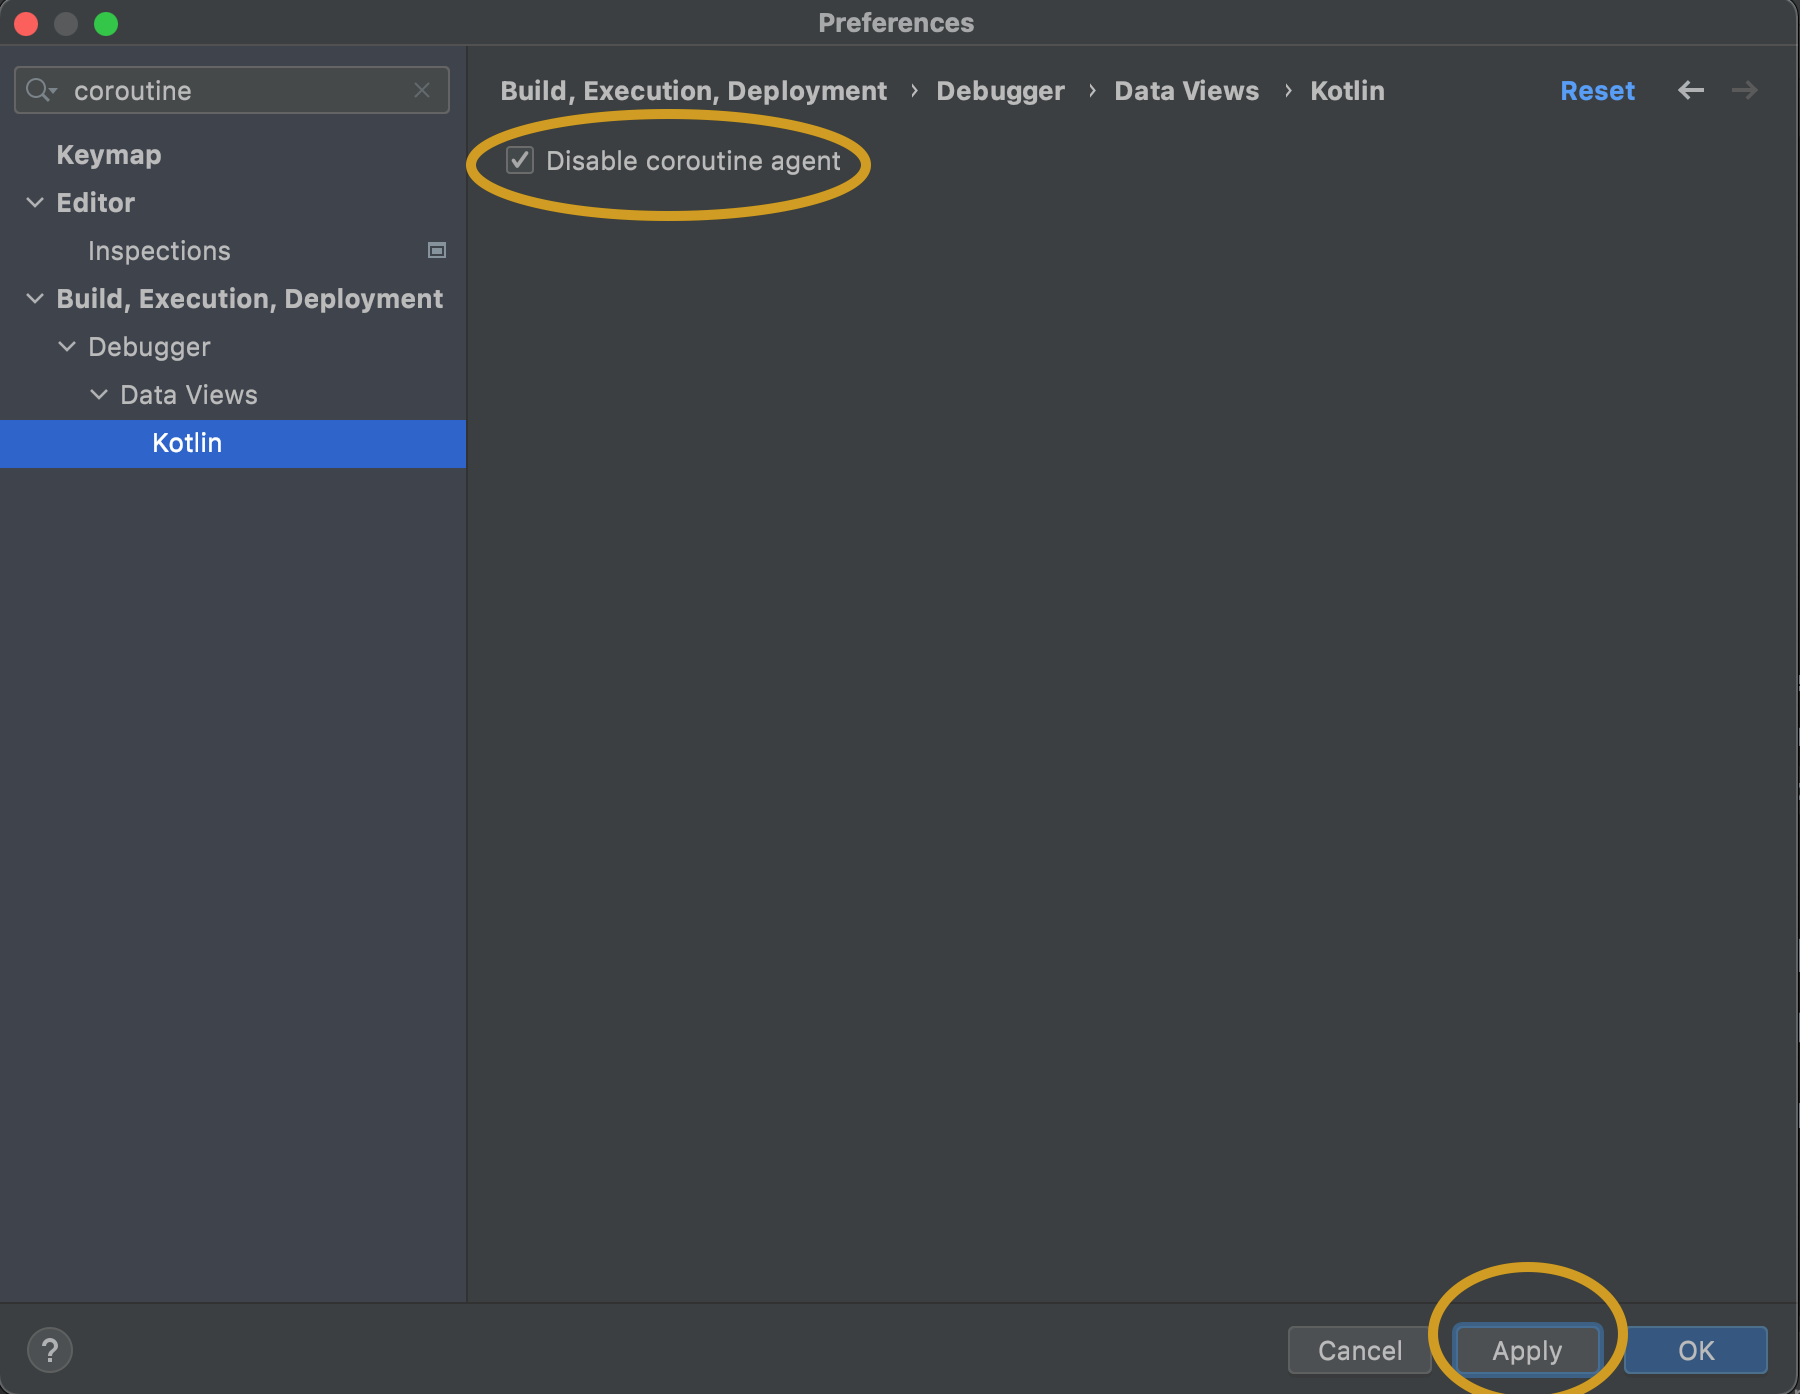
Just go to IDE Preferences and disable the coroutine agent:
Click on Apply button.
Now it should run/debug normally.

