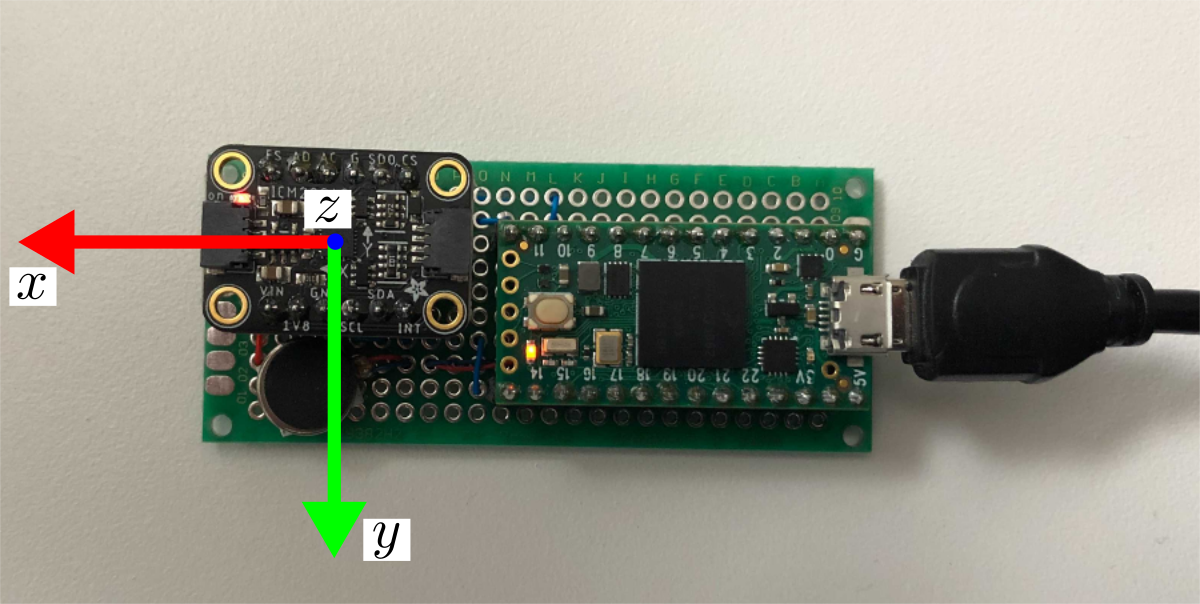
Supporting software to stream IMU (Adafruit ICM-20948) connected to Teensy 4.0 via SPI onto desktop computer via serial. Serial IO is handled in C++ and exposed to Python with pybind11.
This repo provides the teensytools Python package to allow easy access to the hardware from Python. The Python package includes the C++ serial driver for quickly communicating with the teensy. The C++ is transparent to the user via pybind11. This Python package can be installed using the pre-built binaries via pip or by building from source yourself.
Once teensytools is installed on your machine, you will be able to quickly plot data (see Examples below) like:
Note: Only Python 3 is supported. When a command uses python or pip, you may need to replace with python3 or pip3 depending on your system. You can always use python --version or pip --version to check which version is being used.
For the following systems, the teensyimu Python package can be easily installed using pip and without requiring building from source: ubuntu-18.04, ubuntu20.04, macos-catalina (potentially macos-bigsur), windows-10. To do this, we will leverage the pre-built binaries posted on the releases page.
Under the desired release version, expand the Assets list. Then, right-click the appropriate *.tar.gz link and copy the link address. You can simply direct pip to install the package at the URL. For example, using release version 0.1 on macos you would run:
$ pip install https://github.com/plusk01/teensyimu/releases/download/0.1/teensyimu-py3-macos-0.1.tar.gzOnce installed, the installation can be verified with python -m teensyimu.plotimu. If the device is not plugged in, you should see a message (Could not find Teensy!) and the script should quit gracefully. If the device is plugged in data should apppear in the terminal and a plot should open.
Note: If the latest version is desired (check here) and there is not a release matching this version, then this package needs to be built from source (see below, e.g., Linux / MacOS, and then follow "Installing Python Package from Source").
Linux / MacOS
After cloning this project onto your computer:
- Build C++ driver with Python bindings (requires Boost):
mkdir build
cd build
cmake ..
make
Once the package builds successfully, you can install the teensyimu Python package as described below.
Windows
Compilation of this package has been tested on a Windows 10 machine. The environment was setup as follows. Explicit versions used are listed, but these steps are expected to work with reasonably recent versions of these tools.
- Install git bash (2.30.1)
- Install CMake (3.19.5)
- Install Python (3.9.1)
- Install Visual Studio Community or Professional (Pro 2019, v16.8.5 with MSVC 14.28.29333)
- Install Boost (1.75.0,
boost_1_75_0-msvc-14.2-64.exe)
Once the development environment is setup, use git bash (or cmd) to run the following commands
$ git clone https://github.com/plusk01/teensyimu # clone this repo in your preferred directory
$ cd teensyimu
$ mkdir build
$ cd build
$ cmake -DBUILD_SHARED_LIBS=OFF ..
$ cmake --build . --target ALL_BUILD --config Release # or open in VS: start teensyimu.sln
$ cmake --build . --target pypkg --config Release # to tar python pkg
Once the package builds successfully, you can install the teensyimu Python package as described below.
Installing Python Package from Source
Install the built-from-source Python package with pip:
cd build
make pip-installFlash Teensy with firmware/firmware.ino sketch.
See an IMU data plot in real-time with python -m teensyimu.plotimu. Alternatively, you can see the frequency spectrum with python -m teensyimu.plotfreq
To create new or change existing messages, changes need to be made in teensyimu_serial.h and in serial_driver.cpp. For these changes to appear in Python, py_teensyimu.cpp also needs to be changed. For an example of necessary changes, see this commit where two new messages (IMU_NoMag and IMU_3DOF) were added.
If messages are changed, this project must be built from source.

