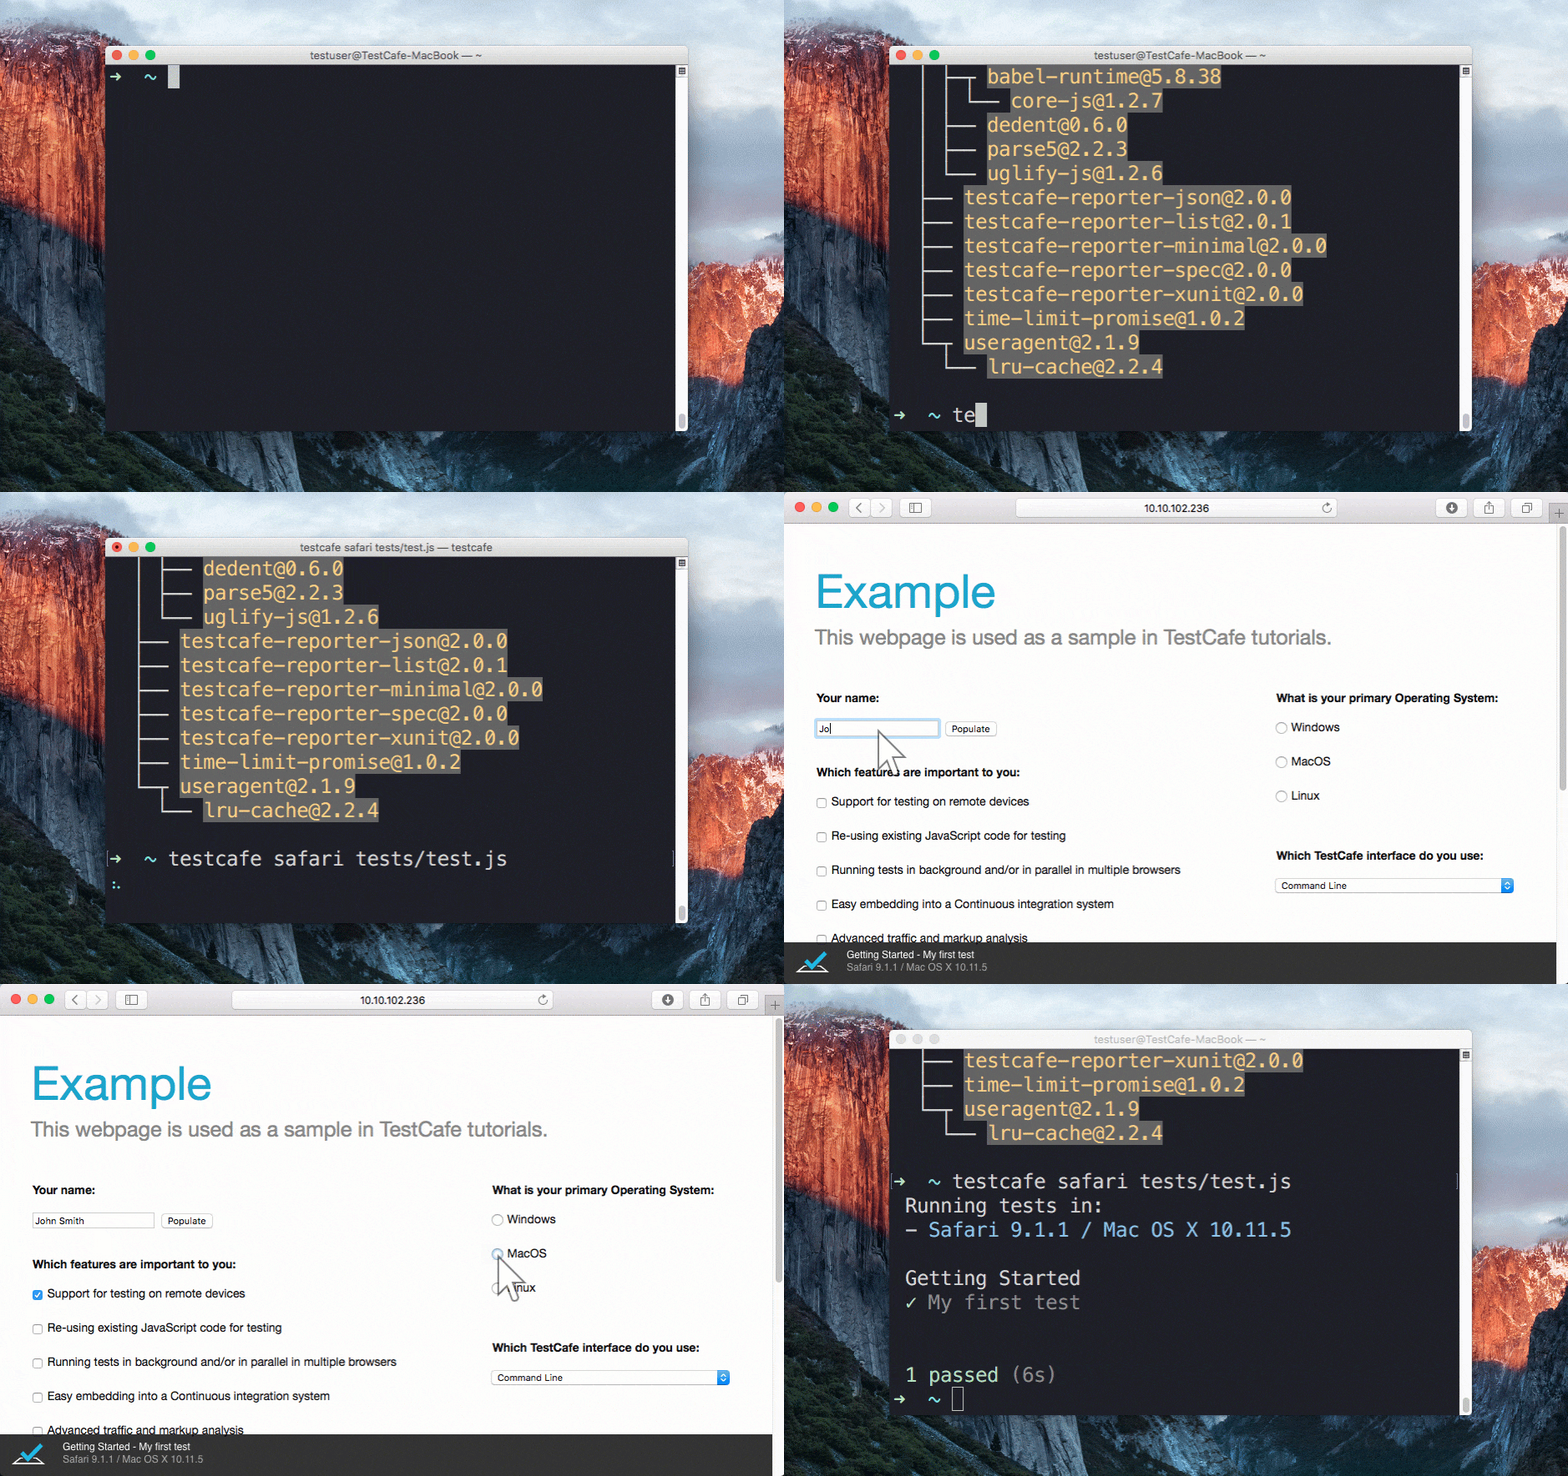
https://devexpress.github.io/testcafe
Automated browser testing for the modern web development stack.
TestCafe is a pure node.js end-to-end solution for testing web apps. It takes care of all the stages: starting browsers, running tests, gathering test results and generating reports. TestCafe doesn’t need browser plugins - it works in all popular modern browsers out-of-the-box.
- Features
- Getting Started
- Documentation
- TestCafe Ecosystem
- Roadmap
- Contributing
- Stay in Touch
- License
- Author
Everything is included in a single module installed with one command.
npm install -g testcafeNo native parts to compile, no browsers plugins to install.
TestCafe automatically starts browsers, runs tests and gathers results. You only type a single command to begin testing.
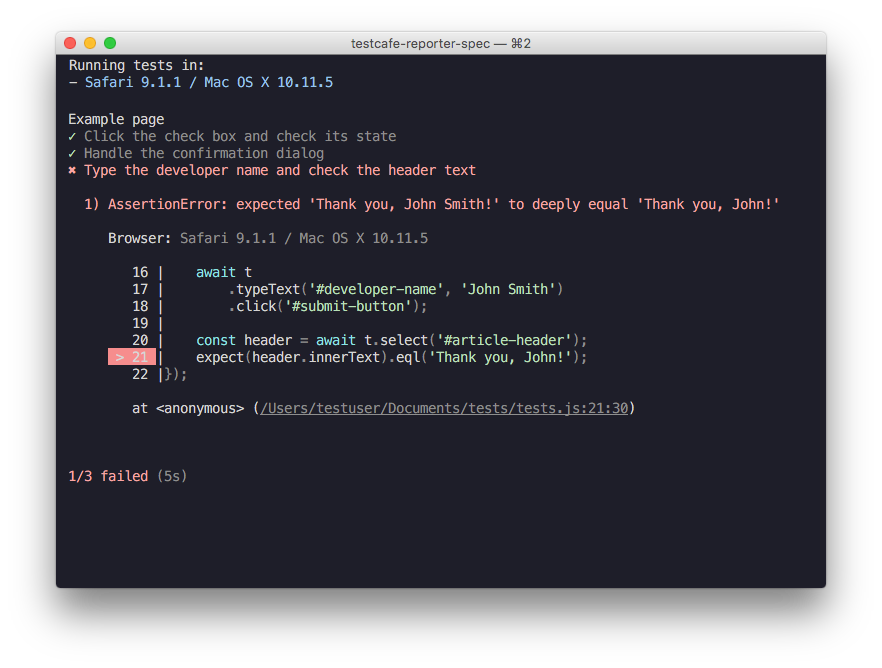
testcafe chrome tests/When testing is finished, TestCafe aggregates test results from different browsers and outputs them into one comprehensive report.
You can write TestCafe tests using the latest JavaScript features like async/await.
Test API consists of over two dozen methods that can emulate all actions one could possibly do with a webpage. Chained syntax allows for code that is easy to write and read.
fixture `Example page`
    .page `https://devexpress.github.io/testcafe/example`;

test('Emulate user actions and perform a verification', async t => {
    await t
        .setNativeDialogHandler(() => true)
        .click('#populate')
        .click('#submit-button');

    const location = await t.eval(() => window.location);

    await t.expect(location.pathname).eql('/testcafe/example/thank-you.html');
});
Additionally, TestCafe automatically generates source maps for easy debugging. To debug your test code, start a debugging session in an IDE that supports source maps.
TestCafe supports a flexible selector system that provides API with rich capabilities for writing test scripts. You can access webpage elements in different ways using selectors. For example, you can use one of the following selector types:
- CSS selector
- Text
- DOM hierarchy
- or use any custom logic
The selector API provides methods that can be combined together, thus providing you with a flexible functional-style selector mechanism.
const macOSInput = Selector('.column').find('label').withText('MacOS').child('input');Check our example that demonstrates how to create tests using declarative Page Objects built with TestCafe selectors.
TestCafe provides a full-featured set of built-in assertions, so you do not need to reference additional libraries. Use assertions with Selector's DOM node state properties to enable the Smart Assertion Query Mechanism and create stable, fast and reliable tests that do not depend on page response time.
import { Selector } from 'testcafe';

fixture `Example page`
    .page `http://devexpress.github.io/testcafe/example/`;

test('Check property of element', async t => {
    const developerNameInput = Selector('#developer-name');

    await t
        .expect(developerNameInput.value).eql('', 'input is empty')
        .typeText(developerNameInput, 'Peter Parker')
        .expect(developerNameInput.value).contains('Peter', 'input contains text "Peter"');
});Write tests without boilerplate code.
- TestCafe automatically waits for page loads and XHRs to complete, as well as for DOM elements to become visible. You do not need to write custom code for that.
- Test runs are isolated, which means that they do not share cookies, local or session storages. There is nothing to clean up between test runs.
TestCafe automatically generates full-detailed reports that provide a test run summary and comprehensive information about errors. Automatic page screenshots, fancy call sites and call stacks free of TestCafe internals allow you to easily detect error causes.
Use one of built-in reporters to output test results or create your own one to produce custom reports.
TestCafe is easy to set up on popular Continuous Integration platforms as it allows you to test against various browsers: local, remote, cloud (e.g., Sauce Labs) or headless (e.g. Nightmare). You can also create a custom browser provider to add support for a browser or a cloud platform of your choice.
- Automatic screenshots of the tested page taken whenever the test fails or triggered from test code.
- File upload support.
- Detecting JavaScript errors on the tested page.
- Handling native browser dialogs (i.e., alert, confirm, prompt, beforeunload ) using custom logic whenever they are invoked during a test run.
- Resizing the browser window during test execution.
- Adjusting the speed of test execution.
Ensure that Node.js and npm are installed on your computer, then run a single command:
npm install -g testcafeFor more information, see Installing TestCafe.
To create a test, create a new .js file anywhere on your computer. This file must have a special structure: tests must be organized into fixtures. Thus, begin by declaring a fixture using the fixture function.
fixture `Getting Started`In this tutorial, you will create a test for the https://devexpress.github.io/testcafe/example sample page. Specify this page as a start page for the fixture by using the page function.
fixture `Getting Started`
    .page `https://devexpress.github.io/testcafe/example`;
Then, create the test function where you will place test code.
fixture `Getting Started`
    .page `https://devexpress.github.io/testcafe/example`;

test('My first test', async t => {
    // Test code
});You can simply run the test from a command shell by calling a single command where you specify the target browser and file path.
testcafe chrome test1.jsTestCafe will automatically open the chosen browser and start test execution within it.
Important! Make sure to keep the browser tab that is running tests active. Do not minimize the browser window. Inactive tabs and minimized browser windows switch to a lower resource consumption mode where tests are not guaranteed to execute correctly.
For more information on how to configure the test run, see Command Line Interface.
While the test is running, TestCafe is gathering information about the test run and outputting the report right into a command shell.
For more information, see Reporters.
Every test should be capable of interacting with page content. To perform user actions, TestCafe provides
a number of actions: click, hover, typeText, setFilesToUpload, etc.
They can be called in a chain.
The following fixture contains a simple test that types a developer name into a text editor and then clicks the Submit button.
fixture `Getting Started`
    .page `https://devexpress.github.io/testcafe/example`;

test('My first test', async t => {
    await t
        .typeText('#developer-name', 'John Smith')
        .click('#submit-button');
});
All test actions are implemented as async functions of the test controller object t.
This object is used to access test run API.
To wait for actions to complete, use the await keyword when calling these actions or action chains.
TestCafe allows you to observe the page state. For this purpose, it offers special kinds of functions that will execute your code on the client: Selector used to get direct access to DOM elements and ClientFunction used to obtain arbitrary data from the client side. You call these functions as regular async functions, that is you can obtain their results and use parameters to pass data to them.
The selector API provides methods and properties to select elements on the page and get theirs state.
For example, clicking the Submit button on the sample web page opens a "Thank you" page.
To get access to DOM elements on the opened page, the Selector function can be used.
The following example demonstrates how to access the article header element and obtain its actual text.
import { Selector } from 'testcafe';

fixture `Getting Started`
    .page `http://devexpress.github.io/testcafe/example`;

test('My first test', async t => {
    await t
        .typeText('#developer-name', 'John Smith')
        .click('#submit-button');

    const articleHeader = await Selector('.result-content').find('h1');

    // Obtain the text of the article header
    let headerText = await articleHeader.innerText;
});
For more information, see Selecting Page Elements.
A functional test also should check the result of actions performed. For example, the article header on the "Thank you" page should address a user by the entered name. To check if the header is correct, you have to add an assertion to the test.
The following test demonstrates how to use build-in assertions.
import { Selector } from 'testcafe';

fixture `Getting Started`
    .page('https://devexpress.github.io/testcafe/example');

test('My first test', async t => {
    await t
        .typeText('#developer-name', 'John Smith')
        .click('#submit-button')
        // Use the assertion to check if the actual header text is equal to the expected one
        .expect(Selector('#article-header').innerText).eql('Thank you, John Smith!');
});The following plugins make your work with TestCafe easy and introduce new features.
Run tests and view test results right from your favorite IDE.
Work with page elements in a way that is native to your framework.
Easily integrate TestCafe into your project's workflow.
Provide support for more browsers to test against.
Enable TestCafe to present test results in different formats.
Use ESLint when writing and editing TestCafe tests.
We are grateful to BrowserStack for providing infrastructure that we use to test code in this repository.
We plan to introduce other outstanding features so that you can test apps with even more efficiency. Meanwhile, you can help us improve TestCafe by voting for features on our roadmap.
Please use our issues page to report a bug or request a feature.
For general purpose questions and discussions, use the discussion board.
For more information on how to help us improve TestCafe, please see the CONTRIBUTING.md file.
Developer Express Inc. (https://devexpress.com)


