The Dark Forest client deploy process is set up for players to easily fork the client and connect to the mainnet game, but that design decision currently makes it difficult to run a playable version of the game locally. This repository provides a setup for running a local game with just a few steps.
For a comprehensive tutorial on using this repository to make custom local games and deploy them, check out the Builder's Guide.
This repo uses submodules to pair the Dark Forest Ethereum backend with the Dark Forest TypeScript frontend so you can launch a local game.
It also uses Yarn, a package manager (like npm) that allows for multiple workspaces to exist within a project.
The workspaces allows each submodule to have their own packages and configuration.
Yarn places all of the packages for each submodule in the top level node_modules/ folder.
- Fork darkforest-local to your GitHub account
git clone --recurse-submodules https://github.com/<your_name>/darkforest-local.git- If you didn't clone with
--recurse-submodulesor already have a cloned version:git submodule update --init --recursive --remote --merge yarnyarn start
- Fork darkforest-local to your GitHub account
- Fork darkforest-eth/eth to your GitHub account
- Fork darkforest-eth/client to your GitHub account
- Fork darkforest-eth/circuits to your GitHub account
- Fork darkforest-eth/packages to your GitHub account
- Clone your darkforest-local repo:
git clone https://github.com/<your_name>/darkforest-local.git - Update the
.gitmodulesfile to point to your new forks ofeth,client,circuits, andpackagesex:url = https://github.com/darkforest-eth/eth=>url = https://github.com/cha0sg0d/ethurl = https://github.com/darkforest-eth/client=>url = https://github.com/cha0sg0d/clienturl = https://github.com/darkforest-eth/circuits=>url = https://github.com/cha0sg0d/circuitsurl = https://github.com/darkforest-eth/packages=>url = https://github.com/cha0sg0d/packages
- Fetch the code from the submodules
git submodule update --init --recursive
- Add new branches for developing:
- The
darkforest-localmonorepo detaches the submodules from their current HEADs. If you want to save your changes (for example, if you're testing an new contract ineth), you'll need to make a new branch in these submodules.
cd ethgit checkout -b <new_name>
cd clientgit checkout -b <new_name>
cd circuitsgit checkout -b <new_name>
cd packagesgit checkout -b <new_name>
- The
- Install packages and dependencies
yarn
- Start a game
yarn start
-
Running
yarn start, will 1) start a local node, 2) deploy the contracts, and 3) run the local client in dev mode -
When finished, the process should pop up your browser to the game client at http://localhost:8081/
-
Here are 3 private keys with 100 ETH each to use in the game:
0x044C7963E9A89D4F8B64AB23E02E97B2E00DD57FCB60F316AC69B77135003AEF0x523170AAE57904F24FFE1F61B7E4FF9E9A0CE7557987C2FC034EACB1C267B4AE0x67195c963ff445314e667112ab22f4a7404bad7f9746564eb409b9bb8c6aed32
If you want to deploy the contracts (with whatever modifications you want) to mainnet, and client code (with whatever modifications you want), you can follow these instructions. The reasons you might want to do this could be one of:
- You want to run a community round of Dark Forest
- You want to run a multiplayer round with some friends
- etc.
Deploying to production is quite similar to deploying a local version of the game, but I'm going to walk through the steps explicitly here.
Unlike in development mode, in production mode you will need to create a .env file in both the
client/ and eth/ submodules. You can find the set of environment variables you will need to
populate those .env files with in their adjacent .env.example files.
Danger! The
.envfiles ARE in the respective.gitignores of the aforementioned submodules, however you should also manually make sure that they don't end up checked into your repository.
To randomly generate a new deployer private key and mnemonic for eth/.env, run
yarn workspace eth hardhat wallet:newYou should see something like this:
To deploy the contracts, you will need to run the following command:
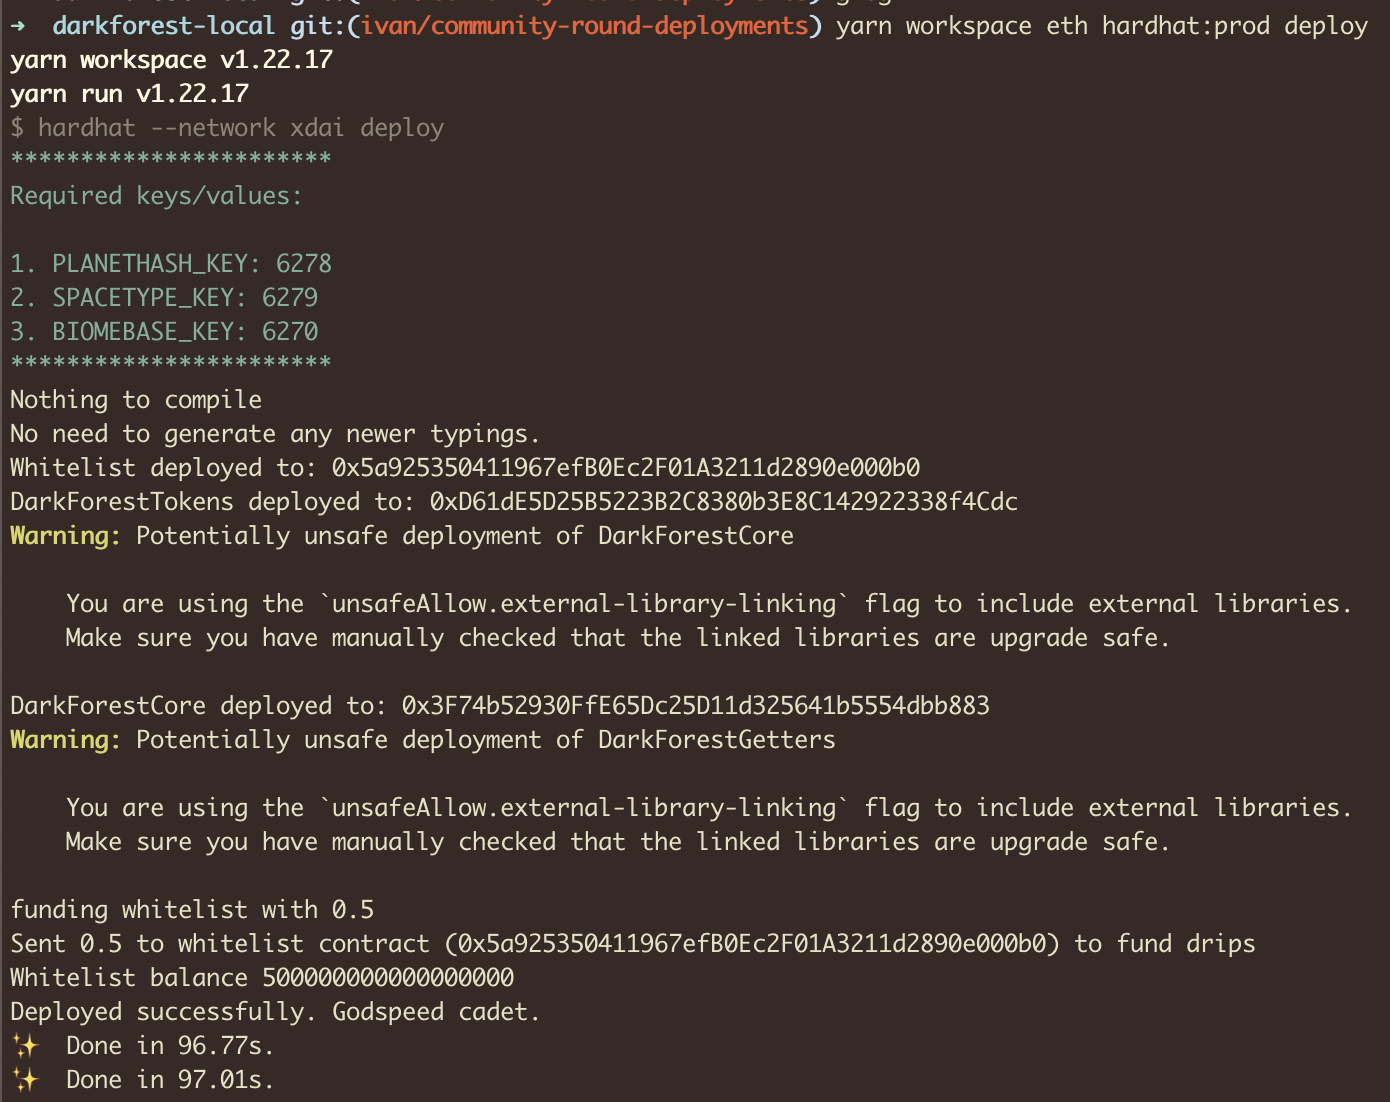
yarn workspace eth hardhat:prod deployYou should see something like this:
To find out more information about the contracts submodule, you can look here:
https://github.com/darkforest-eth/eth.
To deploy the website interface, you may either self-host, or use the same infra that we use - Netlify. This is a simple option, and free for up to some amount of gigabytes of bandwidth per month, which has often been enough for us.
To use Netlify:
-
Make a new Netlify account using your Github profile.
-
Import your forked darkforest-local repo as a new Netlify site.
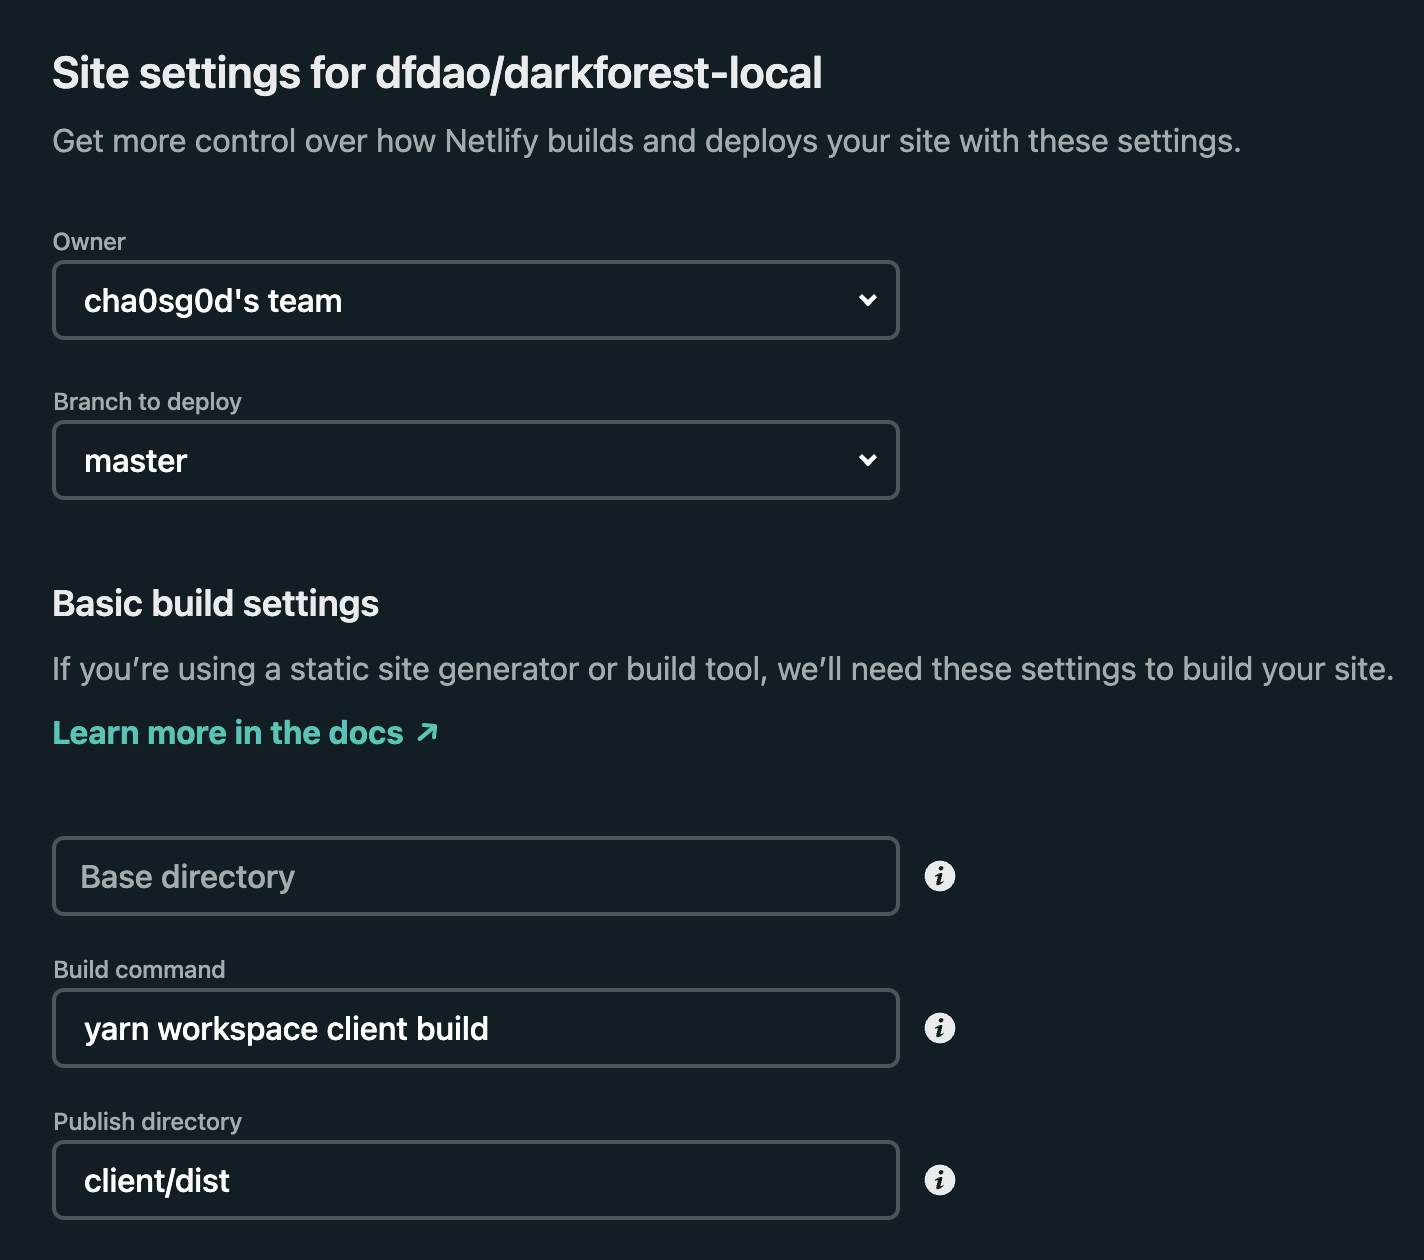
- During Step 3 of the import (Site settings, and deploy!):
- Build command:
yarn workspace client build - Publish directory:
client/dist
- Build command:
Your initial settings should look like this:
Importing from Github will automatically trigger an initial build by Netlify, which will take ~5 min.
- During Step 3 of the import (Site settings, and deploy!):
-
Install the Netlify CLI
npm install netlify-cli -g
-
Login to your account
netlify login
-
Connect to your app
netlify link
-
Choose Enter a site ID
-
Input the id that you find by clicking on your new site on Netlify. In this example, the id is
jolly-hermann-3947ca -
Now that your site is linked, you can deploy to Netlify from the CLI.
-
yarn deploy:client:prod -
If successful, you will see something like this.
-
By default, all future changes to the branch you specified in the settings will result in an automatic deploy (in this case
master). -
You can still choose to deploy manually (via
yarn deploy:client:prod). -
Additionally, if you want to stop auto-publishing via git updates, see this image:
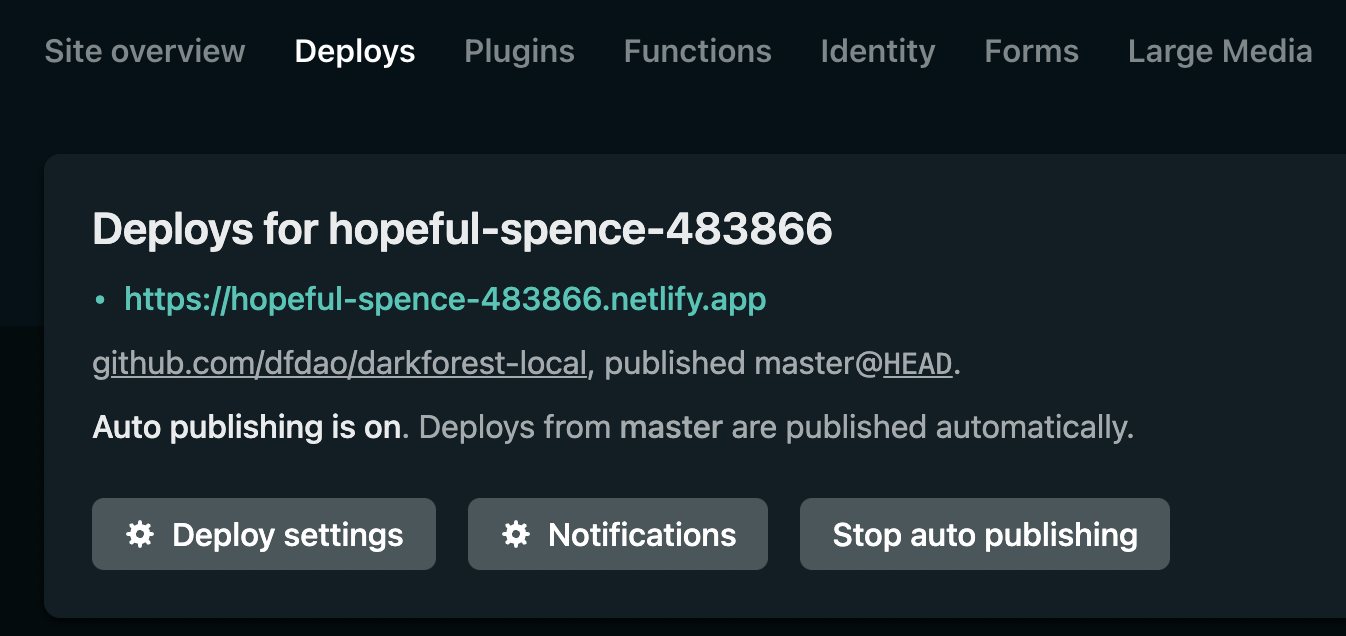
-
The default implementation of Dark Forest ships with a whitelist contract. When we deployed the contracts in Step 1, amongst them was this whitelist contract. A 'static' deployment of Dark Forest (no web server) isn't capable of submitting a whitelisting transaction on behalf of the user (which lets a given burner address into the game and drips it a fraction of an xDAI).
This means that if you want to let players into your game, you must first collect their addresses.
If you want to generate a burner wallet on the CLI for testing, follow the same steps from Step 1:
yarn workspace eth hardhat:dev wallet:newOnce you collect the addresses of the people you want to let into your world, you can register them individually via the following command
yarn workspace eth hardhat:prod whitelist:register --address $BURNER_WALLET_ADDRESS
# where $BURNER_WALLET_ADDRESS is the network address of the player you want to allow to play in
# your deployment of the game.
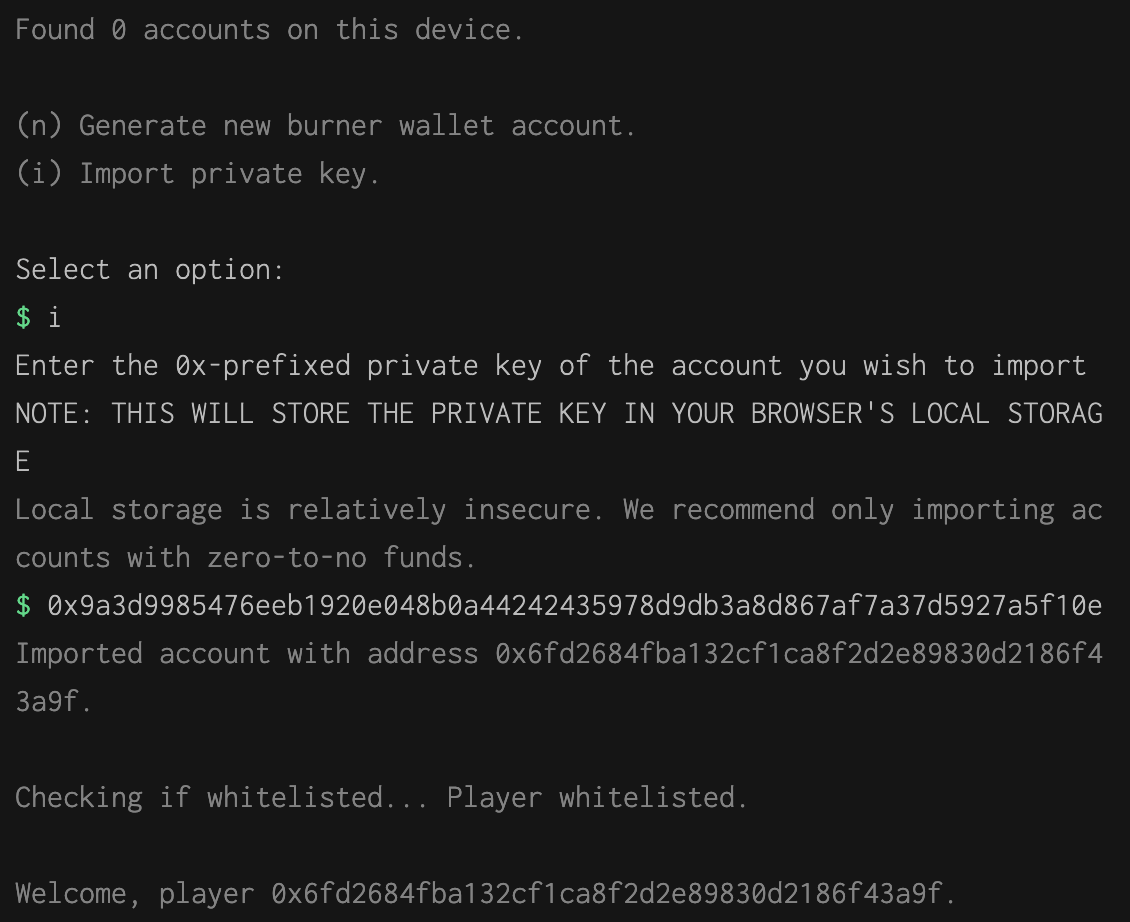
If everything worked properly, you should be able to log in:
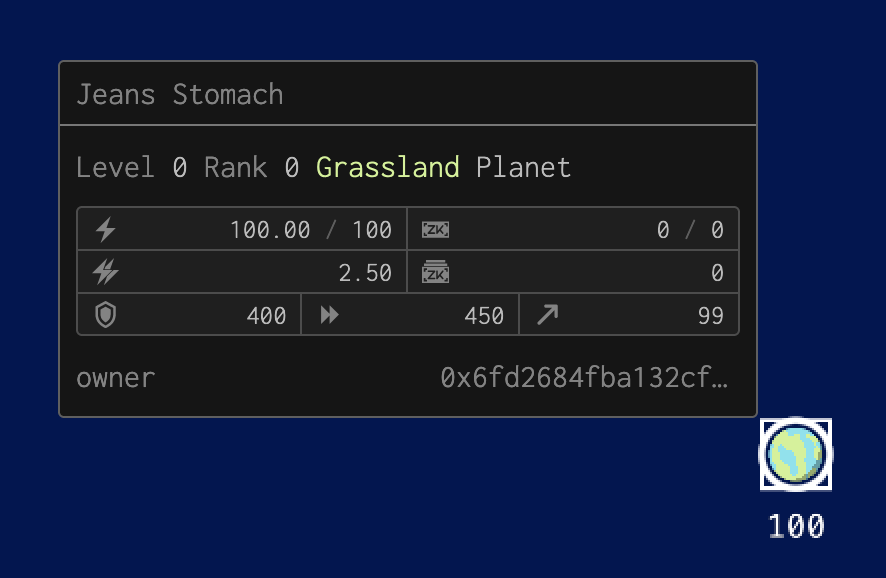
Then, once you've found a home planet, you should be able to enter the game!
- Now go the URL given by Netlify → something like https://jolly-hermann-3947ca.netlify.app/ and test out your game! Login with one of the private keys for the addresses that were whitelisted. Make some moves and test that everything works as expected.
If theres been new Dark Forest updates released and we haven't yet updated this repo yet, it is possible you can get away with updating yourself by running git submodule update --remote --merge and remember to run yarn again.
- Update the submodules.
- Replace the root
yarn.lockwith theyarn.lockfrometh/orclient/ - Run
yarn. - Finally add all changes, commit, and PR.

