A simple Arduino code for ESP32 to control GPIO with Telegram bot, to use this code you need to install the ESP32 board on Arduino IDE and install the Universal Telegram Bot library. At the top of the code you need to enter your Wi-Fi credentials, your bot token* and your Telegram chat ID**.
// Set the Wi-Fi credentials
const char *ssid = "YourWiFiSSID";
const char *password = "YourWiFiPassword";

// Set the Telegram parameters
String BOTtoken = "1234567890:ABCdefgHiJk0MNO1PQrsT1U2_V3Xyz25AYX"; // Your bot token
String CHAT_ID = "1234567891011"; // Your chat ID
*If you don't have a Telegram bot or don't know how to find the bot token, follow this tutorial: How to Create and Connect a Telegram Chatbot
**To get your chat ID, open @myidbot in your telegram and type the /getid command, the bot will be return the your user ID. With you can add your bot to a group, you will need the group ID (see Get Telegram Chat ID), and you need to allow the bot to have read access to messages in the group to receive commands.
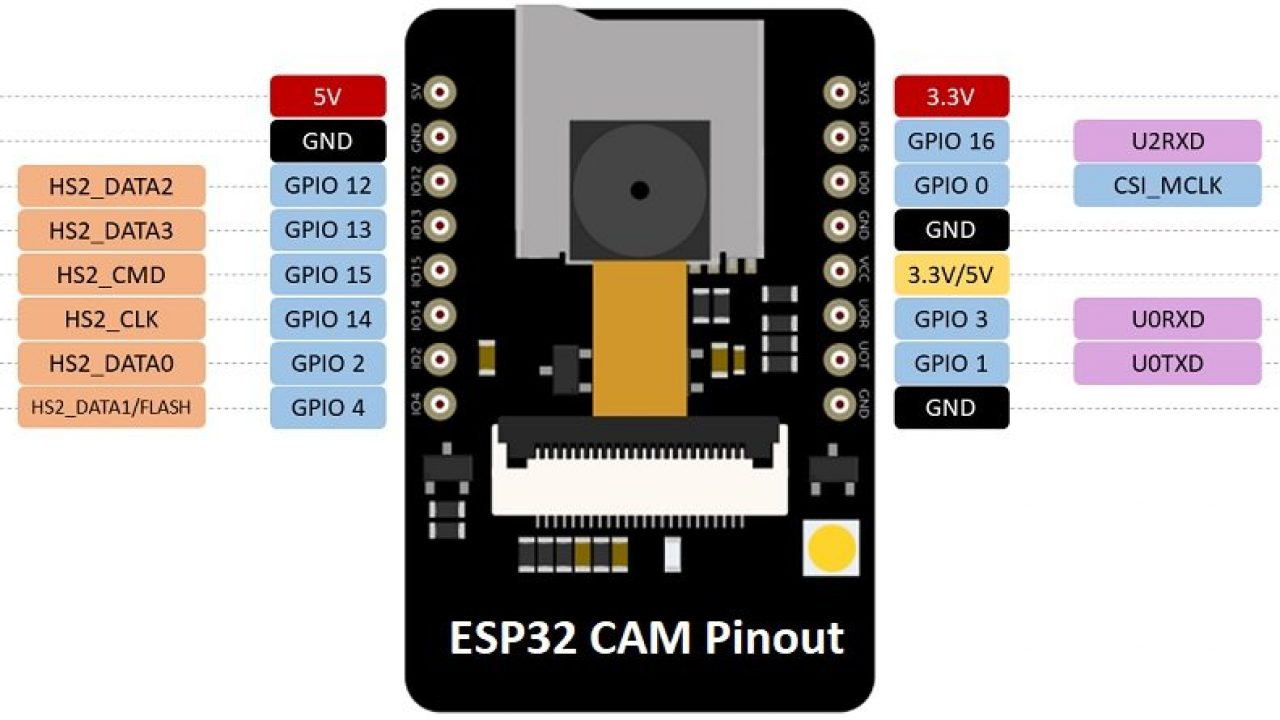
In this example, I used an ESP32-Cam board that has an internal led on GPIO 4 and I add an external led on GPIO 2 to test the blink.

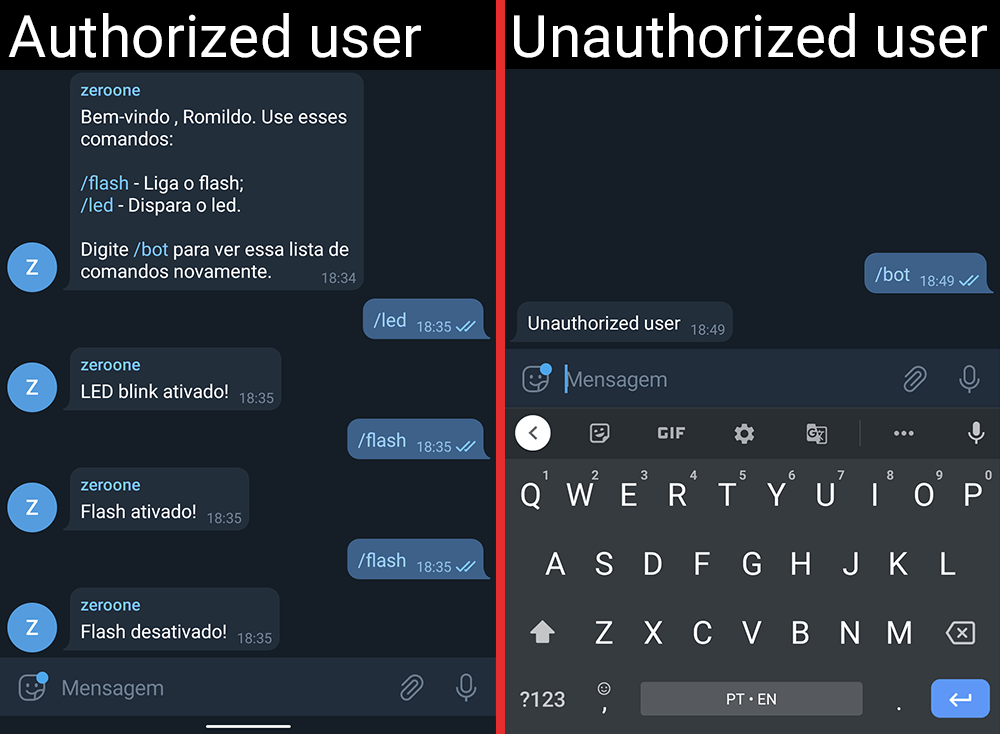
When an authorized user sends /bot command, the ESP32 returns a message with the available commands, if type any command, will execute the action and reply. If an unauthorized user sends a command, the bot reply "unauthorized user".
Test video:
The serial output to debug:
Connecting to Wi-Fi SSID
..
ESP32-CAM IP: 123.456.7.890
Reply...
Handle New Messages: 1
Received message: /bot
Reply...
Handle New Messages: 1
Received message: /led
LED blink on!
Reply...
Handle New Messages: 1
Received message: /flash
Flash on!
Reply...
Handle New Messages: 1
Received message: /flash
Flash off!
Reply...

