Contents
- How to use scripts in InDesign
- How to write scripts in InDesign
- Frequently Asked Questions
- Script De-script-ions
This guide will be using Adobe CC 2019 on Mac OS X, but the overall process should be similar on different versions and operating systems.
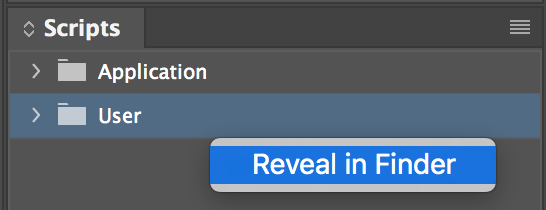
- To locate your Scripts folder, open InDesign. Open the Scripts panel (Window > Utilities > Scripts). Right-click on the User folder, and select Reveal in Finder. This is where you can save any JavaScript files you want to run in InDesign.
- Navigate to a specific GitHub script you'd like to download, like this one. Right-click on "Raw" in the upper right-hand corner of the page, and Save Link As...
- Save the JavaScript file in the folder you found in Step 1. When you go back to the Scripts panel in InDesign, you should now see the file.
- You can run the file either by:
- Right-click and Run Script
- Double-clicking on the script
- Assigning the script to a keyboard shortcut (see Setting up Keyboard Shortcuts below)
Once you have a file available in the Scripts panel, you can assign it to any available keyboard shortcut for easy access.
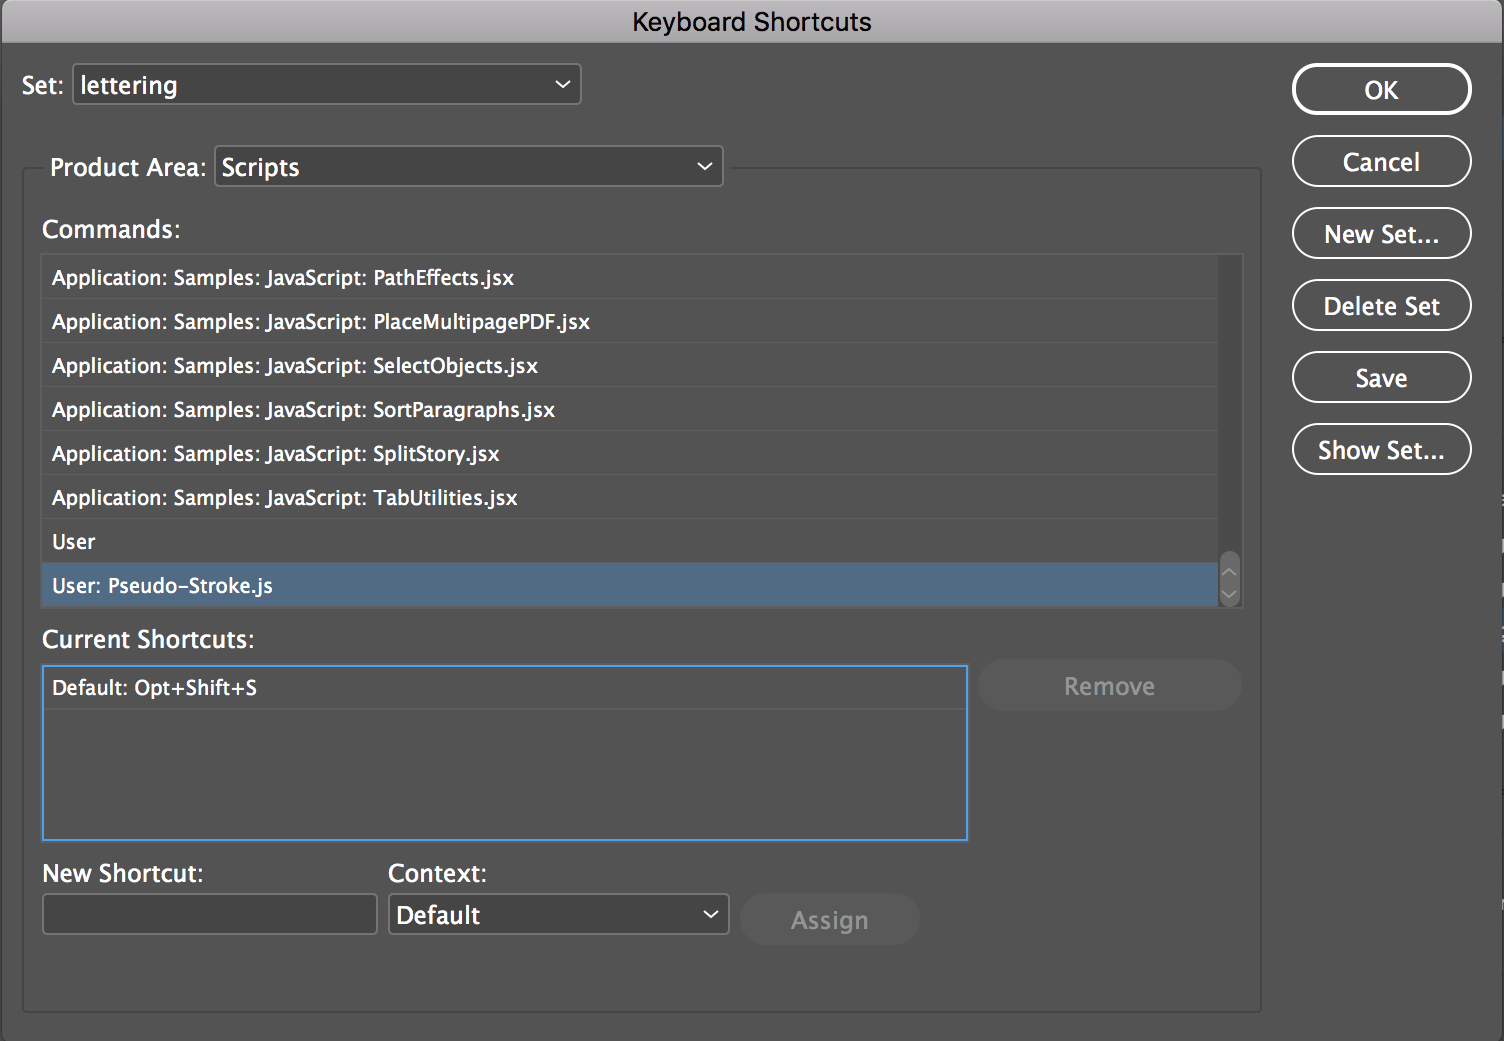
- In InDesign, open Edit > Keyboard Shortcuts...
- Select the Product Area as Scripts
- Select whichever script you'd like to assign a shortcut. In the New Shortcut field, press your desired keystroke, and then click Assign to save it. Finally, click OK.
- Install Visual Studio Code
- In VS Code, install the Adobe Script Runner Extension
- Open Keyboard Shortcuts (On Windows,
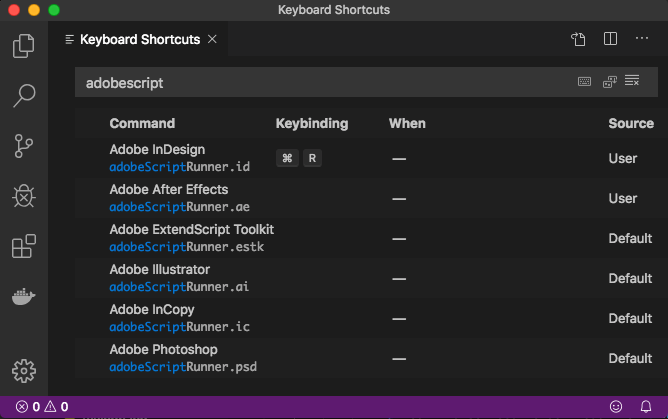
File > Preferences > Keyboard Shortcuts/ On Mac,Code > Preferences > Keyboard Shortcuts) - In the search bar, type "adobescriptrunner"

- Reset the keybinding for
Command/Control + Rto be InDesign. Refer to this guide for help with binding keyboard shortcuts.
- Make sure that InDesign is open.
- In VS Code, open a new text file (
Command/Control + N), and copy and paste the script below into it:
alert("Hello World")
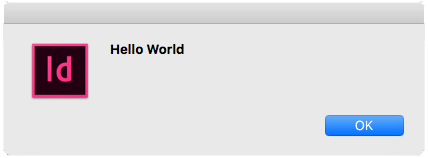
- Press
Command/Control + R(the shortcut from the setup section above), and you should get this popup in InDesign:
(optional) You can also set up the ExtendScript Debugger extension for a true debugging experience, though I've had mixed results attaching it to the InDesign process.
To help you get started, here are a couple sample scripts.
Keep in mind that ExtendScript is based off of a very outdated version of Javascript, so it does not support most modern functions. Here are some examples of features that are not supported:
Display info about the current active page:
var activePage = app.activeWindow.activePage;
alert('Page ' + activePage.name + '\n'
    + 'Text Frames: ' + activePage.textFrames.length + '\n'
    + 'Graphics: ' + activePage.allGraphics.length + '\n'
    + 'Side: ' + activePage.side.toString() + '\n'
    + 'Bounds: ' + activePage.bounds);
Display the contents of all the selected text frames, without line breaks:
var selections = app.selection,
    output = "";
for(var i = 0; i < selections.length; i++){
    if(selections[i] instanceof TextFrame && !!selections[i].contents){
        output += selections[i].contents.replace(/[^\S ]+/g,'') + '\n';
    }
}
alert(output);
I only have access to Adobe CC, so that's the only place I'm able to test them. I have no idea if they'll work on your computer, but I try my best not to use features I know aren't supported before CC.
Creative Cloud will try to migrate scripts over between versions automatically, but it can mess scripts up. Please re-install affected scripts before reaching out with some info to help me debug.
Before reaching out to me, please make sure you have correctly installed the script, and that you've read the instructions at the top of the script file.
I'm only able to test scripts on my own files and workflow, so there are bound to be discrepancies.
I'm happy to help you figure out what's wrong, but I need the following from you:
- What steps make this issue happen?
- Was there an error message that popped up? What did it say?
- What version of InDesign are you using?
- What operating system are you using (Mac/Windows)?
- (Optional) A sample file that you can reproduce the issue in reliably
Sometimes InDesign's migration tool messes up Javascript files. I recommend either:
- Downloading the scripts again
- Manually copying and pasting your old Scripts Panel folder into the new Scripts Panel folder
- See Step 1 of the Installation Guide for help finding the Scripts Panel folder
If neither of those fix the issue, see Why didn't this script work?.
- Adobe CC 2020
- Visual Studio Code
- VS Code Adobe Script Runner Extension
- VS Code ExtendScript Debugger
I do not recommend using the ExtendScript Toolkit application from Adobe. It's no longer supported in CC, and it's a very clunky experience.
Yes, you can use parts of these scripts in your own so long as you:
- Do not sell them
- Credit me
Sure! Feel free to shoot me a DM on Twitter.
A common operation when balancing text is to add a line break to the top or bottom. There are 4 scripts that you can assign to keyboard shortcuts to do this quickly:
- Add Break to Bottom.js
- Add Break to Top.js
- Add Break to Second to Bottom.js
- Add Break to Second to Top.js
Videos showing these scripts in action can be found here and here.
Full guide on how to use these scripts to balance text can be found here.
If for whatever reason you can't use InDesign's auto-leading, these scripts will allow you to adjust both the selected text's size and leading at the same time by the same point amount.
Set these two scripts to keyboard shortcuts for easy usage.
NOTE: the amount that the script increases/descreases is determined by the leading setting for the active document. Change this setting in Preferences > Units & Increments > Keyboard Increments > Size/Leading
Manga Em Dash.js replaces all em dash glyphs with a 200% wide hyphen. This is useful when a font's em dash glyph is the traditional double-dash style, and you're asked to replace them with long hyphens instead.
Creates a new character style with the name "200% Width".
Video showing this script in action can be found here.
Manual Kerning.js is useful when using a font that is designed with poor kerning. You set predefined values in the kerningPairs variable, and the script applies those values when you run it on a text frame.
Video showing this script in action can be found here.
Pseudo-Stroke.js helps with strokes in InDesign. It is basically the equivalent of doing this:
- creating a duplicate text frame and
- converting its text to outlines
- adding a stroke to its text
- moving it behind the original text frame
- putting the duplicate and original text frame in a group
Video showing this script in action can be found here.
Remove Breaks.js works in conjunction with the Add Break to scripts. Removes all the carriage returns in a text frame, for when you want to re-balance a text frame.
Video showing this script in action can be found here
Skew Frame.js increments the Rotation and Shear X Angle of a text frame by the same amount.
Video showing this script in action can be found here
A common operation when balancing text is to adjust the height or width of a text frame by a small amount. There are 4 scripts that you can assign to keyboard shortcuts to do this quickly:
- Squeeze Frame - Horizontal - In.js
- Squeeze Frame - Horizontal - Out.js
- Squeeze Frame - Vertical - In.js
- Squeeze Frame - Vertical - Out.js
Video showing these scripts in action can be found here
More information on how to use scripts to balance text can be found here.
You can change the amount that each script nudges by changing the squeezeFactor just below the script's information block, using any text editor like Notepad or TextEdit. The default value is 0.05 points.
var squeezeFactor = 0.05; // change this number to increase/decrease the amount the text frame is squeezed by
If you wanted it to be 0.1, for example, you would change that line to be:
var squeezeFactor = 0.1; // change this number to increase/decrease the amount the text frame is squeezed by
Place Art.js places art files on the correct pages in a document. You can either let the script try to guess where the art should be placed, or provide a starting page.
Please read the usage instructions and notes before running this script, as it can be a very intensive operation on your computer.
Video showing this script in action can be found here.
Rainbow Layer Colors.js is just a cosmetic change to put a smile on your face. It changes all the layers' colors to be a rainbow.
RtL Page Nums.js creates a reference, non-printing layer for when you have to use "backwards" files.
Longer description and example can be found here.
Set Binding Right to Left.js sets the page binding setting of a document to be "Right to Left" instead of the default "Left to Right". This is a setting that can only be set with a script.
More info on document direction can be found here
Convert Text to Outlines.js converts specific text frames in the document to outlines.
It uses the Find/Replace dialog to determine which text frames should be outlined, so you can get as specific as you need with font styles, paragraph/character styles, etc.
Go to Page.js works like the built-in "Go to Page" function, but also works for "backwards" (Left to Right) books. Uses the pageBinding setting in the document to determine which InDesign page to take you to.
For example, in a 200-page document:
| Input | Page Binding Setting | Final Page |
|---|---|---|
| 40 | Left to Right | 161 |
| 40 | Right to Left | 40 |
Refit Overset Frames.js refits all of the overflowing frames on either the current page or all pages. InDesign's "Fit Frame to Content" function doesn't work well, so this script nudges all the edges out pixel by pixel until the text is no longer overset.
Video showing this script in action can be found here.
Relink Image.js relinks the base image on the current page to a specified file type. Also works if you add text before the file type (e.g. { oldType: '.psd', newType: '_01.tif' },)
Relink All Images.js does the same thing as Relink Image.js, but to a whole document.
Scale Pages.js is useful for resizing pages that have already been lettered. This script allows you to scale all of the art and text at once, for multiple pages. Basically the same thing as selecting everything on a page, and running Object > Transform > Scale... on multiple pages.
It tries to guess which frame is the base art and refits that frame to the bleed after resizing.
Video showing this script in action can be found here.
Select All on Page.js selects everything on the page, but only selects the graphic inside of frames.
This is useful when resizing a page that's already been lettered, and a guide for that can be found here.
Toggle Layer Lock.js toggles the lock on layers in the active document whose names are specified in the file name.
For example, to lock layers with the names "Text" and "Images", you would rename the file to Toggle Layer Lock Text Images.js"
Position.js scales and moves art within its frame, across a whole book.
More info on how to use this script can be found here.


