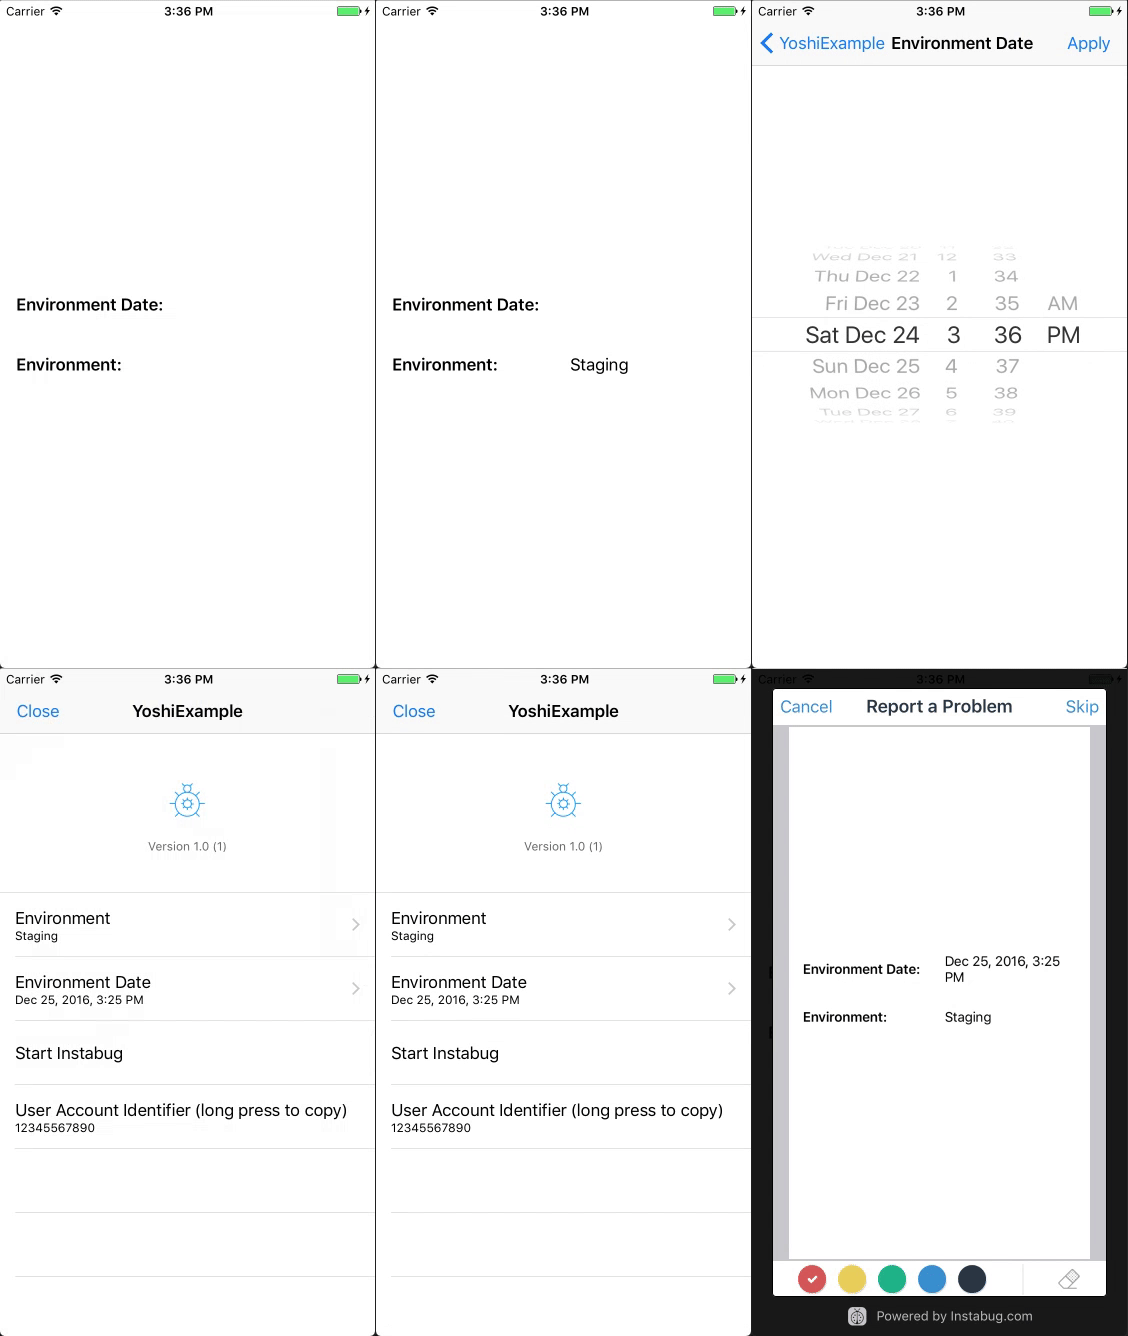
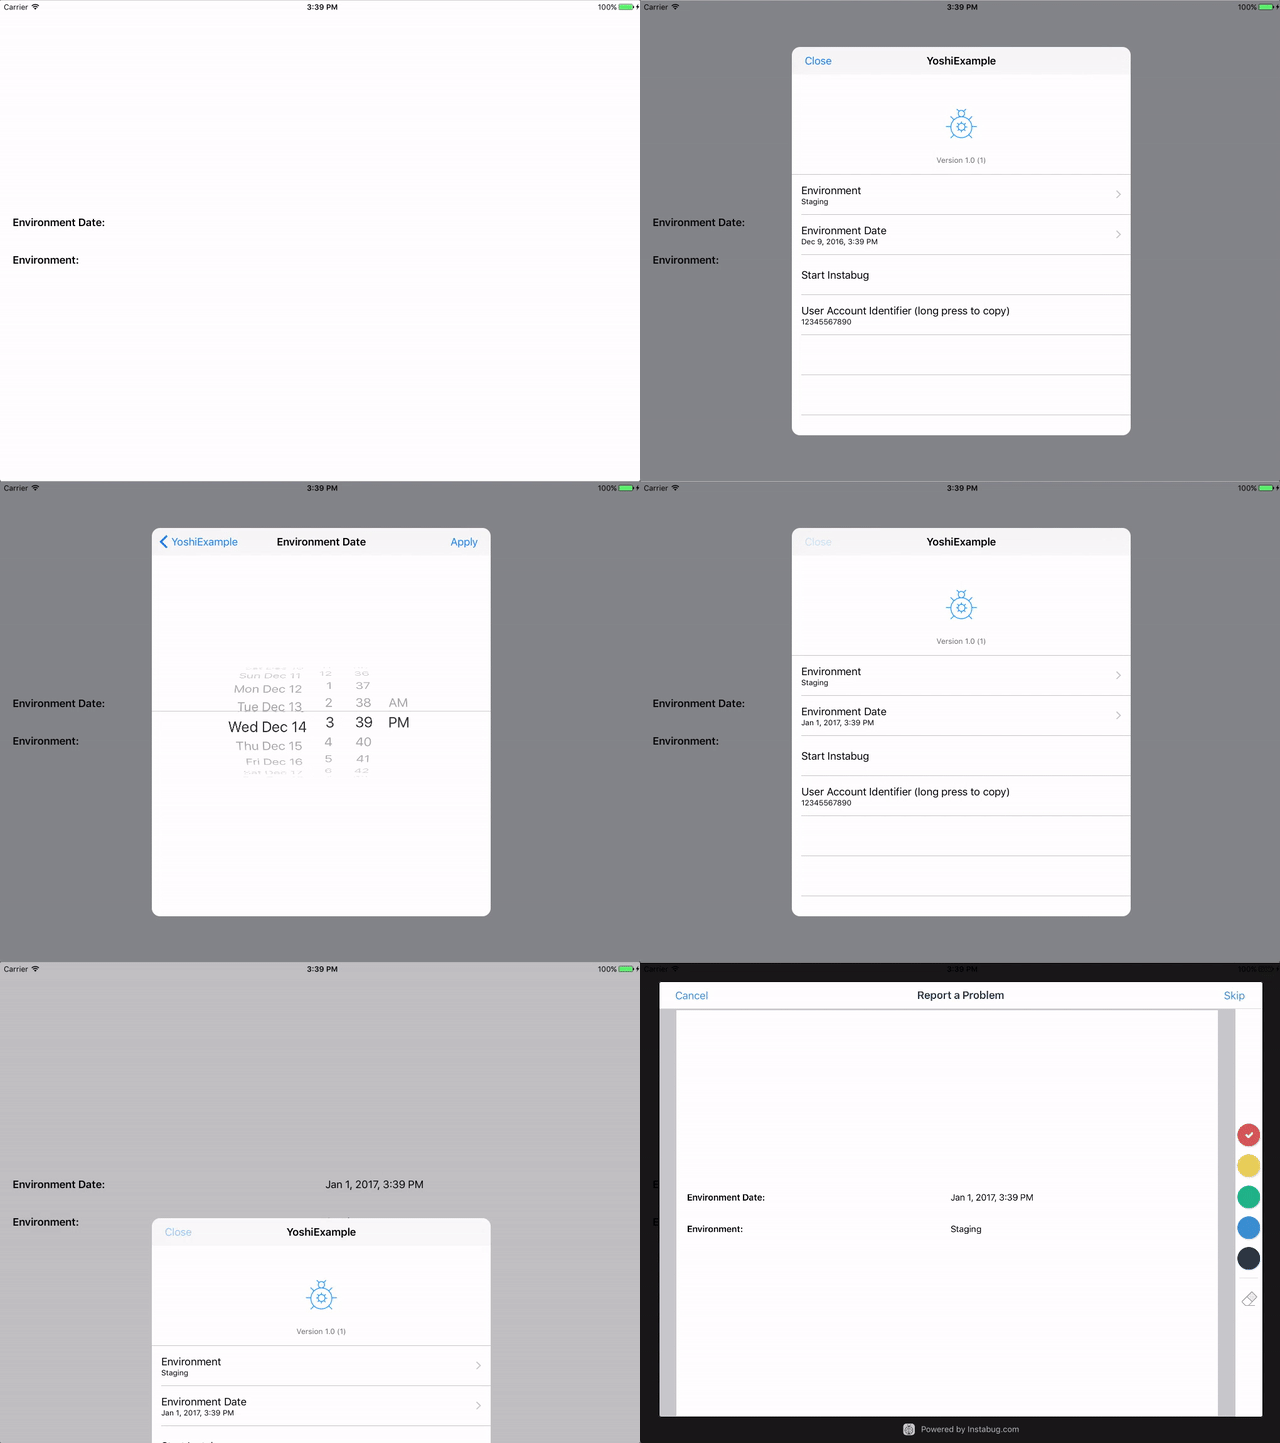
A helpful companion for your iOS app.
Yoshi is a convenient wrapper around the UI code that is often needed for displaying debug menus. Out of the box, Yoshi provides easy-to-implement date, list and custom menus.
- iOS 8.0+
- Xcode 8.0+
Yoshi is available through CocoaPods. To install
it, simply add the following line to your Podfile:
pod "Yoshi"pod 'Yoshi', '1.1.1'You can also add Yoshi to your project using Carthage. Add the following to your Cartfile:
github "prolificinteractive/Yoshi"Yoshi can be set up to display any sort of menu as long as the menu object conforms to YoshiMenu. Yoshi comes with two built-in menus: list menu and date menu.
To display a list menu, create two types that conform to YoshiTableViewMenu and YoshiTableViewMenuItem protocols respectively.
struct TableViewMenu: YoshiTableViewMenu {

    var title: String
    var subtitle: String?
    var displayItems: [YoshiTableViewMenuItem]
    var didSelectDisplayItem: (displayItem: YoshiTableViewMenuItem) -> ()

}

internal final class MenuItem: YoshiTableViewMenuItem {

    let name: String
    var selected: Bool

    init(name: String,
         selected: Bool = false) {
        self.name = name
        self.selected = selected
    }

}
Then, set up the menu and present it using Yoshi.
let production = MenuItem(name: "Production")
let staging = MenuItem(name: "Staging")
let qa = MenuItem(name: "QA", selected: true)
let environmentItems: [YoshiTableViewMenuItem] = [production, staging, qa]

let tableViewMenu = TableViewMenu(title: "Environment",
  subtitle: nil,
  displayItems: environmentItems,
  didSelectDisplayItem: { (displayItem) in
    // Switch environment here
})

Yoshi.setupDebugMenu([tableViewMenu])

// Invoke Yoshi
Yoshi.show()
Yoshi will take care of managing selections and call back the convenient closure function when a new selection is made.
Similarly, to present a date selector menu, create a type that conforms to YoshiDateSelectorMenu protocol
internal final class DateSelector: YoshiDateSelectorMenu {

    var title: String
    var subtitle: String?
    var selectedDate: NSDate
    var didUpdateDate: (dateSelected: NSDate) -> ()

    init(title: String,
         subtitle: String? = nil,
         selectedDate: NSDate = NSDate(),
         didUpdateDate: (NSDate) -> ()) {
        self.title = title
        self.subtitle = subtitle
        self.selectedDate = selectedDate
        self.didUpdateDate = didUpdateDate
    }

}
and present it using the same functions.
let dateSelectorMenu = DateSelector(title: "Environment Date",
    subtitle: nil,
    didUpdateDate: { (dateSelected) in
      // Do something with the selected date here
})

Yoshi.setupDebugMenu([dateSelectorMenu])
Yoshi.show()Yoshi can also be configured to display custom menus which can be used for triggering events or presenting view controllers.
For example, we can invoke Instabug when a custom menu is selected.
private struct CustomMenu: YoshiMenu {

    let title: String
    let subtitle: String?
    let completion: () -> ()

    func execute() -> YoshiActionResult {
        return .AsyncAfterDismissing(completion)
    }

}

Instabug.startWithToken("abcdefghijklmnopqrstuvwxyz", invocationEvent: .None)
Instabug.setDefaultInvocationMode(.BugReporter)

let instabugMenu = CustomMenu(title: "Start Instabug",
    subtitle: nil,
    completion: {
        Instabug.invoke()
    })

Yoshi.setupDebugMenu([instabugMenu])
Yoshi.show()Yoshi can be invoked with a number of different options. The simplest way is to manually invoke using the show() function.
Yoshi.show()In addition to the vanilla invocation option, Yoshi can also be invoked in response of 3 different options of motion or touch events.
If you want to enable all of those 3 following options you can simply pass the all option to the setupDebugMenu, although this option is already the default one.
Yoshi.setupDebugMenu([/* YoshiMenu items */], invocations: [.all])
/// Or simply
Yoshi.setupDebugMenu([/* YoshiMenu items */])
To specify which option you want exactly you just need to pass the ones you want to the setupDebugMenu function like this:
- To invoke Yoshi in response to a shake-motion gesture, add the
shakeMotionGestureoption in thesetupDebugMenuinvocations parameter as follows.
Yoshi.setupDebugMenu([/* YoshiMenu items */], invocations: [.shakeMotionGesture])- To invoke Yoshi in in response to a multi-touch event, add the
multiTouchoption in thesetupDebugMenuinvocations parameter as follows.
Yoshi.setupDebugMenu([/* YoshiMenu items */], invocations: [.multiTouch])- Finally, to invoke Yoshi in response to a 3D touch event, add the
forceTouchoption in thesetupDebugMenuinvocations parameter as follows.
Yoshi.setupDebugMenu([/* YoshiMenu items */], invocations: [.forceTouch])Long press on any cell of the Yoshi Menu to copy the subtitle.
To report a bug or enhancement request, feel free to file an issue under the respective heading.
If you wish to contribute to the project, fork this repo and submit a pull request. Code contributions should follow the standards specified in the Prolific Swift Style Guide.
Copyright (c) 2017 Prolific Interactive
Yoshi is maintained and sponsored by Prolific Interactive. It may be redistributed under the terms specified in the LICENSE file.


