This repo contains terraform code to deploy a simple network landing zone for Nutanix Cloud Cluster (NC2) on AWS
-
All prerequisites for NC2 : https://portal.nutanix.com/page/documents/details?targetId=Nutanix-Clusters-AWS:aws-clusters-aws-requirements-c.html
-
More information about NC2 on AWS : https://portal.nutanix.com/page/documents/details?targetId=Nutanix-Clusters-AWS:aws-clusters-aws-getting-started-c.html
-
An AWS Account with enough privileges (create Role, ...)
-
AWS CLI 2.15 or >: https://docs.aws.amazon.com/cli/latest/userguide/getting-started-install.html or https://github.com/aws/aws-cli/tree/v2
-
Terraform CLI 1.5 or > : https://www.terraform.io/downloads.html
You can also clone this repo in your AWS Cloud Shell and install terraform in your cloud shell.
For additional information about creating manually your AWS for Nutanix Cloud Cluster : https://portal.nutanix.com/page/documents/details?targetId=Nutanix-Clusters-AWS:aws-aws-create-resources-manual-c.html
If you want to use Native AWS VPC integration, this is the basic landing zone. If you want to use Nutanix Flow Networking integration available in AOS 6.8 or more, check FlowNetworking Branch in this repo
IP ranges here are for example, you can define yours.
This landing zone also include the option to have a dedicated subnet and a virtual machine to use as a jumbox. All AWS resources related to Jumbox are in jumbox.tf file.
Clone this repo.
Edit configuration.tfvars to define your AWS resources names or tags, your AWS region, AMI for Jumpbox Virtual Machine...
To get these information, you can use the AWS CLI on your workstation or in AWS Cloud Shell
You can list your AWS regions available using the following command :
aws ec2 describe-regions --output tableThe following command gives the region actually used by the CLI regardless of whether environment variables are or are not set:
aws configure get regionCheck that the region and EC2 metal instance(s) you choose are supported for Nutanix Cloud Cluster : https://portal.nutanix.com/page/documents/details?targetId=Nutanix-Clusters-AWS:aws-clusters-aws-xi-supported-regions-metals.html
If you don't need a Jumpbox VM and its associated resources, you can delete jumbox.tf file.
To get AMI ID for the Windows Server Jumbox in the choosen region :
aws ec2 describe-images --region eu-central-1 --owners amazon --filters "Name=name,Values=Windows_Server-2022-English-Full-Base-*" "Name=state,Values=available" --query "Images | sort_by(@, &CreationDate) | [-1].ImageId" --output textIf you want to define your own IP ranges for AWS VPC and subnets, check variables.tf to be sure of valid CIDR value per resource. Avoid IP ranges overlapping with your on-premises IP ranges if you plan to have interconnection through Site to Site VPN or DirectConnect
Before deploying check on which AWS Account you are connected :
aws sts get-caller-identity- Terraform Init phase
terraform init- Terraform Plan phase
terraform plan --var-file=configuration.tfvars- Terraform deployment phase (add TF_LOG=info at the beginning of the following command line if you want to see what's happen during deployment)
terraform apply --var-file=configuration.tfvars-
Wait until the end of deployment (It should take around 2 minutes)
-
Go to Nutanix Cloud Cluster (NC2) Portal https://cloud.nutanix.com and start your Nutanix Cluster deployment wizard.
In Step 1 (General) choose the same AWS region and Availability Zone that you used in your terraform deployment
In Step 4 (Network) choose the VPC and Management Subnets created with terraform
-
After the deployment of the cluster is successfull, you can add connectivity with on-premises or other AWS VPC or services by peering a Transit VPC . If you enabled a bastion and a Jumpbox VM, you can login to the Jumbox VM and connect Prism Element or Prism Central through a web browser.
-
Use the solution and configure Nutanix features like categories, VM, replication...
-
When you want to destroy the Nutanix Cluster, use the NC2 Portal (https://cloud.nutanix.com) to terminate it.
-
After Nutanix cluster terminaison, you can destroy the landing zone using the following command :
terraform destroy --var-file=configuration.tfvarsIt's very cheap to test and customize this simple landing zone.
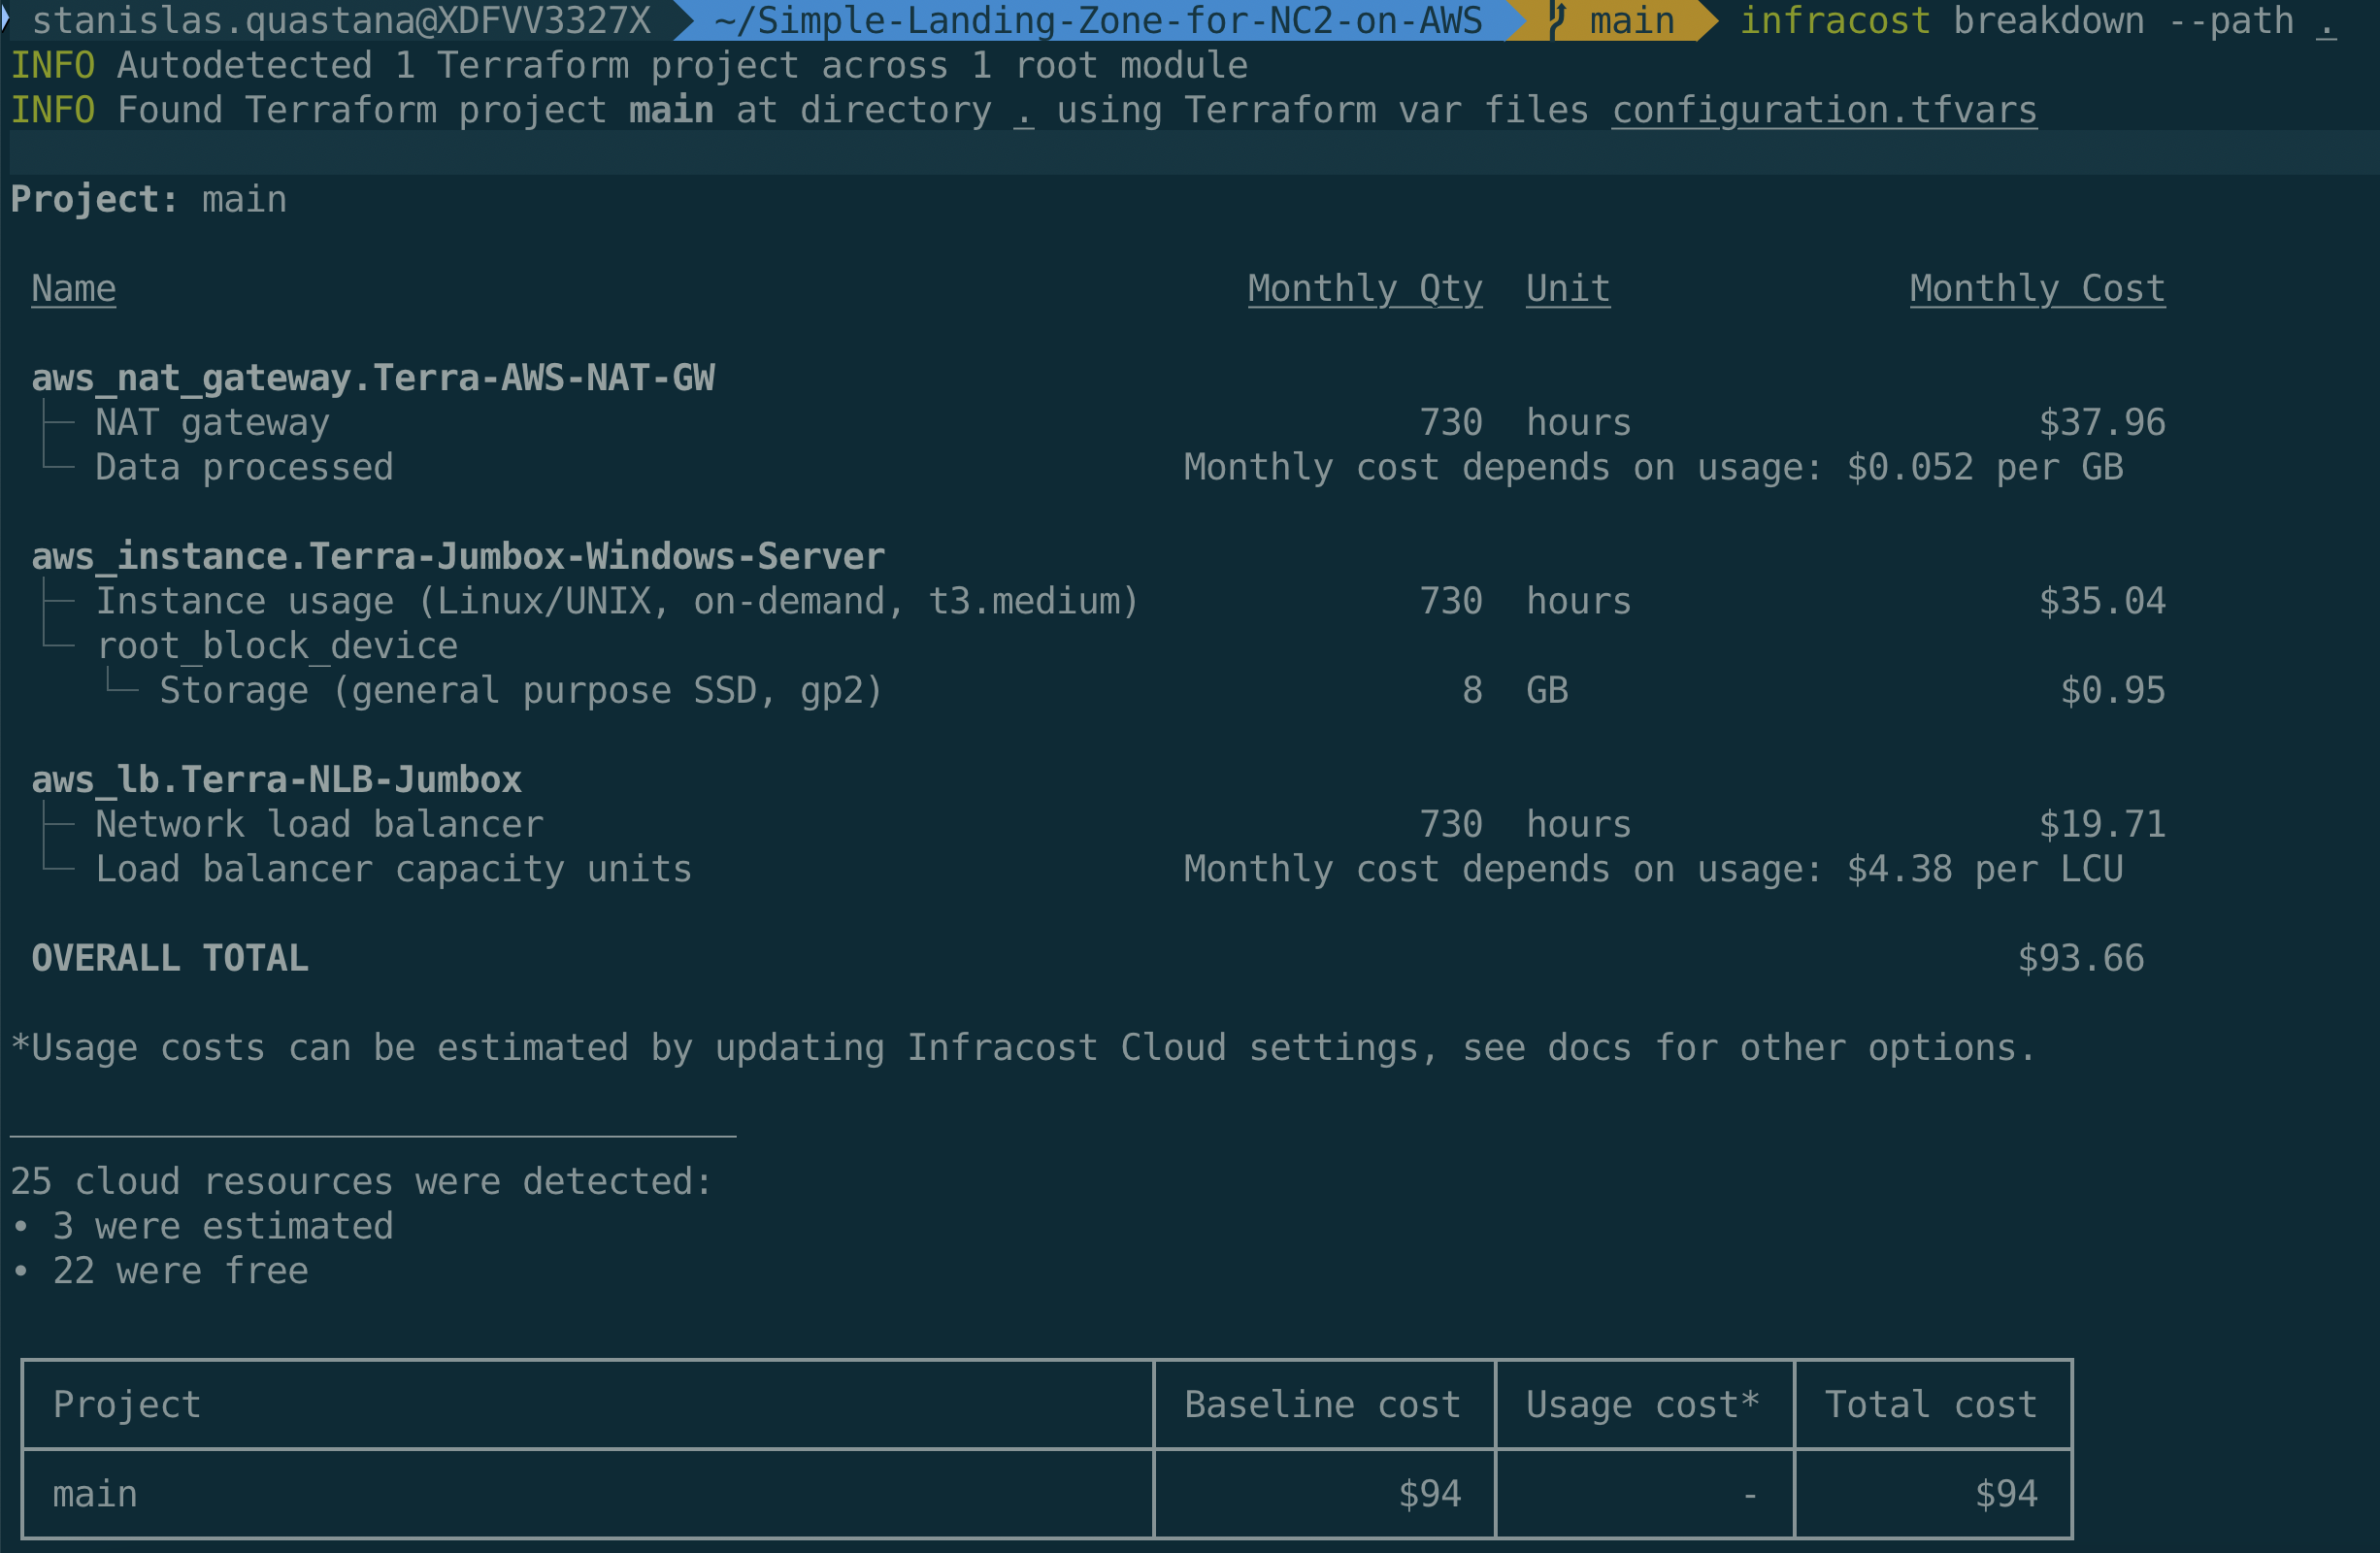
You can use infracost (available on https://www.infracost.io/) to check the estimate price for 1 month. Here is an exemple for Frankfurt (eu-central-1) AWS Region
❗ Important : this landing zone cost estimation does not include the cost of AWS EC2 Metal instance(s) used as node(s) in the Nutanix Cluster and network traffic. Please have a look of metal instances prices here : https://aws.amazon.com/ec2/pricing/on-demand/. Pricing is per instance-hour consumed for each instance, from the time an instance is launched until it is terminated or stopped. Each partial instance-hour consumed will be billed per-second for Linux, Windows, Windows with SQL Enterprise, Windows with SQL Standard, and Windows with SQL Web Instances, and as a full hour for all other instance types.
- Add a variable to define AWS Availability Zone
- Add a Linux VM for Jumbox
- Add a way to enable/disabled Windows and/or Linux Jumbox
- Add additional tags to every AWS resources


