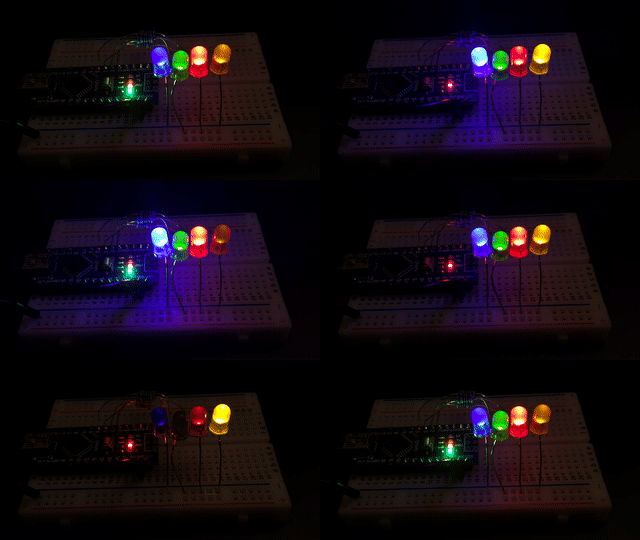
An Arduino library to control LEDs. It uses a non-blocking approach and can control LEDs in simple (on/off) and complex (blinking, breathing) ways in a time-driven manner.
// blink and breathe two LEDs (builtin and gpio 9) for 12 seconds.
#include <jled.h>

JLed led_breathe = JLed(9).Breathe(1500).Repeat(6).DelayAfter(500);
JLed led_blink = JLed(LED_BUILTIN).Blink(500, 500).Repeat(11).DelayBefore(1000);

void setup() { }

void loop() {
  led_blink.Update();
  led_breathe.Update();
}- non-blocking
- simple on/off
- breathe effect
- blinking effect
- fade-on and -off effect
- user provided effects
- supports reversed polarity of LED
- easy configuration using fluent interface
In the main menu of the Arduino IDE, select Sketch > Include Library >
Manage Libraries... and search for jled, then press install.
Add jled to your library dependencies in your platformio.ini project file,
e.g.
...
[env:nanoatmega328]
platform = atmelavr
board = nanoatmega328
framework = arduino
lib_deps=jled
...First the LED object is constructed and configured, then the state is updated
with subsequent calls to the Update() method, typically from the loop()
function. The class maintains a list of all JLed objects so if you want to update them all
you can call JLed::UpdateAll() instead. The constructor takes the pin, to which the LED is connected to as
only parameter. Further configuration of the LED object is done using a fluent
interface, e.g. JLed led = JLed(13).Breathe(2000).DelayAfter(1000).Repeat(5).
See examples and Parameter overview section below for
further details.
Calling On() turns the LED on on after an optional time, specified by
DelayBefore(), has elapsed. To immediately turn a LED on, make a call
like JLed(LED_BUILTIN).On().Update().
#include <jled.h>

// turn builtin LED on after 1 second.
JLed led = JLed(LED_BUILTIN).On().DelayBefore(1000);

void setup() { }

void loop() {
  led.Update();
}Off() works like On(), except that it turns the LED off.
In blinking mode, the LED cycles through a given number of on-off cycles.
#include <jled.h>

// blink internal LED every second.
JLed led = JLed(LED_BUILTIN).Blink(1000, 1000).Forever();

void setup() { }

void loop() {
  led.Update();
}In breathing mode, the LED smoothly changes brightness using PWM.
#include <jled.h>

// connect LED to pin 13 (PWM capable). LED will breathe with period of
// 2000ms and a delay of 1000ms after each period.
JLed led = JLed(13).Breathe(2000).DelayAfter(1000).Forever();

void setup() { }

void loop() {
  led.Update();
}In FadeOn mode, the LED is smoothly faded on to 100% brightness using PWM.
#include <jled.h>

// LED is connected to pin 9 (PWM capable) gpio
JLed led = JLed(9).FadeOn(1000).DelayBefore(2000);

void setup() { }

void loop() {
  led.Update();
}In FadeOff mode, the LED is smoothly faded off using PWM. The fade starts at 100% brightness. Internally it is implemented as a mirrored version of the FadeOn function, i.e. FadeOn(t) = FadeOff(period-t)
It is also possible to provide a user defined brightness function. The
signature of such a function is unit8_t func(unit32_t t, uint16_t period, uintptr_t param).
The function must return the brightness in range 0..255 in dependence of the
current time t.
The example uses a user provided function to calculate the brightness.
#include <jled.h>

// this function returns changes between 0 and 255 and vice versa every 250 ms.
uint8_t blinkFunc(uint32_t t, uint16_t /*period*/, uintptr_t /*param*/) {
  return 255*((t/250)%2);
}

// Run blinkUserFunc for 5000ms
JLed led = JLed(LED_BUILTIN).UserFunc(blinkFunc, 5000);

void setup() {
}

void loop() {
  led.Update();
}Call Stop() to immediately turn the LED off and stop any running effects.
The following table shows the applicability of the various parameters in dependence of the chosen effect:
| Method | Description | Default | On | Off | Blink | Breath | FadeOn | FadeOff | UserFunc |
|---|---|---|---|---|---|---|---|---|---|
| DelayBefore(t) | time to wait before state is initially changed | 0 | Yes | Yes | Yes | Yes | Yes | Yes | Yes |
| DelayAfter(t) | time to wait after each period | 0 | Yes | Yes | Yes | Yes | |||
| Repeat(n) | repeat effect for given number of periods | 1 | Yes | Yes | Yes | Yes | Yes | ||
| Forever() | repeat infinitely | false | Yes | Yes | Yes | Yes | Yes | ||
| LowActive() | set output to be low-active (i.e. invert output) | false | Yes | Yes | Yes | Yes | Yes | Yes | Yes |
- all times are specified in milliseconds
- time specified by
DelayBefore()is relative to first invocation ofUpdate()
Examples sketches are provided in the examples directory.
To build an example using the PlatformIO ide, simply uncomment the example to be built in the platformio.ini project file, e.g.:
...
[platformio]
; uncomment example to build
src_dir = examples/hello
;src_dir = examples/breathe
...To build an example sketch in the Arduino IDE, simply select an example from
the File > Examples > JLed menu.
Info on how to run the host based provided unit tests is provided here.
Al Williams (@wd5gnr) modified this version to maintain a linked list of JLed objects to support UpdateAll.
Jan Delgado, jdelgado[at]gmx.net.
